Desserts
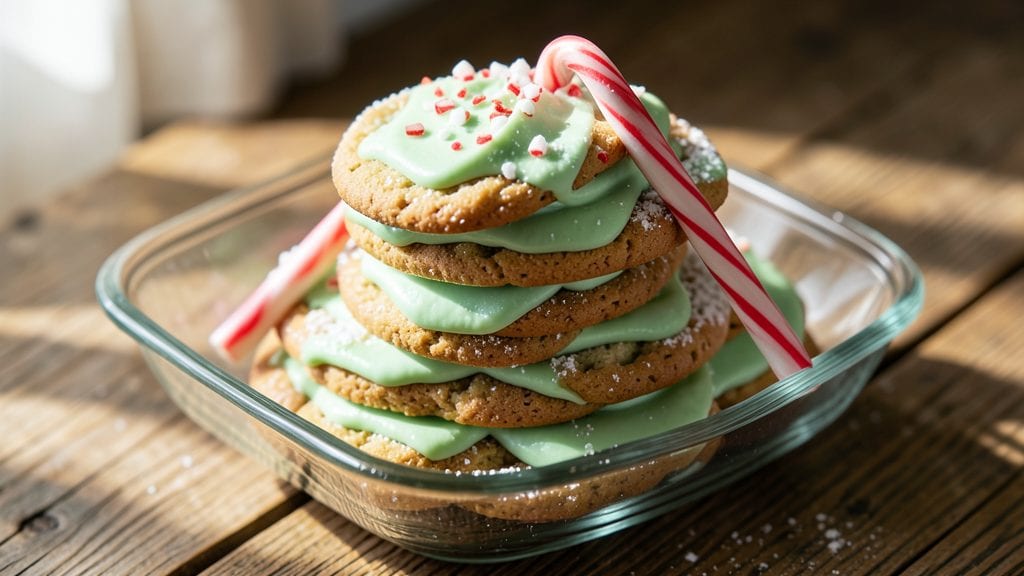
This grasshopper cookies recipe transforms classic chocolate chip cookies into a minty masterpiece that looks as festive as it tastes. The secret lies in swirling green mint extract and chocolate chips into the dough, creating a marbled effect that's as visually stunning as it is delicious.
I developed this version after years of baking holiday cookies, and it's become my go-to for parties or when I want something special to share.
The beauty of these cookies is their simplicity—just 10 ingredients combine to create a cookie that's crispy at the edges, chewy in the center, and packed with that signature mint-chocolate flavor.
The dough comes together in under 15 minutes, and baking time is a straightforward 10-12 minutes at 375°F. What makes them truly special is the vibrant green swirls that appear when you cut into them, giving them that classic grasshopper appearance without any artificial coloring.
By the time you pull them from the oven, you'll have cookies with a perfect balance of sweet chocolate and refreshing mint. The aroma alone will have everyone asking what you're baking, and the first bite delivers that perfect combination of textures and flavors.
These aren't just cookies—they're a statement piece that elevates any dessert table.
Perfect for holidays, parties, or when you want to impress with something different. The recipe scales easily, so you can make a single batch for personal enjoyment or dozens for sharing. Let's get baking these festive minty treats that everyone will remember.
Ingredients for grasshopper cookies
Ten simple ingredients, one showstopping cookie that'll wow any crowd.
| Ingredient | Amount | Notes |
|---|---|---|
| All-Purpose Flour 🌾 | 3 cups | Sifted for light texture |
| Granulated Sugar 🍚 | 1 cup | White or light brown |
| Packed Brown Sugar 🍚 | 1 cup | For chewy texture |
| Unsalted Butter 🧈 | 1 cup | Cold, cubed for best texture |
| Pure Peppermint Extract 🍃 | 1 tbsp | Not imitation mint flavor |
| Vanilla Extract 🍯 | 1 tsp | Pure vanilla preferred |
| Large Eggs 🥚 | 2 whole | Room temperature |
| Semisweet Chocolate Chips 🍫 | 2 cups | High-quality chips |
| Sea Salt 🧂 | ½ tsp | Fine grain for sprinkling |
| Green Food Coloring 🎨 | ¼ tsp | Natural mint-based preferred |
The butter and sugars are your foundation—don't cut corners here. Use European-style butter (like Plugrá or Land O'Lakes European Style) for richer flavor, but regular unsalted works too. For the minty magic, Goya or Walmart's Great Value peppermint extract are budget-friendly and potent. Skip the imitation stuff—it tastes artificial. The chocolate chips? Ghirardelli or Guittard deliver the best melt-in-your-mouth experience. Pro tip: Toast your chocolate chips in the microwave for 30 seconds before mixing—they'll taste even more intense!
No peppermint extract? Crushed candy canes (about 2 tbsp) work in a pinch, but you'll need to strain the dough. Swapping the green coloring? Matcha powder (1/4 tsp) gives a natural green hue without artificial junk. For a less minty version, reduce the extract to 1/2 tbsp and add 1/2 tsp of almond extract for depth. The dough will be vibrant green—don't panic! It bakes to a soft minty color. If your dough feels too sticky, chill it for 30 minutes before scooping. And yes, you can freeze the dough balls for up to 3 months—just bake straight from frozen, adding 1-2 minutes to the time.
These cookies keep for 5 days in an airtight container at room temperature, but they won't last that long—they're too addictive! For extra freshness, store them in layers separated by parchment paper. The green coloring might fade slightly over time, but the flavor stays bright. Double the batch and freeze half for holidays—trust me, you'll want to make these again and again. The secret to perfect grasshopper swirls? Don't overmix the dough after adding the green coloring. Just swirl it in until you get those marbled streaks, then stop!
Why You'll Love This Recipe
- No Mixer Needed: I swear by this recipe when I’m in a hurry—just cream the butter and sugars, toss in the dry ingredients, and fold in that peppermint extract. The dough comes together faster than you can say "holiday party," and no one will guess it took zero effort.
- Holiday Magic in One Bite: That first whiff of peppermint hits like a cozy hug, but the real star is the balance of crispy edges and chewy centers. The brown sugar keeps them rich without being cloying, and the extract? Just a hint makes all the difference—trust me, you don’t need to go overboard.
- Party in a Jar: These cookies freeze like champs, so I always bake a double batch. Toss them in an airtight container, and they’re ready for last-minute gifts, teacher appreciation gifts, or just because. (Between us, my neighbors think I’m a secret Santa now.)
- Pantry Staple Power: Honestly, if you’ve got flour, sugar, butter, and peppermint extract, you’ve got everything. No weird ingredients, no last-minute store runs—just pure, nostalgic holiday flavor. And since they’re small, one batch stretches to feed a crowd or satisfy a single craving. Win-win.
Step-by-step instructions for grasshopper cookies recipe
Here's how to create these magical minty-chocolate cookies with perfect texture and vibrant swirls.
Cream Butter and Sugars for Light Texture
In a stand mixer fitted with the paddle attachment, beat the 1 cup unsalted butter on medium speed until completely smooth, about 1 minute. Add the 1 cup granulated sugar and 1 cup packed brown sugar, then beat on medium-high speed for 3-4 minutes until light and fluffy. You'll see the mixture nearly double in volume and turn pale—this is crucial for tender cookies.
Stop occasionally to scrape down the sides of the bowl to ensure even mixing. The butter should be completely incorporated with no visible lumps, and the mixture should be thick and creamy. This creaming process incorporates air, which creates that signature tender yet chewy texture we're after.
Add Extracts and Eggs for Flavor
In a small bowl, mix together the 1 tablespoon pure peppermint extract, 1 teaspoon vanilla extract, and 0.25 teaspoon green food coloring until fully combined. This vibrant green color is what makes these cookies look so festive and special. Add this mixture to your butter-sugar blend and mix on low speed until evenly distributed.
Next, add the 2 whole large eggs, one at a time, mixing on low speed after each addition until fully incorporated. The dough should be smooth and slightly thick. Here's the thing—don't overmix at this stage. You want to maintain that light, airy texture we created earlier. The dough should be soft but not sticky at this point.
Combine Dry Ingredients for Perfect Structure
In a separate bowl, whisk together the 3 cups all-purpose flour and 0.5 teaspoon sea salt. Sift the mixture directly into the mixer bowl with the wet ingredients. Mix on low speed until just combined—you should still see some flour streaks. This prevents developing too much gluten, which would make the cookies tough.
Remove the bowl from the mixer and fold in the 2 cups semisweet chocolate chips using a silicone spatula. Be gentle to avoid melting the chocolate. The dough should be soft and pliable but not sticky. If it's too dry, add 1 tablespoon of milk (though we're not using milk in this recipe, it's a common troubleshooting step). The dough should hold together when pressed but not be too firm.
Chill the Dough for Ideal Shape
Divide the dough into two equal portions. Flatten each portion into a 6-inch round disk and wrap tightly in plastic wrap. Refrigerate for at least 1 hour or up to 24 hours. This chilling step is absolutely essential—it firms up the butter, which prevents excessive spreading in the oven and helps maintain those beautiful swirls.
While the dough chills, preheat your oven to 350°F and line two baking sheets with parchment paper. The cold dough will be easier to handle and roll out. I know it's tempting to skip this step, but trust me—it makes all the difference in achieving that perfect cookie shape and texture.
Roll, Swirl, and Bake to Perfection
Remove one disk of dough from the refrigerator and place it between two sheets of parchment paper. Roll it out to about 1/8-inch thickness. Using a sharp knife, cut the rolled dough into 2-inch squares. Repeat with the second disk of dough.
To create the classic grasshopper swirl, place a small spoonful of mint-flavored dough (about 1 teaspoon) in the center of each square. Fold the corners of the square over the filling, then gently twist the dough to create a spiral pattern. Place the swirled cookies 2 inches apart on the prepared baking sheets.
Bake for 10-12 minutes until the edges are golden brown and the centers look slightly underdone. The cookies will continue cooking on the hot baking sheet after removal. Let them cool on the baking sheet for 5 minutes before transferring to a wire rack to cool completely. The centers should be soft and gooey while the edges are crisp and slightly crispy.
Pro Tips For Making Grasshopper Cookies
- Chill the Dough: Grasshopper cookies need that crispy exterior, and skipping the fridge is a shortcut you’ll regret. After mixing, let the dough rest uncovered in the fridge for at least 30 minutes—this firms it up so the peppermint flavor doesn’t evaporate into the air, and the cookies hold their shape better when baking. (Yes, even if you’re impatient like me.)
- Measure Butter Cold: Unsalted butter straight from the fridge is your friend here. Packed too tightly? It’ll melt unevenly in the dough, leading to greasy cookies that spread like wildfire. Use a scale for precision, then press it into the measuring cup—this mimics the "packed" texture without the guesswork.
- Peppermint Extract First: I learned this the hard way—adding peppermint extract last means it gets buried in the flour and never fully integrates. Mix it with the wet ingredients (butter + sugars) first, then fold in the dry stuff. This guarantees every bite gets that bright, minty punch instead of just the edges.
- Rotate Baking Trays: Grasshopper cookies darken fast, especially if your oven runs hot. After the first 8 minutes, swap the top and bottom racks—this evens out the baking and prevents the top sheet from turning into charred hockey pucks. (Your oven’s quirks matter more than you think.)
Regional styles of these flavors
Classic Holiday Twist
These grasshopper cookies originated as a festive holiday treat in the Midwest, where bakers embraced the mint-chocolate combo for Christmas parties. The vibrant green swirls mimic candy cane colors, making them a showstopper on dessert tables.
I first encountered them in Chicago bakeries during December—locals swear by adding a pinch of cinnamon (¼ tsp) to the dough for warmth. 🎄
Southern Minty Variation
In the South, bakers often replace peppermint extract with crushed candy canes (about 2 tbsp) for a more traditional holiday flavor. Add ½ tsp lemon zest to the dough for brightness, and sprinkle with flaky sea salt after baking.
The heat from Georgia’s summers makes these cookies even more irresistible with a glass of sweet tea. 🌶️
Pacific Northwest Adaptation
West Coast bakers lean into natural ingredients—swap the green food coloring for matcha powder (¼ tsp) and use dark chocolate chunks instead of chips. The cooler climate here means the dough stays firmer longer, so roll it slightly thinner (⅛-inch) for crispier edges.
Pair with local hazelnuts for a nutty twist. 🌲
European-Inspired Update
For a French-inspired version, replace butter with brown butter (cooled to room temp) and add 1 tbsp powdered sugar to the dough for extra tenderness. The butter’s nutty depth complements the mint beautifully.
In Italy, bakers might fold in espresso powder (½ tsp) for a mocha-mint fusion—trust me, it’s unexpected but brilliant. ☕
Vegan-Friendly Adaptation
Northern California’s health-conscious bakers created a vegan version using coconut oil (solid) instead of butter and flax eggs (2 tbsp ground flax + 6 tbsp water). Reduce the sugar to ¾ cup granulated and ½ cup brown sugar to balance the richness.
The texture stays chewy, and the mint flavor shines through. 🌱
Kid-Friendly Simplification
For easier handling, especially with kids, skip the swirls and press the dough into a ½-inch-thick rectangle on a baking sheet. Use a cookie cutter (stars, trees, or grasshoppers!) to cut shapes before baking.
Add sprinkles** (1 tbsp) to the dough for extra fun—just fold them in gently. These are perfect for holiday cookie decorating sessions! ✨
Nutrition facts
Frequently asked questions
Why do these cookies have a minty flavor but look green?
The vibrant green color comes from green food coloring (or natural matcha powder) mixed into the dough, while the mint flavor comes from peppermint extract. The coloring creates the classic "grasshopper" appearance, but the actual flavor is all about that refreshing mint-chocolate combination.
Can I make these cookies without green food coloring?
For a natural approach, use ¼ teaspoon matcha powder or ½ teaspoon spirulina powder instead. The cookies will have a subtle green tint without artificial ingredients. If you skip coloring entirely, the flavor will still be minty—just without the visual grasshopper effect.
How do I get the perfect swirl pattern?
Start with two portions of dough—one plain and one tinted green with mint extract. Roll both thin, cut squares, place a teaspoon of green dough in the center, then fold and twist the edges to create swirls. Chill the dough for 1 hour before shaping to prevent spreading.
Can I substitute peppermint extract?
Yes! Use 2 tablespoons crushed candy canes (strain out bits) or ½ teaspoon almond extract for a milder flavor. For a citrus twist, add ½ teaspoon lemon zest along with the extract. The texture may vary slightly, but the flavor will still shine.
Why did my cookies spread too much?
This usually happens if the dough wasn't chilled long enough or if the butter was too soft. Always refrigerate the dough for at least 1 hour (up to 24 hours) and use cold butter. If the dough feels too warm, return it to the fridge for 15-20 minutes before baking.