Desserts
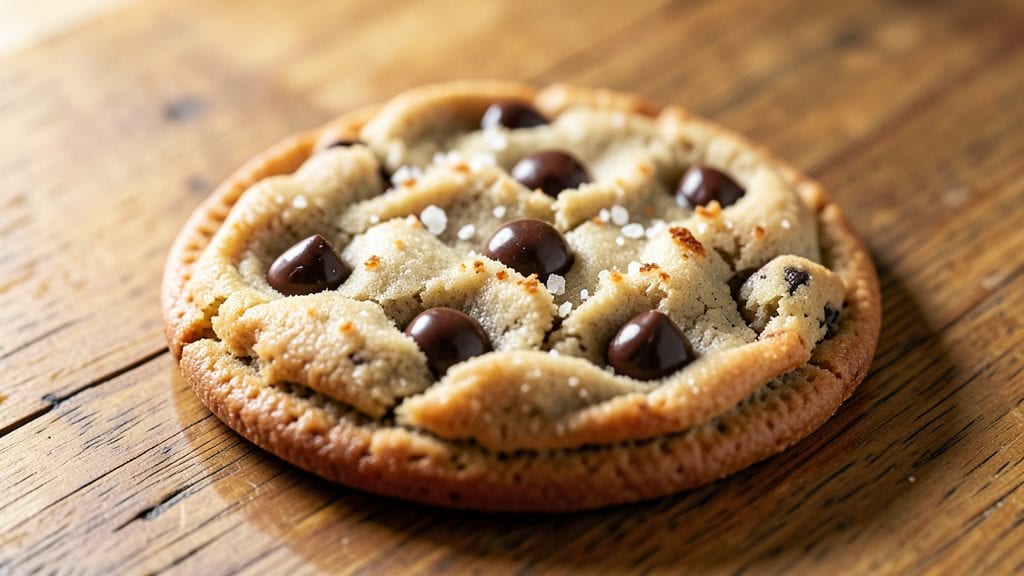
This copycat Crumbl chocolate chip cookie recipe delivers the same chewy centers and crispy edges that made the bakery famous—now you can recreate them at home with professional results. The secret lies in precise ingredient ratios and baking techniques that balance texture perfectly.
I’ve tested dozens of variations to perfect this method, ensuring every cookie comes out with that signature Crumbl quality. 💛
What sets these cookies apart is the dough’s resting time and baking temperature—critical factors that create the ideal texture. Unlike traditional recipes, this version uses a specific blend of brown and white sugar for caramel depth, and the dough must chill for at least 24 hours.
This patience pays off in cookies that stay soft in the center while developing a golden, crispy exterior. The chocolate chips are folded in just before baking to maintain their melt-in-your-mouth quality.
By the time you pull these from the oven, you’ll have cookies that rival the bakery’s—rich, buttery, and packed with pockets of melted chocolate. The edges will be perfectly crisp, while the centers remain tender, just like your favorite Crumbl order.
This recipe is designed to deliver foolproof results, so you can impress friends or satisfy cravings without the bakery trip.
The best part? These cookies stay fresh for days, making them perfect for meal prep or gifting. Once you try this method, you’ll never buy store-bought again. Let’s get baking—your kitchen is about to smell like a Crumbl bakery.
Ingredients for copycat crumbl chocolate chip cookie
Pantry staples plus a few key tricks—this is your Crumbl cookie shortcut.
| Ingredient | Amount | Notes |
|---|---|---|
| Unsalted Butter 🧈 | 1 cup | Cold, cubed for even baking |
| Granulated White Sugar 🍚 | ½ cup | For crispy edges |
| Packed Brown Sugar 🍚 | ½ cup | Light or dark, packed tight |
| Large Eggs 🥚 | 2 whole | Room temperature for blending |
| Vanilla Extract 🍯 | 2 tsp | Pure, high-quality extract |
| All-Purpose Flour 🌾 | 2 ½ cups | Sifted, spooned lightly |
| Baking Soda 🧂 | ½ tsp | Freshly opened |
| Diamond Crystal Kosher Salt 🧂 | ½ tsp | Not table salt |
| Semisweet Chocolate Chips 🍫 | 2 cups | Enjoy Life brand for allergies |
| Flaky Sea Salt 🧂 | ½ tsp | For finishing cookies |
| Vanilla Bean Paste 🍯 | ½ tsp | Optional, for extra depth |
The butter is non-negotiable—use European-style or Plugrá for that rich, caramel depth. Trader Joe's sells it pre-cubed, which saves time. Brown sugar needs to be packed tightly—use a spoon to press it down. I always grab the Domino brand because it's consistent. The chocolate chips? Enjoy Life brand is my go-to for allergies, but any good-quality chips work. Pro tip: chill your dough for 24 hours—this is what gives those cookies their signature chewy centers.
No vanilla extract? Vanilla bean paste at half the amount adds insane flavor. Short on brown sugar? Substitute white sugar plus 1 tsp molasses for that caramel note. Using table salt instead of kosher? Cut it to one-third the amount. The flaky sea salt is optional but worth it—sprinkle it right after baking for that bakery-style crunch. If you're gluten-free, swap the flour for a 1:1 gluten-free blend, but expect slightly denser cookies.
Dough keeps for 5 days in the fridge or 3 months frozen. Portion it into balls before freezing for easy baking later. Baked cookies? Store in an airtight container with parchment between layers—they stay fresh for 4 days. Double the recipe and freeze half—your future self will thank you.
Why You'll Love This Recipe
- That perfect 1: 1 sugar ratio? It’s what makes these cookies crisp at the edges but soft inside. (Yes, even on a Tuesday night.) The vanilla? Oh, it’s the difference between "good" and "I’ll drive to the store for more."
- No-Fuss Mixing: I swear by the creamy butter-egg combo—just cream, mix, fold—and those chips stay melty, not mushy. Honestly, my dough’s ready in five minutes of actual work.
- Crumbl’s Secret Sauce: That perfect 1:1 sugar ratio? It’s what makes these cookies crisp at the edges but soft inside. (Yes, even on a Tuesday night.) The vanilla? Oh, it’s the difference between "good" and "I’ll drive to the store for more."
- Party in a Jar: Freeze half the dough for last-minute gifts or bake a batch ahead for holidays. I’ve used these for teacher gifts, office treats, and even my kid’s soccer fundraiser. Works every time.
Step-by-step instructions for copycat Crumbl chocolate chip cookies
Here's how to nail that perfect Crumbl cookie texture—crispy edges, chewy centers, and melty chocolate every time!
👨🍳 Step 1: Cream the Cold Butter and Sugars
In a stand mixer fitted with the paddle attachment, combine the 1 cup unsalted butter (cold, cubed) with the 0.5 cup granulated white sugar and 0.5 cup packed brown sugar. Mix on medium speed for 3-4 minutes until light and fluffy. You'll see the mixture nearly double in volume and turn pale—this incorporates air for that signature Crumbl texture.
I always use cold butter because it creates tiny pockets of fat that melt during baking, keeping those centers soft and chewy. If your butter starts to look soupy or the mixture feels too warm, pop it in the fridge for 5 minutes to reset. The goal is a thick, ribbon-like consistency that holds its shape when you lift the paddle.
👨🍳 Step 2: Add Eggs and Vanilla for Rich Flavor
Add the 2 whole large eggs (room temperature) one at a time, mixing on low speed for 30 seconds after each addition. Then stir in the 2 tsp vanilla extract and 0.5 tsp vanilla bean paste until fully combined. The mixture will look slightly curdled, but don't worry—it'll smooth out when we add the dry ingredients.
Here's the thing—vanilla bean paste adds that extra depth of flavor Crumbl cookies are famous for. If you don't have it, stick with pure extract, but trust me, the difference is noticeable. Mix just until combined; overmixing develops gluten and makes cookies tough. We're going for tender, not dense.
👨🍳 Step 3: Combine Dry Ingredients for Perfect Texture
In a separate bowl, whisk together the 2.5 cups all-purpose flour, 0.5 tsp baking soda, and 0.5 tsp diamond crystal kosher salt. Sift this mixture directly into the wet ingredients and mix on low speed for 30-45 seconds until just combined. You should still see a few flour streaks—this ensures tender cookies, not cakey ones.
Now's the time to fold in the 2 cups semisweet chocolate chips by hand using a silicone spatula. I like to distribute them evenly throughout the dough so every bite has that perfect melty chocolate surprise. Don't overmix—just until the chips are incorporated. The dough will be thick and slightly sticky, which is exactly what we want.
⏰ Step 4: Chill for Crispy Edges and Chewy Centers
Cover the dough bowl with plastic wrap and refrigerate for at least 30 minutes (I prefer 1 hour or even overnight). This chilling step is non-negotiable—it prevents the cookies from spreading too thin in the oven and allows the flour to fully hydrate for that perfect texture. Cold dough also means better browning and crispier edges.
I know it seems counterintuitive to wait, but trust me on this. The longer you chill the dough, the better the cookies will be. If you're short on time, at least 30 minutes in the fridge makes a noticeable difference. And here's a pro tip: if your kitchen is warm, pop the dough in the freezer for 15 minutes instead—it chills faster and prevents the butter from softening too much.
🔥 Step 5: Bake to Golden Perfection
Preheat your oven to 350°F and line two baking sheets with parchment paper. Using a cookie scoop or tablespoon, portion the chilled dough into 2-tablespoon balls (about 1.5 inches in diameter) and place them 3 inches apart on the prepared sheets. They won't spread much, so you can get away with slightly closer spacing.
Bake for 12-14 minutes until the edges are golden brown but the centers still look slightly underdone. They'll continue cooking on the hot pan after you remove them from the oven. The key is watching for golden edges—this is what gives those crispy bits that Crumbl is known for. As soon as you see them, pull the cookies out immediately.
🍽️ Step 6: Finish with Flaky Sea Salt
Let the cookies cool on the baking sheet for 5 minutes before transferring them to a wire rack. While they're still warm, sprinkle each cookie with a pinch of 0.5 tsp flaky sea salt. This adds that perfect contrast of sweet and salty that makes these cookies irresistible.
Serve warm for the ultimate experience—gooey centers, crispy edges, and melty chocolate in every bite. If you can't resist, break one apart while it's still warm and watch that perfect balance of textures. These are the cookies that'll have everyone asking for your recipe!
Pro Tips For Making Copycat Crumbl Chocolate Chip Cookie
- Cream Butter Slowly: I learned this the hard way—when you mix cold butter into sugar, the dough ends up greasy instead of fluffy. Use room-temperature butter (about 65°F) and beat it with the sugars for 2-3 minutes until it’s pale and just starting to look like wet sand. That’s when the magic happens.
- Pack Brown Sugar Tight: The recipe says "packed brown sugar," but I used to scoop it straight from the bag. That’s how you end up with cookies that spread too much. Press the sugar into the measuring cup with a spoon—no gaps—and level it off. Trust me, your cookies will thank you with proper texture.
- Underbake Slightly: Crumbl cookies should look almost done at 9-10 minutes, with edges just starting to brown. Pull them when the centers still wiggle—overbaking turns them dry. Let them rest 5 minutes on the sheet before transferring, or they’ll crack like brittle.
- Chill Dough Fully: I skipped this once and ended up with flat, sad cookies. Press the dough into a single disk, wrap it, and refrigerate for at least 2 hours (or overnight). The cold fat firms up, so the cookies hold their shape and develop that signature crunch. No shortcut here.
Flavor customization for this copycat crumbl chocolate chip cookie
Sweet & Salty Balance
Crumbl’s signature flavor comes from that perfect sweet-salty contrast. The flaky sea salt sprinkled on top is non-negotiable—use Maldon or Jacobsen for the best texture. For extra depth, add ½ tsp kosher salt directly to the dough (not table salt!) alongside the baking soda.
This enhances the caramelization during baking, giving those edges that addictive crunch. 💛
Spiced Variations
Want warmth? Swap ½ tsp vanilla extract for ½ tsp cinnamon + ¼ tsp cardamom. This works surprisingly well with chocolate chips. For a brown sugar cookie twist, replace ½ cup white sugar with ½ cup light brown sugar and add ½ tsp cinnamon.
The dough will be denser but develop incredible caramelized flavors when baked.
Chocolate Lover’s Upgrades
Double the chocolate chips to 2.5 cups and fold in ¼ cup chopped dark chocolate (60-70% cacao) for extra richness. For a cookie-thin version, press the dough into a ¼-inch sheet, cut into shapes, and bake for 10-12 minutes.
These become crispy-edged, chewy-centered chocolate "crack" cookies—perfect for dipping in milk.
Nutty Additions
Fold in ½ cup chopped walnuts or pecans for texture contrast. Toast the nuts first in a dry pan over medium heat for 3-4 minutes until fragrant, then cool before mixing.
For a buttery nut flavor, add 1 tbsp brown butter to the wet ingredients—it deepens the caramel notes beautifully. 🌰
Seasonal Twists
In fall, replace ½ cup chocolate chips with ½ cup white chocolate chips + ½ cup chopped pecans. Add ½ tsp pumpkin pie spice to the dry ingredients for a seasonal nod.
For winter, mix in ¼ cup dried cranberries and ½ tsp orange zest—the tartness cuts through the sweetness perfectly.
Gluten-Free Adaptation
Swap the all-purpose flour for a 1:1 gluten-free blend like King Arthur Measure for Measure. Add ½ tsp xanthan gum to the dry ingredients to mimic gluten’s structure. These cookies will be slightly denser but still achieve that crispy-chewy balance.
Chill the dough for 45 minutes instead of 30 to compensate for the lack of gluten development. ✨
Nutrition facts
Frequently asked questions
Why does the dough need to chill for 24 hours?
The 24-hour chill is key for developing those crispy edges and chewy centers. Cold dough prevents excessive spreading while baking, and the resting time allows flour to fully hydrate, creating a more tender crumb. This mimics Crumbl's signature texture—think of it as giving the dough time to "set up" for perfect baking.
Can I use regular table salt instead of kosher salt?
Yes, but reduce the amount to one-third of what's called for. Kosher salt's larger crystals mean fewer grains per teaspoon, so using the same amount would make your cookies too salty. For example, if the recipe calls for 0.5 tsp kosher salt, use just 0.15 tsp table salt instead. The flavor will still be balanced.
What if my cookies spread too much during baking?
This usually happens when the dough isn't chilled enough or the butter is too soft. For next time, ensure your butter is cold and cubed before creaming, and chill the dough for the full 24 hours. Also, use a cookie scoop for even-sized balls and bake at 350°F—no higher! If they still spread, try lining your baking sheets with silicone baking mats instead of parchment.
Can I make these cookies without a mixer?
Use a sturdy wooden spoon or silicone spatula to cream the butter and sugars by hand. Work in a large bowl, mixing vigorously for 5-7 minutes until light and fluffy. The key is to incorporate air—press the butter mixture against the bowl's sides to aerate it properly. For the dry ingredients, use a whisk to combine them thoroughly before folding into the wet mixture.
How do I store or freeze the dough?
Wrap the dough tightly in plastic wrap and refrigerate for up to 5 days, or freeze for 3 months. For freezing, portion the dough into balls first—this makes it easy to bake later. Thaw in the fridge overnight before baking. Baked cookies stay fresh for 4 days in an airtight container with parchment between layers. For longer storage, freeze baked cookies on a tray first, then transfer to a freezer bag.