
Desserts
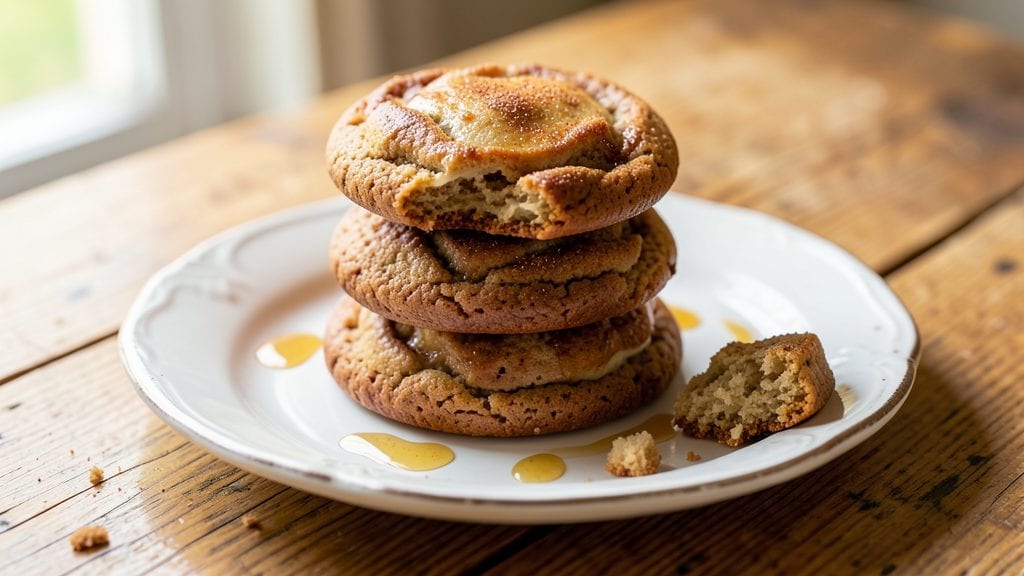
This vintage cookie recipe brings back the golden era of homemade baking with its perfect balance of buttery richness and warm spices. 🌟 The kind that reminds you of grandma’s kitchen—where flour dusted the counters and every batch tasted like love.
These cookies deliver that nostalgic flavor with a tender crumb and crisp edges, baked just as they were in the 1950s.
The secret lies in the technique: creaming butter and sugar until light and fluffy, then folding in just the right amount of flour and spices for that classic vintage taste. No fancy equipment needed—just a bowl, a mixer, and patience.
The result is a cookie that’s sturdy enough to hold its shape but still melts slightly in your mouth, with layers of flavor from cinnamon, nutmeg, and a touch of vanilla.
What makes these cookies truly special is their versatility—drop them for soft, chewy centers or roll them out for cut-out shapes with that signature vintage charm. Whether you’re baking for a holiday gathering or just craving a taste of the past, these cookies deliver comfort in every bite.
Perfectly golden, with just the right amount of crunch.
Store them in an airtight container for up to a week, or freeze for longer shelf life. The aroma alone will transport you back to simpler times, making these cookies more than just a treat—they’re a piece of history on your plate. Let’s get baking!
Ingredients for vintage cookie
Buttery richness meets warm spices—these 11 ingredients bring back grandma’s kitchen magic.
| Ingredient | Amount | Notes |
|---|---|---|
| Unsalted Butter 🧈 | 1 cup | Softened, room temperature |
| Granulated Sugar 🍚 | 1 cup | Light brown sugar works too |
| Large Eggs 🥚 | 2 whole | Room temperature preferred |
| All-Purpose Flour 🌾 | 2 ½ cups | Sifted for light texture |
| Ground Cinnamon 🌶️ | 1 ½ tsp | Freshly ground for warmth |
| Ground Nutmeg 🌿 | ½ tsp | Freshly grated preferred |
| Vanilla Extract 🍯 | 1 tsp | Pure vanilla preferred |
| Baking Soda 🧂 | ½ tsp | For lift and texture |
| Salt 🧂 | ½ tsp | Fine sea salt preferred |
| Chopped Walnuts 🥜 | 1 cup | Toasted for extra flavor |
| Powdered Sugar 🍚 | ½ cup | For rolling cookies |
The butter makes or breaks these cookies. Use European-style butter if you can find it—it’s higher in fat and gives that classic vintage melt. Crisco or shortening works in a pinch, but you’ll lose that authentic flavor. For the sugar, light brown sugar adds moisture and chew, but white sugar keeps them crispier. I always grab the Domino brand flour from the grocery store—it’s consistent. The spices? Penzeys or Spicewalla for the freshest ground cinnamon and nutmeg, but regular grocery store stuff works fine. Toast your walnuts in a dry pan for 5 minutes—they’ll smell amazing and add crunch.
No vanilla extract? Vanilla bean paste works great, or even vanilla sugar** if you’re in a hurry. Short on walnuts? Pecans or almonds toasted will do the trick. Need to swap the sugar? Coconut sugar for brown sugar, but reduce by 1/4 cup. The baking soda is key—don’t use baking powder. For a gluten-free version, swap the flour for a 1:1 GF blend. And if you’re rolling cookies for cut-out shapes, chill the dough for 30 minutes first**—it makes rolling so much easier.
These cookies keep for 1 week in an airtight container at room temperature, but honestly? They disappear faster than that. For longer storage, freeze the dough balls and bake straight from frozen—just add 2 extra minutes** to the baking time. The aroma alone will have your whole house smelling like grandma’s kitchen. Double the batch and freeze half—trust me, you’ll thank me later. And if you’re feeling fancy, dust with extra powdered sugar** right after baking.
Why You'll Love This Recipe
- No Mixer Needed: I swear by this recipe when my hands are full—just cream the butter and sugar with a wooden spoon until it’s light and fluffy. No electric mess, no cleanup, just good old elbow grease that somehow makes it taste even better.
- Warm Spice Magic: That first bite of cinnamon-kissed dough? It’s like a hug in cookie form. The butter stays rich but never greasy, and the sugar caramelizes just enough to give you that perfect chewy center—no fancy techniques, just pure, nostalgic flavor.
- Holiday or Hangry Fix: I make these for Christmas mornings, but honestly? They’re my go-to when I’m craving something sweet after a long day. Freeze half the batch for later, and boom—you’ve got a pantry full of stress relievers that cost less than takeout.
- Butter Budget Hack: Between us, this recipe uses butter smartly—just enough to keep it tender without breaking the bank. A single stick stretches further than you’d think, and the eggs bind it so well you won’t even miss extra fat. Plus, the flour is basic, so you’re not hunting for specialty ingredients.
Step-by-step instructions for vintage spice cookies
Here's how to make these nostalgic cookies with perfect layers and warm spice flavors.
👨🍳 Step 1: Cream Butter and Sugar Together
In a large mixing bowl, combine the 1 cup softened unsalted butter and 1 cup granulated sugar. Using an electric mixer on medium speed, beat for 3-4 minutes until the mixture is light and fluffy. You'll see it nearly double in volume and turn pale yellow—this is what creates those signature layers.
I like to scrape down the sides of the bowl every 30 seconds to make sure everything gets incorporated evenly. If the butter isn't completely softened, it won't cream properly, and your cookies will turn out dense instead of tender.
👨🍳 Step 2: Add Eggs and Flavorings
Add the 2 whole large eggs, one at a time, mixing well after each addition. Then stir in the 1 teaspoon vanilla extract, 1.5 teaspoons ground cinnamon, 0.5 teaspoon ground nutmeg, 0.5 teaspoon baking soda, and 0.5 teaspoon salt. Mix on low speed just until combined—about 1 minute—to avoid developing too much gluten.
This is where the vintage spice magic happens. The nutmeg adds warmth while the cinnamon gives that classic cookie aroma. Don't worry if the mixture looks slightly streaky—the dry ingredients will come together in the next step.
👨🍳 Step 3: Fold in Dry Ingredients and Walnuts
In a separate bowl, whisk together the 2.5 cups all-purpose flour to lighten it up. Then gradually add it to the wet mixture, mixing on low speed just until combined. Be careful not to overmix—you want to see some flour streaks remain. Finally, gently fold in the 1 cup chopped walnuts using a spatula.
Here's the thing—walnuts add texture and crunch, but they can get dry. I always toast mine first in a dry skillet over medium heat for 3-4 minutes until fragrant, then chop them while still warm. This enhances their flavor and prevents them from overpowering the cookie.
⏰ Step 4: Chill the Dough
Cover the dough with plastic wrap and refrigerate for at least 1 hour (or up to 24 hours for best results). This chilling step is crucial—it prevents the cookies from spreading too much in the oven and helps develop those beautiful layers. The dough should be firm but still pliable when you take it out.
I know it's tempting to skip this step, but trust me—chilled dough makes all the difference. If you're short on time, you can even pop the dough in the freezer for 20 minutes to achieve the same effect. Just make sure it's cold before shaping the cookies.
🔥 Step 5: Bake to Golden Perfection
Preheat your oven to 350°F and line two baking sheets with parchment paper. Using a cookie scoop or tablespoon, drop rounded tablespoons of dough onto the prepared sheets, spacing them about 2 inches apart. They won't spread much, so you can place them a bit closer together.
Bake for 12-14 minutes until the edges are light golden brown and the centers look just slightly underdone. The cookies will continue to set as they cool. Let them rest on the baking sheet for 5 minutes before transferring to a wire rack to cool completely.
🍽️ Step 6: Roll in Powdered Sugar
Once completely cooled, roll each cookie in the 0.5 cup powdered sugar to coat evenly. This final step gives them that classic vintage look and adds a touch of sweetness. I like to do this on parchment paper to make cleanup easier.
These cookies are best enjoyed fresh from the oven, but they'll keep well in an airtight container for up to 5 days. The flavors actually improve as they sit, with the spices mellowing and the textures perfecting. Store any leftovers at room temperature for the best texture.
Pro Tips For Making Vintage Cookie
- CREAM BUTTER COLD: Use unsalted butter straight from the fridge—cut it into chunks and let it sit out for exactly 30 minutes before mixing. I learned this the hard way: room-temp butter gets greasy dough, and fridge-cold butter just doesn’t emulsify right.
- WEIGH THE FLOUR: Scoop and level won’t cut it here—use a kitchen scale for the flour. Vintage recipes often rely on precise ratios, and a cup of flour can vary by 10-15 grams depending on how you pack it. (Yes, even if you’re in a hurry.)
- UNDERBAKE SLIGHTLY: Pull cookies out when edges are just set but centers still look soft—about 2-3 minutes before the recipe’s suggested time. They’ll firm up as they cool, and you’ll avoid the sad, flat centers that happen when you overbake. Trust the look, not the clock.
- EGGS AT ROOM TEMP: Take eggs out of the fridge 15 minutes before cracking them. Cold eggs mix unevenly and can cause dough to separate, leading to dense cookies. (I know, it’s annoying to remember—but the texture difference is noticeable.)
Make-ahead tips for this vintage cookie
Dough Prep Ahead
The dough for these vintage cookies keeps beautifully in the fridge, making them perfect for make-ahead baking. After mixing, cover the dough tightly with plastic wrap and refrigerate for up to 48 hours.
The longer it rests, the more developed the flavors become—think deeper spice notes and a more tender crumb. I often make a double batch on Sundays and keep it chilled for the week. 🥖
Freeze Dough Balls
For ultimate convenience, shape the dough into 1-inch balls (about 2 tablespoons each) and place them on a parchment-lined tray. Freeze solid for 1 hour, then transfer to a ziplock bag or airtight container.
These frozen dough balls will keep for 3 months—just bake straight from frozen, adding 2-3 extra minutes to the baking time. No thawing needed!
Bake from Frozen
Preheat your oven to 350°F as usual. Place frozen dough balls directly on parchment-lined sheets, spacing them 2 inches apart. Bake for 14-16 minutes until edges are golden. The centers will still look slightly soft but will set as they cool.
This method works especially well for holiday baking—just pull out what you need when guests arrive. 🎄
Storage Tips
Once baked, store cookies in an airtight container at room temperature for up to 7 days. The powdered sugar coating helps preserve freshness, but I recommend keeping them in a cool, dark place to prevent the butter from softening too quickly.
For longer storage, freeze baked cookies for up to 3 months—just warm them in the oven at 300°F for 5 minutes to refresh their texture.
Reheating Tricks
If your cookies lose their crispness, revive them by placing on a baking sheet and warming in a 300°F oven for 3-5 minutes. For a quick fix, microwave for 10-15 seconds (covered with a damp paper towel) to soften the edges.
I also love serving slightly warmed cookies with a cup of hot milk or coffee—the contrast in temperatures makes them taste even more nostalgic. ☕
Gift-Worthy Packaging
Wrap cooled cookies in parchment paper, tie with twine, and place in a cellophane bag for a charming vintage gift. Add a handwritten note or a small spice jar (like extra cinnamon) for a personal touch.
These cookies make perfect holiday gifts or teacher/student appreciation treats. The aroma alone makes them irresistible—just like grandma used to pack! 🎁
Nutrition facts
Frequently asked questions
Can I substitute butter with another fat?
For the best vintage flavor, stick with unsalted butter—it's essential for that classic richness. However, you can use Crisco or shortening (1:1 ratio) if needed, though the texture will be slightly denser. For a lighter version, try half butter, half coconut oil, but expect a slightly different taste.
Why do I need to chill the dough?
Chilling prevents excessive spreading and helps develop the cookie's layers. The dough should rest for at least 1 hour (or up to 24 hours) to firm up. This step also enhances the spice flavors and gives you more control when shaping. Skipping it often results in flat, cakey cookies instead of the perfect vintage texture.
What's the best way to store these cookies?
Keep them in an airtight container at room temperature for up to 5 days. For longer storage, freeze baked cookies for 3 months—just warm them at 300°F for 5 minutes to refresh their texture. The powdered sugar coating helps preserve freshness, but avoid humid environments to prevent sogginess.
Can I make these cookies gluten-free?
Yes! Swap the all-purpose flour for a 1:1 gluten-free baking blend (like Bob's Red Mill). Add 1/4 teaspoon xanthan gum if your blend doesn't contain it. The texture will be slightly denser, but the spice flavor remains the same. For best results, chill the dough longer (up to 2 hours) to compensate for the lack of gluten structure.
How do I make these into cut-out shapes?
Roll the chilled dough to 1/4-inch thickness on a floured surface, then cut with vintage-inspired shapes (like stars or trees). Place on baking sheets 2 inches apart and bake for 10-12 minutes at 350°F. For extra crisp edges, bake 2 minutes longer. Use a cookie press for intricate designs or a knife for simple shapes.