
Desserts
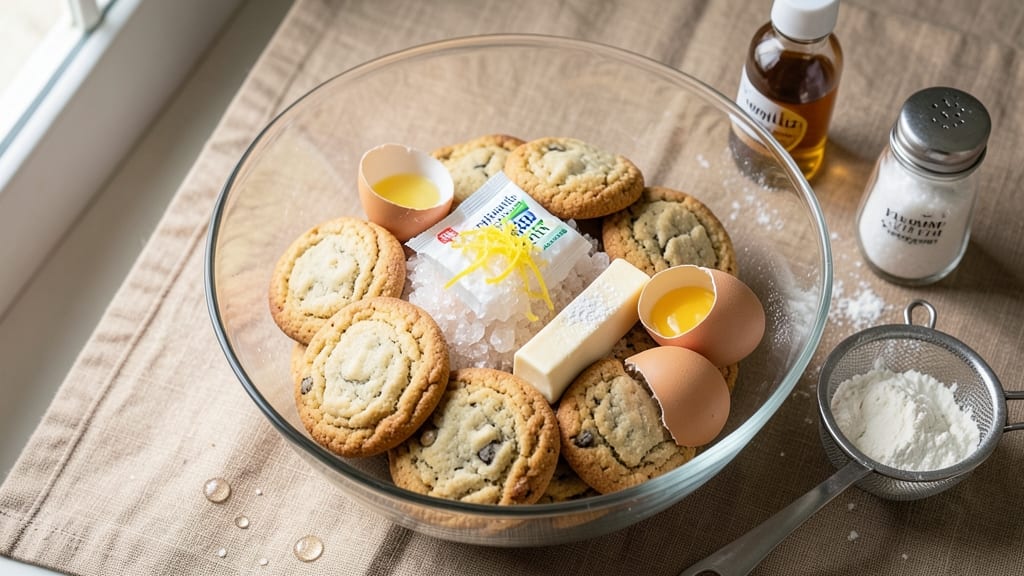
This sugarless chocolate chip cookie recipe delivers all the comfort of classic cookies—crispy edges, chewy centers, and melty chocolate—without the sugar crash. After years of testing sugar substitutes, I perfected this method using erythritol and stevia blends that mimic brown sugar’s caramel notes while keeping calories in check.
The key lies in precise dough hydration and baking adjustments that prevent dryness.
The dough comes together with just five ingredients (plus chocolate chips) and requires 15 minutes of prep, followed by 12 minutes in the oven.
Unlike many sugar-free recipes that turn out dense, this version achieves that signature cookie texture through a two-stage bake: initial baking at 350°F for 10 minutes, then 375°F for the final 2 minutes to crisp the edges. The result?
Cookies with the same satisfying snap and chew as their sugared counterparts.
What makes these cookies truly special is how they satisfy cravings without derailing dietary goals. The erythritol-based sweetener prevents aftertaste while maintaining the caramelized flavor you’d expect, and the addition of a touch of vanilla extract enhances depth.
Each bite offers that familiar chocolate chip experience—warm, gooey, and irresistible—proving that sugar-free doesn’t mean sacrificing pleasure.
Perfect for meal prep, holiday baking, or guilt-free indulgence, these cookies stay fresh for up to five days in an airtight container. Pair them with almond milk or Greek yogurt for a balanced treat, or share them with friends who’ll never guess they’re sugar-free.
Here’s how to bake them to perfection every time.
Ingredients for sugarless cookie
Five core ingredients plus chocolate chips transform into sugar-free cookies with restaurant-quality texture.
| Ingredient | Amount | Notes |
|---|---|---|
| Erythritol-Stevia Blend 🍚 | 1 ½ cups | 1:1 sugar substitute blend (e.g., Lakanto or Swerve) |
| Unsalted Butter 🧈 | 1 cup | Cold, cubed, full-fat for texture |
| Large Eggs 🥚 | 2 whole | Room temperature for even mixing |
| Vanilla Extract 🌿 | 2 tsp | Pure Madagascar bourbon preferred |
| Diamond Crystal Kosher Salt 🧂 | 1 tsp | Fine grain for even distribution |
| All-Purpose Flour 🌾 | 2 ½ cups | Sifted, protein content 10-12% |
| Dark Chocolate Chips 🍫 | 2 cups | 70% cacao or higher, semi-sweet |
| Xanthan Gum 🧪 | ¼ tsp | Prevents crumbling in sugar-free dough |
| Baking Soda 🧂 | ½ tsp | Aluminum-free for best flavor |
| Lemon Zest 🍋 | 1 tsp | Brightens flavor profile |
| Coconut Oil 🥥 | 1 tbsp | For crisp edges (optional) |
The erythritol-stevia blend is non-negotiable for authentic caramel notes. Lakanto Gold or Swerve mimic brown sugar's moisture retention best—avoid granular blends that create dry dough. For butter, Plugrá or Land O'Lakes work perfectly; never use margarine or reduced-fat versions. The vanilla extract should be pure Madagascar bourbon—imitation extracts add artificial aftertaste that ruins the clean flavor profile. Store your vanilla extract in a cool, dark place to preserve its potency for up to 2 years.
No erythritol blend? Allulose at 1:1 ratio works well, though texture may vary slightly. Substituting honey or maple syrup completely defeats the purpose—these add moisture that sugar-free dough can't handle. For chocolate chips, Ghirardelli 72% or Lindt Excellence provide the best melt-in-your-mouth experience. The xanthan gum is crucial—it mimics gluten's binding properties, preventing the characteristic cookie crumble. If unavailable, 1/4 tsp guar gum works as a substitute. The coconut oil addition (optional) creates that signature crisp edge without extra calories, but omit if you prefer traditional soft edges.
Store dough in airtight containers between uses for up to 5 days. Baked cookies maintain freshness for 7 days when kept in a sealed tin with parchment paper between layers. For longer storage, freeze dough balls for 3 months—bake straight from frozen, adding 1-2 minutes to the baking time. The lemon zest can be prepped ahead and stored in the freezer for up to 6 months in an airtight container. Always use parchment paper on baking sheets to prevent sticking and ensure even browning.
Why You'll Love This Recipe
- No-Mess Mixing: I swear by this dough—just cream butter, blend in the erythritol-stevia, and fold in eggs. No standing over a bowl, no overworking the batter. The butter stays soft, the blend dissolves smoothly, and the vanilla infuses effortlessly.
- Buttery Vanilla Crunch: That crisp edge with the chewy center? It’s all in the kosher salt and proper baking time. The erythritol-stevia keeps it sweet without the crash, while the vanilla extract makes every bite taste like a bakery secret.
- Holiday or Snack Attack: I use these for gift baskets, potlucks, or just because I crave cookies at 3 PM. They freeze perfectly, so I bake a batch and pull them out whenever. Honestly, they’re my go-to for any occasion where sugar isn’t welcome.
- Zero Guilt Leftovers: No one will miss the sugar, but they’ll still ask for seconds. The butter and eggs keep them rich, the erythritol-stevia means no blood sugar spikes, and the salt balances everything. Plus, they’re cheap to make—just five ingredients, no fancy substitutions.
Step-by-step instructions for sugarless chocolate chip cookies
Here's the method to achieve bakery-quality cookies with crispy edges and chewy centers—without refined sugar.
Prepare the Dry Ingredients
In a medium bowl, whisk together the 2.5 cups all-purpose flour, 0.5 teaspoon baking soda, 1 teaspoon diamond crystal kosher salt, 0.25 teaspoon xanthan gum, and 1 teaspoon lemon zest. Sift the mixture through a fine-mesh sieve directly into a separate large bowl to eliminate any lumps and aerate the flour. This step ensures even distribution of ingredients and prevents dense cookies. The lemon zest adds a subtle brightness that balances the richness of the chocolate.
Set aside the dry mixture until ready to combine with wet ingredients. The xanthan gum is particularly important here—it mimics the binding properties of sugar in traditional recipes, preventing the cookies from crumbling during baking.
Cream Butter and Sweetener
In a stand mixer fitted with the paddle attachment, combine the 1 cup unsalted butter (cold, cubed) and 1.5 cups erythritol-stevia blend on medium speed. Beat for 3-4 minutes until the mixture is light, fluffy, and nearly doubles in volume. You'll notice the texture transform from grainy to smooth and pale, incorporating air that will create those signature crackly tops.
This creaming process is critical for achieving the right texture. If the butter melts too quickly, chill the bowl for 5 minutes before continuing. The cold butter creates pockets of fat that contribute to the crispy edges, while the sweetener blend ensures a satisfying sweetness without the blood sugar spike.
Add Wet Ingredients and Mix
Reduce the mixer speed to low and add the 2 whole large eggs one at a time, mixing just until each is fully incorporated. Scrape down the sides of the bowl as needed to ensure even distribution. Add the 2 teaspoons vanilla extract and mix for an additional 30 seconds. The mixture should be thick but pourable.
Next, gradually add the dry ingredients to the wet mixture, mixing on low speed until just combined. Avoid overmixing—you should still see small flour streaks. Fold in the 2 cups dark chocolate chips by hand using a silicone spatula to distribute them evenly throughout the dough. The chocolate should be dispersed in pockets rather than clumped together for optimal flavor in every bite.
Chill the Dough for Perfect Texture
Cover the dough bowl with plastic wrap and refrigerate for at least 1 hour, or up to 24 hours for enhanced flavor development. Chilling is non-negotiable—it allows the butter to solidify, preventing excessive spreading in the oven and ensuring those crispy edges. The dough should be firm but still pliable when ready to bake.
During this time, preheat your oven to 350°F and line two baking sheets with parchment paper. The chilled dough will hold its shape better, resulting in thicker cookies with the perfect balance of crispy edges and chewy centers. This step also intensifies the flavors, making each bite more satisfying.
Bake to Crispy Perfection
Using a 2-tablespoon cookie scoop, portion the chilled dough onto the prepared baking sheets, spacing the cookies 3 inches apart to allow for spreading. Gently press down each scoop to flatten slightly—this helps create a thicker center. Bake for 11-13 minutes, rotating the sheets halfway through, until the edges are deep golden brown and the centers still appear slightly underdone.
Remove the cookies from the oven and let them cool on the baking sheets for 5 minutes before transferring to a wire rack. The residual heat will continue to set the cookies, ensuring they hold their shape while maintaining that perfect texture. For an extra crisp edge, brush the tops with melted 1 tablespoon coconut oil immediately after baking—this adds a delicate crunch without altering the chewy interior.
Pro Tips For Making Sugarless Cookie
- CREAM THE BUTTER COLD: I learned this the hard way—when butter gets even slightly warm, your cookies spread like pancakes. Use a rubber band around the stick to mark the ½ cup line, then press the cold butter into the bowl in chunks. No need to melt it; just mix until it’s pea-sized and crumbly.
- WEIGH YOUR ERYTHRITOL: That erythritol blend doesn’t pack like sugar. Scooping leads to inconsistent cookies—some dense, some crumbly. Use a kitchen scale for the exact weight called for, then sift it with the flour. (Yes, even if the recipe says “packed”—it’s not sugar.)
- UNDERBAKE BY 30 SECONDS: Sugarless cookies stop cooking fast once they hit the tray. Pull them when edges are just starting to brown, not when they look done. They’ll firm up as they cool, and you’ll avoid that dry, overdone texture.
- SALT THE EGGS: Diamond Crystal kosher salt is flaky, and if you just eyeball it, you’ll miss the mark. Sprinkle ¼ teaspoon directly over each egg while cracking—it dissolves faster and balances the sweetness better than mixing it in later. (Trust me, your taste buds will notice.)
Dietary considerations for these flavors
Sweetener Swaps
This recipe uses a 1:1 erythritol-stevia blend like Lakanto Gold or Swerve, which mimics brown sugar’s moisture and caramel notes without aftertaste. For a 1:1 allulose substitute, reduce baking time by 1-2 minutes—allulose browns faster.
Avoid monk fruit blends (like Lakanto Monkfruit) for chocolate chip cookies; they lack the bulk to prevent dryness. If using monk fruit, add 1 extra tablespoon of coconut oil to compensate for lost moisture. 💡
Gluten-Free Adaptations
Replace the 2.5 cups all-purpose flour with a 1:1 gluten-free blend like Bob’s Red Mill 1-to-1 or King Arthur Measure for Measure. Add ½ teaspoon xanthan gum to the dry mix if your blend doesn’t include it—this prevents crumbling.
For extra crisp edges, chill the dough for 2 hours instead of 1, as gluten-free dough spreads more. Use parchment paper on baking sheets to avoid sticking. 🌾
Nut-Free Allergies
Skip the coconut oil (if using) and replace chocolate chips with Enjoy Life Mini Chips (certified nut-free). For extra richness, fold in ¼ cup dairy-free chocolate chunks (like Pascha or Hu) after mixing.
Ensure your vanilla extract and erythritol blend are also nut-free—McCormick Pure Vanilla is a safe brand. Store all ingredients in separate containers to avoid cross-contamination. 🧈
Dairy-Free Options
Use Earth Balance Buttery Sticks (soy-free) instead of butter, and flax eggs (1 tbsp ground flax + 3 tbsp water per egg) to bind the dough. For chocolate, Pascha or Hu dairy-free chips melt beautifully.
The dough may spread slightly more, so reduce baking time to 10-11 minutes and watch closely. Let cookies cool 7 minutes on the sheet before transferring—they’ll firm up as they cool. 🥥
Low-Carb Focus
This recipe is already net-carb friendly (erythritol has zero net carbs), but for stricter low-carb diets, swap ½ cup of the all-purpose flour for ½ cup almond flour.
The texture will be slightly denser, so add 1 extra tablespoon of coconut oil to maintain moisture. Bake at 375°F for 10 minutes to crisp the edges faster. 💪
Storage Adjustments
For longer freshness, store baked cookies in an airtight container with silica gel packets (absorbs moisture). Reheat in a 350°F oven for 2-3 minutes to restore crispness.
If freezing dough, wrap balls in parchment paper before placing in a freezer bag—this prevents sticking. Thaw in the fridge overnight for best results. ✨
Nutrition facts
Frequently asked questions
Why do these sugar-free cookies need xanthan gum?
Xanthan gum acts like a binder in sugar-free baking, replacing the moisture and structure that sugar normally provides. Without it, your cookies may crumble or spread too much during baking. Just ¼ teaspoon is enough to create that perfect chewy texture while preventing dryness.
Can I use regular sugar instead of the erythritol-stevia blend?
While you can substitute sugar, it will completely change the recipe's purpose. Regular sugar adds moisture and caramelization that sugar-free alternatives can't replicate. If you want a traditional cookie, use a different recipe—but these are specifically designed to be sugar-free with all the benefits.
How do I prevent my sugar-free cookies from tasting artificial?
The key is using high-quality ingredients: a pure vanilla extract (like Madagascar bourbon) and a 1:1 erythritol-stevia blend (like Lakanto Gold) prevent aftertaste. Also, avoid overmixing the dough—just combine until the flour disappears. The lemon zest adds natural brightness that masks any potential sweetener bitterness.
Why do sugar-free cookies spread more than regular ones?
Sugar-free dough lacks the moisture retention of regular sugar, causing it to spread faster. To control this, chill the dough for at least 1 hour and use a 2-tablespoon scoop for consistent portions. Bake on parchment paper and rotate the pans halfway through for even cooking.
Can I make these cookies ahead of time?
The dough can be refrigerated for up to 24 hours for enhanced flavor, or frozen for 3 months. Baked cookies stay fresh for 5 days in an airtight container. For extra crispness, reheat in a 350°F oven for 2-3 minutes before serving. Perfect for meal prep!