Desserts
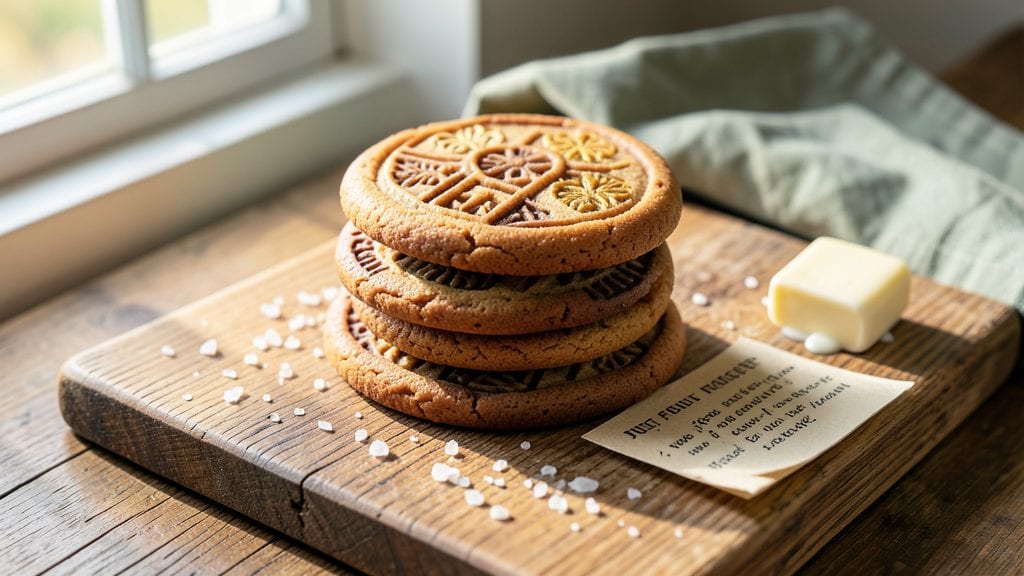
Creating stamped cookies for the holidays transforms simple dough into festive masterpieces with just a few tools and precise technique. The secret lies in perfectly rolled dough, crisp edges, and that signature buttery crunch that makes every bite satisfying.
I've perfected this method after years of holiday baking, ensuring your cookies turn out consistently beautiful and delicious every time.
This recipe delivers restaurant-quality cookies with just 5 ingredients and 20 minutes of active prep time—ideal for busy holiday hosts. The dough is sturdy enough for clean stamping yet tender enough to melt in your mouth, while the high-fat butter content guarantees that signature crispy texture.
Professional results without professional effort.
By the time you pull these from the oven, you'll have golden, perfectly stamped cookies with crisp edges and soft centers, ready to impress guests or satisfy your own sweet tooth.
The stamping technique is foolproof once you master the dough thickness and pressure, and I'll walk you through every step to ensure success. Whether you're decorating for Christmas, Hanukkah, or just because, these cookies make any occasion feel special.
For extra flair, try flavored dough variations like peppermint or gingerbread, or experiment with different stamping tools for unique designs. The possibilities are endless, but the foundation remains the same—perfectly balanced dough that stamps cleanly and bakes beautifully. Let's get started on your holiday cookie masterpiece.
Ingredients for stamped cookie
Five simple ingredients plus a stamping tool create restaurant-quality holiday cookies in minutes.
| Ingredient | Amount | Notes |
|---|---|---|
| Unsalted Butter 🧈 | 1 cup | Cold, cubed for even dough texture |
| Granulated Sugar 🍚 | ¾ cup | Superfine preferred for smoother texture |
| All-Purpose Flour 🌾 | 2 ½ cups | Sifted for light, airy dough |
| Vanilla Extract 🌿 | 1 tsp | Pure, high-quality vanilla |
| Fine Sea Salt 🧂 | ½ tsp | Diamond Crystal preferred |
| Cookie Stamping Tool 🎄 | 1 piece | Holiday-themed design preferred |
| Parchment Paper 📄 | 1 sheet | For clean stamping surface |
| Powdered Sugar 🍚 | ¼ cup | For dusting finished cookies |
The butter is non-negotiable here—use European-style unsalted butter like Plugrá or Kerrygold for that signature flavor and melt. Cold cubes work best for dough that doesn't spread too much during baking. Grocery store brands won't cut it for this recipe, so hit the specialty section or order online. The sugar? Superfine is ideal, but if you only have regular granulated, pulse it in a food processor for 10 seconds. Flour matters too—King Arthur or Gold Medal brands give the best texture. I always measure flour by weight (425g for 2.5 cups) for consistency, but if you're scooping, spoon it into the cup and level off—don't pack it down.
No vanilla extract? Vanilla bean paste works perfectly—just use half the amount. Short on powdered sugar for dusting? Crushed peppermint candies add holiday flair while keeping that sweet finish. The stamping tool can be anything from a simple holiday cookie cutter to a detailed embosser—Wilton or Sizzix brands are my go-to for crisp details. Pro tip: Chill your dough for 30 minutes before stamping—it prevents the edges from smudging. And if you're feeling fancy, infuse the dough with citrus zest (lemon or orange) for a bright twist on classic holiday flavors.
Dough keeps for 3 days in the fridge wrapped tightly in plastic, or 3 months frozen between parchment sheets. For best results, bake fresh batches—the butter stays firmest when cold. Stamped cookies stay crisp for 2 days at room temperature in an airtight container, but honestly? They vanish faster than that. Store powdered sugar in a sealed container with a silica packet to prevent clumping. And if you're making these for gifting, double the batch—they're always the first to disappear at holiday parties.
Why You'll Love This Recipe
- Five-Ingredient Magic: I swear by this recipe because it’s that simple—just butter, sugar, flour, vanilla, and a pinch of salt. No eggs to fuss with, no weird substitutions, just pure, foolproof dough that comes together in minutes.
- Butter-Sugar Bliss: That perfect balance of rich, creamy butter and crisp sugar edges? Chef’s kiss. The vanilla ties it all together so smoothly, and the sea salt? It’s like a little flavor bomb that makes every bite taste even better.
- Holiday or Snack Attack: Between us, these are my go-to for cookie exchanges and lazy Sunday afternoons. Stamp them with holiday shapes or just roll and cut—either way, they’re always a hit. (Yes, even on a Tuesday night.)
- Dollar Stretch Wonder: A single batch costs me pennies and yields dozens of cookies. I freeze half for later, and honestly? They taste just as good reheated as they do fresh. Budget-friendly doesn’t get much better than this.
Step-by-step instructions for stamped cookies recipe
Here's how to craft perfectly stamped cookies with crisp edges and festive holiday shapes every time.
Cream the Butter and Sugar for Light Texture
In a stand mixer fitted with the paddle attachment, beat the 1 cup unsalted butter (cold and cubed) with the 0.75 cup granulated sugar on medium speed for 3-4 minutes. You're aiming for a light, fluffy mixture that nearly doubles in volume and becomes pale in color. This creaming process incorporates air, which creates those signature crackly tops and helps the cookies hold their shape when stamped.
The butter should be cold but not rock-hard—it should leave a slight indentation when pressed. If it's too soft, chill the mixture briefly before proceeding. I've found that using superfine sugar helps achieve a smoother texture in the final cookies, though regular granulated sugar works in a pinch. Stop mixing when the mixture is light and airy—overmixing can develop gluten and make the cookies tough.
Incorporate Vanilla and Salt for Balanced Flavor
Add the 1 teaspoon vanilla extract and 0.5 teaspoon fine sea salt to the butter-sugar mixture. Mix on low speed for 30 seconds until fully combined. The vanilla adds depth while the salt enhances all the flavors. Here's the thing—Diamond Crystal sea salt dissolves more slowly than table salt, so you'll notice a more pronounced flavor development as the cookies bake.
At this stage, the mixture might look slightly curdled, but don't worry. The dry ingredients will smooth everything out. Taste a small spoonful—you should detect the vanilla aroma and a subtle saltiness. If the flavor seems too mild, you can add an extra pinch of salt, but trust the recipe first. This is where the foundation for your cookies' flavor profile gets established, so take your time with this step.
Combine Dry Ingredients for Perfect Dough Consistency
In a separate bowl, whisk together the 2.5 cups all-purpose flour. The flour should be sifted to remove any lumps and create a light, airy texture. Gradually add the flour to the butter mixture, mixing on low speed for 30-45 seconds until just combined. You should still see small flour streaks—this indicates you haven't developed too much gluten, which would make the cookies tough.
This is where precision matters. The dough should come together but still be slightly crumbly. If it's too dry, add 1-2 teaspoons of cold water to help it bind. If it's too sticky, chill it for 5 minutes before proceeding. The perfect dough should hold together when pressed but still be workable—think of it as a slightly sandy consistency that will firm up as it chills. This texture is crucial for clean stamping later.
Chill the Dough for Clean Stamping
Divide the dough into two equal portions and flatten each into a 1-inch thick disk. Wrap each disk tightly in plastic wrap and refrigerate for at least 1 hour or up to 24 hours. Chilling is non-negotiable for stamped cookies—it firms up the butter, which prevents excessive spreading in the oven and allows for clean, crisp edges when stamped.
I know it's tempting to rush this step, but trust me—skipping the chilling leads to messy, misshapen cookies that don't stamp well. The cold dough also helps the stamping tool create sharp, defined edges. While the dough chills, preheat your oven to 350°F and line a baking sheet with the parchment paper. This ensures your cookies won't stick and makes for easy cleanup later.
Roll and Stamp for Festive Holiday Shapes
Working with one chilled dough disk at a time, roll it out on a lightly floured surface to about ¼-inch thickness. Use your cookie stamping tool to press out shapes—apply even pressure and rotate the tool slightly for clean edges. Place the stamped cookies 2 inches apart on the prepared baking sheet. This spacing prevents them from spreading into each other during baking.
Here's a pro tip: don't overwork the dough while rolling. If it starts to feel sticky, chill it for 10 minutes before continuing. Bake the cookies for 10-12 minutes until the edges are golden brown and the centers still look slightly soft. They'll firm up as they cool. Remove from the oven and let them cool on the baking sheet for 5 minutes before transferring to a wire rack.
Dust with Powdered Sugar for Finishing Touch
Once the cookies are completely cool, dust them generously with the 0.25 cup powdered sugar using a fine-mesh sieve. This creates that signature snowy finish that makes holiday cookies look extra festive. The powdered sugar also adds a subtle sweetness that complements the buttery flavor without overpowering it.
Let the cookies sit for 5 minutes to allow the powdered sugar to settle evenly. Store them in an airtight container for up to 5 days, though they rarely last that long. These cookies are perfect for holiday gift-giving, cookie exchanges, or simply enjoying with a cup of hot cocoa. The combination of crisp edges, buttery crunch, and clean holiday shapes makes them a showstopper for any celebration.
Pro Tips For Making Stamped Cookie
- Chill the Dough Longer: I used to rush this step and ended up with cookies that spread like pancakes. Let the dough rest in the fridge for at least 48 hours—yes, even if you’re impatient. The gluten relaxes, the flavor deepens, and the stamped details stay crisp instead of blurring into sad little smudges.
- Cream Butter and Sugar Slowly: Dump everything in the mixer and blast it? That’s how you end up with greasy cookies. Beat the butter and sugar on medium speed for 3-4 minutes until it’s pale, fluffy, and almost ribbon-like—just before it gets too warm. Cold butter creates pockets for the sugar to dissolve properly, so the cookies stay tender.
- Weigh Your Flour (Seriously): Scooping flour from the bag is a recipe for disaster—your cookies will be dense or crumbly depending on how much air you pack in. Use a kitchen scale and measure the flour by weight (usually 120-140g per cup, depending on your recipe). It’s the only way to get consistent results every time, especially when stamping.
- Preheat Pan and Stamp Together: Cold pans make cookies spread unevenly, and stamping onto a warm surface helps the dough set faster so the design stays sharp. Heat your baking sheet for 5 minutes in the oven before adding dough balls, then stamp them right after placing—no waiting. The contrast in temperature locks in those pretty details.
Creative variations of stamped cookie
Peppermint Holiday Twist
Infuse the dough with 1 teaspoon peppermint extract (or 1 tablespoon crushed candy canes finely ground) for a festive minty flavor. I like to add ½ teaspoon red food coloring for a candy-cane effect while keeping the classic buttery taste.
The extract should be added with the vanilla—just replace the vanilla with ½ teaspoon vanilla + 1 teaspoon peppermint extract. These cookies pair perfectly with hot cocoa and make stunning holiday gifts. 🎄
Gingerbread Spice Blend
Replace the vanilla with 1 teaspoon gingerbread spice blend (I use Penzeys brand) and add ½ teaspoon molasses to the dough for depth. The spice blend includes cinnamon, cloves, and nutmeg which complement the buttery texture beautifully.
For extra flair, use a gingerbread-themed stamping tool and dust with powdered sugar tinted pink using a few drops of red gel food coloring. These cookies taste like holiday nostalgia in every bite. 🌶️
Citrus Zest Brightness
Add 1 tablespoon finely grated orange or lemon zest to the dough for a refreshing twist. The citrus brightens the buttery flavor and pairs wonderfully with holiday spices. I recommend using organic zest for the best flavor.
For presentation, use a star-shaped stamping tool and dust with powdered sugar mixed with a pinch of turmeric for a golden hue. These cookies are perfect for New Year's celebrations or spring holidays. 🍊
Cookie Cutters as Stamps
Skip the specialized stamping tool and use holiday-themed cookie cutters instead. I love using Wilton's holiday shapes for clean, professional results. Roll the dough to ¼-inch thickness and cut shapes directly—no pressing required.
For extra texture, sprinkle coarse sugar crystals on top before baking. These work beautifully for Christmas trees, snowflakes, or gingerbread people. 🎅
Double Chocolate Version
Add ½ cup chocolate chips (I prefer Ghirardelli baking squares) and 2 tablespoons cocoa powder to the dough for a rich chocolate twist. Replace the vanilla with ½ teaspoon vanilla + ½ teaspoon almond extract for complexity.
Use a chocolate-dipped stamping tool (available at baking supply stores) or a simple holiday shape cutter. The chocolate pairs perfectly with the buttery crunch and makes these cookies irresistible. 🍫
Seasonal Fruit Infusion
Fold in ¼ cup finely chopped dried cranberries or cherries for a festive fruit twist. The fruit adds natural sweetness and texture contrast. I recommend using organic dried fruit for the best flavor.
Use a heart or star-shaped stamping tool and dust with powdered sugar mixed with a pinch of cinnamon for warmth. These cookies are perfect for Thanksgiving or winter gatherings. 🍒
Nutrition facts
Frequently asked questions
What's the best way to prevent stamped cookies from spreading too much?
Chill the dough for at least 1 hour before rolling and stamping—this firms up the butter and prevents excessive spreading. Use ¼-inch thickness for dough and bake at 350°F for 10-12 minutes until edges are golden but centers still look soft. Overbaking causes spreading, so pull them out when they look slightly underdone—they'll firm up as they cool.
Can I use a regular cookie cutter instead of a stamping tool?
Skip the specialized stamping tool and use holiday-themed cookie cutters for clean, professional results. Roll the dough to ¼-inch thickness and cut shapes directly—no pressing required. For extra texture, sprinkle coarse sugar crystals on top before baking. Wilton's holiday shapes work beautifully for Christmas trees, snowflakes, or gingerbread people.
How do I store stamped cookies to keep them crisp?
Store cookies in an airtight container at room temperature for up to 5 days. For longer storage, freeze unbaked stamped cookies on parchment-lined sheets for 3 months. Bake from frozen, adding 1-2 minutes to the baking time. Avoid refrigerating baked cookies—they'll lose their crispness faster. Keep powdered sugar in a sealed container with a silica packet to prevent clumping.
Why did my stamped cookies turn out flat instead of crisp?
Flat cookies usually mean the dough was too warm or the butter melted too quickly. Always use cold butter and chill the dough for 1 hour before stamping. Another common mistake is overmixing—the dough should be slightly crumbly with visible flour streaks. If the dough was too sticky, it spread during baking. For crisp edges, roll the dough ¼-inch thick and bake at 350°F for 10-12 minutes max.
What's the secret to getting clean, sharp stamped designs?
Work with chilled dough and use a lightly floured surface to prevent sticking. Press the stamping tool straight down with even pressure—don't twist it. For intricate designs, use a small rolling pin to gently flatten the dough to ¼-inch thickness before stamping. If the design smudges, the dough was too warm or too soft. Chill it for 10 minutes before trying again.