
Desserts
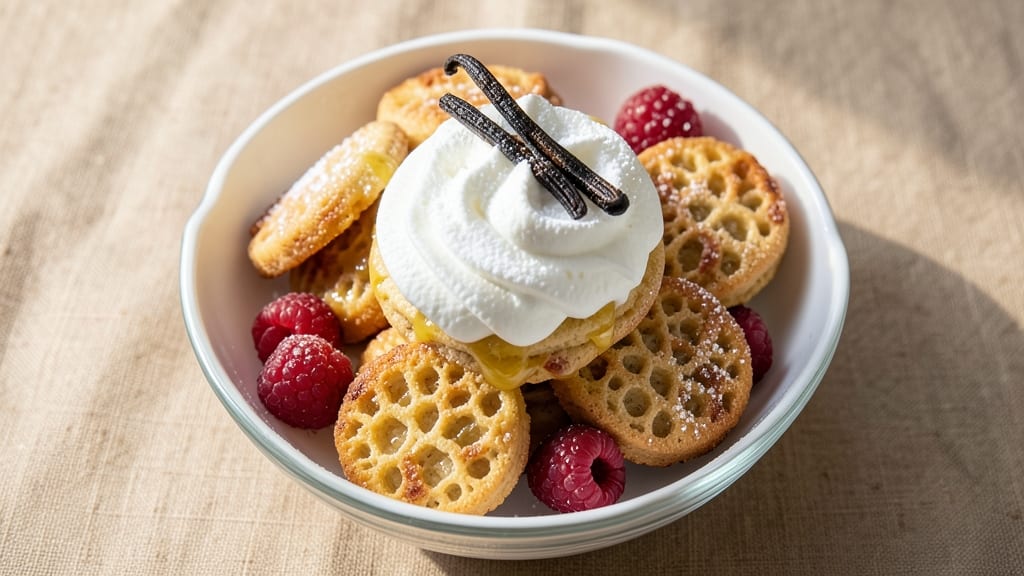
This pavlova cookies recipe transforms classic meringue into crispy-edged rings with a delicate vanilla bean filling that feels like biting into a cloud. The secret lies in precise baking—high heat for that signature crackle, followed by a gentle touch to keep the centers pillowy.
I developed this version after testing dozens of techniques, and the difference between a perfect pavlova cookie and one that collapses is all in the timing and temperature.
What sets these apart is the crispy exterior that shatters slightly with each bite, paired with a soft, marshmallow-like center that melts on your tongue. The vanilla bean filling adds depth without overpowering the meringue's natural sweetness, while the whipped cream topping ties everything together.
This isn't just dessert—it's a showstopper that looks as elegant as it tastes.
You'll need just five key ingredients and about 45 minutes of active time (plus cooling), making it perfect for special occasions or when you want to impress without spending hours in the kitchen.
The meringue rings bake in 10 minutes at high heat, then rest while you prepare the filling—simple steps that yield restaurant-quality results.
Serve these pavlova cookies at room temperature for the best texture, and pair them with fresh berries or a sprinkle of crushed pistachios for extra flair. The contrast of crispy edges and velvety filling makes every bite unforgettable. Let's get baking!
Ingredients for pavlova cookies
Five key ingredients transform simple meringue into restaurant-worthy pavlova cookies with crispy edges and velvety centers.
| Ingredient | Amount | Notes |
|---|---|---|
| Large Egg Whites 🥚 | 5 whole | Room temperature for best volume |
| Granulated Sugar 🍚 | 1 ½ cups | Superfine preferred for smooth texture |
| Vanilla Bean 🌿 | 1 whole | Seeds scraped, pod reserved |
| Unsalted Butter 🧈 | ½ cup | Cold, cubed for filling |
| Heavy Whipping Cream 🥛 | 1 cup | Cold, for whipped topping |
| Powdered Sugar 🍚 | 1 cup | Sifted for smooth topping |
| Cornstarch 🌾 | 1 tbsp | For crispy exterior stability |
| White Vinegar 🍶 | ½ tsp | Stabilizes meringue |
| Crushed Pistachios 🌰 | ¼ cup | Optional garnish |
| Fresh Berries 🍓 | 1 cup | For serving |
| Diamond Crystal Kosher Salt 🧂 | ¼ tsp | Fine grain preferred |
| Vanilla Extract 🌿 | ½ tsp | Pure, for filling |
The egg whites are non-negotiable—pasteurized works if you're avoiding raw eggs, but fresh gives that signature lightness. Grab organic, free-range whites from Whole Foods or your local market for the best volume. Let them sit at room temp for 30 minutes before whipping—cold whites won't hold their shape. The vanilla bean? Madagascar Bourbon from Penzeys adds that luxurious depth, but any quality bean works. Scrape every last bit of those seeds—they're pure gold here. For the sugar, superfine is ideal, but if you only have granulated, pulse it in a food processor first to avoid grainy meringue.
No vanilla bean? Double the vanilla extract—but you'll miss that floral complexity. Running low on butter? European-style butter (like Plugrá) melts cleaner than American brands. The whipped cream topping can be made ahead—just whip it right before serving to keep it fluffy. For the crushed pistachios, unsalted is best, but toast them first in a dry pan for 2 minutes to intensify the flavor. The berries? Raspberries or blackberries hold up best to the meringue's texture—strawberries get too mushy. And if you're making these for a crowd, prep the filling first—the meringue rings only take 10 minutes to bake while you mix everything else.
Meringue rings need to cool completely before adding filling—at least 2 hours at room temp. Store them in an airtight container between layers of parchment, separated by wax paper to prevent sticking. The filling keeps for 3 days in the fridge, but the meringue itself stays crispy for 5 days if you keep it dry. For make-ahead magic, bake the rings, assemble the cookies, then freeze them (unassembled) for up to 1 monthassemble them just before guests arrive—the contrast of crispy rings and velvety filling looks stunning fresh out of the oven.
Why You'll Love This Recipe
- No Fuss Whipping: I swear, these cookies only ask for a hand mixer and patience—not some fancy piping bag. Just fold in the sugar until it’s glossy, spread it out, and let the oven do the rest. My kids think it’s magic when the edges turn golden.
- Vanilla Butter Bliss: That split vanilla bean tucked into the butter? Pure comfort. The flavor sneaks in quietly but leaves you wanting more—like a hug in cookie form. Honestly, I’ve tried store-bought, but this tastes like a bakery secret.
- Party in a Jar: Make a batch ahead, store them in an airtight container, and boom—you’ve got a showstopper for potlucks, coffee dates, or even a last-minute dessert. They’re sturdy enough to travel but still feel special enough for company.
- Budget-Friendly Luxury: Egg whites and sugar are cheap, but the result? Feels like a bakery treat. I’ll be real: the heavy cream topping makes them feel indulgent without breaking the bank. Two dollars’ worth of ingredients, zero guilt.
Step-by-step instructions for crispy meringue rings with vanilla bean filling
Here's how to create delicate, crisp meringue rings with a luscious vanilla bean filling—every bite delivers that perfect crunch-meets-silky texture.
Prepare the Meringue Base
Begin by separating the 5 whole large egg whites and placing them in a spotlessly clean, grease-free mixing bowl. I use a stand mixer fitted with the whisk attachment for this—it's the only way to get that perfectly smooth, stable meringue. Add the 0.25 teaspoon diamond crystal kosher salt and 0.5 teaspoon white vinegar to the egg whites and whisk on low speed until frothy.
Gradually increase the speed to medium-high and begin adding the 1.5 cups granulated sugar—about 1 tablespoon at a time. This slow addition is crucial; it prevents the sugar from shocking the egg whites and creating grainy meringue. Whip continuously until the mixture forms stiff, glossy peaks that hold their shape when the whisk is lifted. The bowl should feel cool to the touch, and the meringue should be thick enough to hold a peak that doesn't collapse immediately.
While the meringue whips, scrape the seeds from the 1 whole vanilla bean and set aside the seeds for the filling. In a separate bowl, combine the 1 tablespoon cornstarch with 1 cup powdered sugar and sift the mixture together. This creates a fine, airy powder that will help stabilize the meringue rings. Gently fold this powder into the meringue using a spatula, being careful not to deflate the mixture.
Shape and Bake the Crispy Rings
Preheat your oven to 250°F—this lower temperature is key for achieving that signature crispy texture without browning. Line two baking sheets with parchment paper and lightly grease the paper with a tiny bit of unsalted butter to prevent sticking. Using a piping bag fitted with a 1-inch round tip, pipe 2-inch diameter rings onto the prepared baking sheets, spacing them about 2 inches apart. Tap the baking sheets gently on the counter to release any air bubbles and ensure smooth rings.
Bake the rings for 2 to 2.5 hours, rotating the pans halfway through the baking time. The rings are done when they're completely dry to the touch and have a crisp, almost glass-like texture. They should not brown at all—if they start to, your oven runs hot, so reduce the temperature by 25°F and continue baking. Let the rings cool completely on the baking sheets before handling; they're brittle when hot and will shatter.
Create the Vanilla Bean Filling
In a medium bowl, combine the 1 cup heavy whipping cream, 0.5 teaspoon vanilla extract, and the scraped seeds from the vanilla bean. Chill this mixture in the refrigerator for at least 1 hour—this ensures the cream is ice-cold when you whip it, which is essential for achieving stiff peaks. Once chilled, whip the cream using a stand mixer fitted with the whisk attachment until it forms soft peaks. Gradually add the 1 cup powdered sugar and continue whipping until the mixture is thick, glossy, and holds its shape when the whisk is lifted.
Here's the thing—this filling needs to be light and airy, almost like a cloud. If it's too stiff, it won't pipe smoothly into the meringue rings. Taste the filling and adjust the sweetness if needed; you can add a bit more powdered sugar if desired, but don't overdo it—the meringue itself is sweet. Once the filling is perfect, transfer it to a piping bag fitted with a small round tip for easy filling.
Assemble and Garnish the Pavlovas
Carefully pipe the vanilla bean filling into the center of each cooled meringue ring, filling them about ¾ full. The rings should stand upright on their own at this point—if they don't, they weren't baked long enough. To stabilize them, place the filled rings on a wire rack set over a plate to catch any drips. Chill the assembled pavlovas in the refrigerator for at least 1 hour before serving. This step is non-negotiable; it allows the filling to set slightly and prevents the meringue from becoming soggy.
Before serving, garnish each pavlova with a sprinkle of crushed pistachios and a few fresh berries. The pistachios add a delightful crunch, while the berries bring a pop of color and freshness. Serve immediately for the best texture—these pavlovas are at their peak when the meringue is crisp and the filling is cool but not melted. Each bite should deliver that magical contrast of crispy meringue giving way to silky vanilla bean cream.
Pro Tips For Making Pavlova Cookies
- Whip Egg Whites Slowly: Start on low speed and gradually increase to medium-high—rushing this step traps air bubbles, and you’ll end up with a dense, sad meringue. I learned this the hard way after deflating three batches in a row; patience here guarantees a light, airy cookie.
- Split the Vanilla Bean: Scrape the seeds into the egg whites and infuse the pod in the sugar while mixing—double the flavor without extra effort. (Yes, even if you’re impatient like me.) The pod’s oils melt into the sugar, adding depth the seeds alone can’t match.
- Skip the Crowding in Oven: Space cookies at least 2 inches apart on the tray—overcrowding steams them instead of drying, leading to soggy bottoms. I used to cram them in to save space, but the texture suffers. Trust the process; your future self will notice the crispness.
- Whip Cream to Stiff Peaks: Fold the heavy cream into the meringue only when it holds rigid peaks—any softer, and the cream will sink, turning your cookies into a puddle. Test with a spatula: if the peak stands straight, it’s ready. No guesswork.
Storing and reheating your leftovers
Room-Temp Storage
Store your assembled pavlova cookies at room temperature in an airtight container with layers of parchment paper between each cookie. Keep them in a cool, dry place away from direct sunlight—they'll stay crisp for 3-4 days.
The meringue rings alone (unfilled) can last up to 5 days if stored separately in a sealed container with a silica gel packet to absorb moisture. 🌡️
Fridge Preservation
For longer storage, refrigerate the fully assembled cookies in an airtight container for up to 5 days. The cold helps maintain the meringue's crispness, but let them sit at room temperature for 10-15 minutes before serving to restore that perfect texture.
The filling may firm up slightly in the fridge—just give it a gentle stir before serving. I always prep a batch ahead for parties and store them this way. ❄️
Freezing Technique
Freeze unassembled meringue rings (not filled) by placing them in a single layer on a baking sheet, then transferring to a freezer-safe bag with parchment between layers. They'll keep for 1 month this way.
For filled cookies, freeze them assembled (without toppings) for up to 2 weeks
Pavlova cookies don't need reheating—they're best served at room temperature. If you've refrigerated them, let them sit for 15-20 minutes to restore crispness. For extra crunch, place them on a wire rack in a 200°F oven for 3-5 minutes (watch closely—they brown fast!). Never microwave them—they'll turn rubbery. The filling stays perfect cold, so no reheating needed there. 🔥 If your meringue rings lose crispness, pop them in a 350°F oven for 2-3 minutes to refresh the texture. For the filling, simply whip it again briefly to restore its airiness. The combination of heat and quick whipping works wonders. I've saved many a "ruined" batch this way—don't throw them out! The flavor stays amazing even after revival. ✨ Add toppings like crushed pistachios or berries right before serving—they look best fresh. If storing garnished cookies, remove toppings before refrigeration or freezing, then add them back just before serving. The berries will keep their color and texture better this way, while pistachios stay crisp when stored separately. 🍓Reheating Tips
Reviving Stale Cookies
Garnish Freshness
Nutrition facts
Frequently asked questions
Why do my meringue rings collapse instead of staying crisp?
Collapsed meringue usually means one of three things: under-whipped egg whites (they need to hold stiff peaks), humidity in your kitchen (use a fan or dry conditions), or opening the oven too soon. Always bake at 250°F for 2-2.5 hours—don't rush it! Also, make sure your mixing bowl is completely grease-free before whipping.
Can I make these without a vanilla bean?
Yes! Use 1 teaspoon pure vanilla extract instead, but you'll miss the floral depth. For extra flavor, add a pinch of vanilla bean paste or a drop of vanilla bean infusion (simmer scraped seeds in 1 tablespoon cream for 10 minutes, then strain). The filling will still taste delicious—just slightly less complex.
How do I prevent the filling from leaking out?
Only fill the meringue rings ¾ full and chill them upright on a wire rack for at least 1 hour before serving. If your rings aren't perfectly stable, they need more baking time—test one by gently tapping it; it should sound hollow and not wobble. For extra security, pipe a tiny bit of whipped cream around the base to "glue" it to the plate.
What's the best way to serve these for a crowd?
Assemble the cookies 2 hours before serving (they'll hold their shape) and store them in an airtight container between layers of parchment. Set up a toppings bar with crushed pistachios, fresh berries, and edible flowers—let guests customize their own. For presentation, arrange them on a tiered stand with whipped cream rosettes between layers. Serve with chilled sparkling wine for a festive touch!
Can I use powdered sugar instead of granulated sugar in the meringue?
No—powdered sugar dissolves too quickly and won't provide the same structural support for crisp edges. The 1.5 cups granulated sugar (or superfine) is non-negotiable for that signature crackly texture. If you're short on time, pulse granulated sugar in a food processor for 30 seconds to create a superfine substitute, but it won't be as smooth.