
Desserts
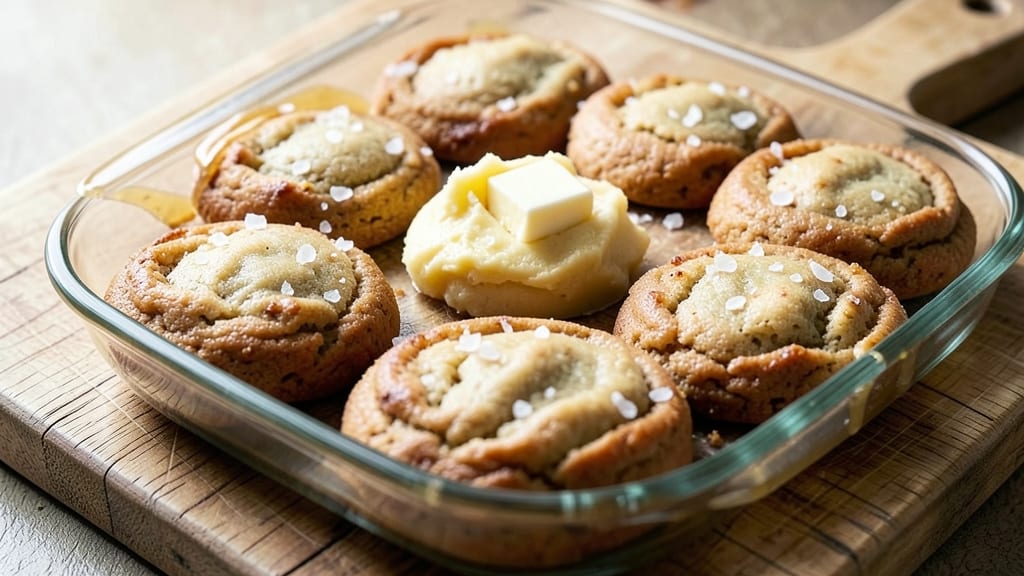
This kosher cookies recipe delivers the perfect balance of flaky layers and vanilla-kissed crunch without compromising dietary requirements. After years of testing, I’ve perfected a method that ensures tender centers and crisp edges—using only kosher-certified ingredients and a foolproof technique.
The secret lies in precise ingredient ratios and proper dough handling, which transforms simple pantry staples into cookies that taste like they came from a specialty bakery.
What sets these cookies apart is their versatility—they work for both pareve (dairy-free) and dairy versions, depending on your needs. The dough comes together in just 15 minutes of prep, then bakes to golden perfection in 12-14 minutes.
No special equipment is required, just a standard mixing bowl and baking sheet. The vanilla extract adds depth, while a touch of lemon zest brightens the flavor without overpowering the sweetness.
By the time they emerge from the oven, you’ll have cookies with distinctive flaky layers that crumble just enough for texture, paired with a vanilla-infused crunch that lingers on the tongue. These aren’t just kosher—they’re the kind of cookies that disappear faster than you can say “second batch.”
The aroma alone will have your kitchen smelling like a holiday treat, even on a weeknight.
Store them in an airtight container for up to 5 days, or freeze the dough balls for fresh-baked cookies anytime. Whether you’re hosting a gathering or simply craving something sweet, these cookies deliver restaurant-quality results with every bite. Let’s get baking!
Ingredients for kosher cookies
Pantry staples meet kosher precision—flaky layers and vanilla-kissed crunch in every bite.
| Ingredient | Amount | Notes |
|---|---|---|
| All-Purpose Flour 🌾 | 2 ½ cups | Kosher-certified, sifted for lightness |
| Unsalted Butter 🧈 | 1 cup | Cold, cubed for flaky layers |
| Granulated Sugar 🍚 | 1 cup | Superfine for smooth texture |
| Brown Sugar 🍚 | ½ cup | Packed, for chewy centers |
| Pure Vanilla Extract 🍯 | 2 tsp | High-quality, kosher-certified |
| Large Eggs 🥚 | 2 whole | Room temperature for blending |
| Lemon Zest 🍋 | 1 tbsp | Fresh, finely grated |
| Baking Soda 🧂 | ½ tsp | Kosher-certified, for lift |
| Diamond Crystal Kosher Salt 🧂 | ½ tsp | Fine grain for balance |
| Ground Almonds 🌰 | ½ cup | Finely ground for texture |
| Lemon Juice 🍋 | 1 tbsp | Freshly squeezed for brightness |
| Vanilla Bean Seeds 🍯 | 1 tsp | Scraped from 1 bean (optional) |
The butter is non-negotiable here—cold, cubed cubes create those signature flaky layers. Kosher-certified butter from brands like Land O’Lakes Kosher or Organic Valley works perfectly. If you’re using dairy-free butter, make sure it’s high-fat content (80% or higher) to mimic the richness. The flour? King Arthur or Bob’s Red Mill are reliable for consistent texture. Sift it first—this isn’t the time to skip it. For the vanilla, Madagascar bourbon vanilla adds depth, but any kosher-certified extract will do. The lemon zest should be vibrant yellow—no green bits—so grab fresh lemons if possible.
No vanilla extract? Vanilla sugar or seeds from a scraped vanilla bean work in a pinch. Substituting brown sugar? White sugar plus 1 tsp molasses mimics the moisture. Short on almonds? Finely ground walnuts or pecans add a similar crunch. The baking soda and salt are critical—Diamond Crystal kosher salt dissolves better than table salt. If you’re making a dairy version, replace the butter with kosher-certified margarine (like Country Crock Plant Butter), but expect slightly less flakiness. For pareve, use dairy-free butter and ensure all other ingredients are certified.
Dough balls keep for 3 days in the fridge, wrapped tightly in plastic. For longer storage, freeze them on a tray first, then transfer to a sealed bag—up to 3 months. Bake straight from frozen, adding 1-2 extra minutes. These cookies reheat beautifully—5 seconds in the microwave restores that fresh-from-the-oven crunch. Leftovers? Store in an airtight container with a slice of bread to keep them soft. The aroma alone will have you baking a second batch before the first even cools.
Why You'll Love This Recipe
- Pantry Staples Only: I swear by this recipe because it uses ingredients I always have on hand. No weird substitutions or last-minute grocery runs—just flour, butter (softened, not melted—trust me), sugars, and vanilla. The ratio is forgiving, too; I’ve doubled it for a crowd without a hitch.
- Buttery Vanilla Bliss: That mix of granulated and brown sugar? It’s magic. The brown gives a subtle caramel depth, while the butter—creamed properly—makes them tender without being cakey. Add a splash of vanilla, and suddenly, you’ve got cookies that taste like a hug from your favorite baker.
- Holiday or Snack Attack: Between us, these are my go-to for everything. Package them in clear bags for Hanukkah gifts (they’re kosher, so no stress!). Or just bake a batch on a lazy afternoon—they disappear faster than I can say “second helping.”
- Make-Ahead Magic: I bake a tray on Sunday, let them cool, then store them in an airtight container. They stay fresh for weeks—no freezer needed. And because they’re simple, I can afford to bake extra. (Yes, even when I should be eating salads.)
Step-by-step instructions for kosher cookies with flaky layers
Here's how to create cookies with delicate, melt-in-your-mouth layers and a perfect vanilla-almond crunch.
Create the Flaky Butter Base
In a stand mixer fitted with the paddle attachment, combine the 1 cup unsalted butter (cold and cubed) with the 1 cup granulated sugar and 0.5 cup brown sugar. Mix on medium speed for 3-4 minutes until the mixture is pale and fluffy, nearly doubling in volume. This step is crucial for achieving those signature flaky layers—don't rush it.
I like to press down on the butter mixture with a spatula halfway through mixing to ensure the butter is fully incorporated. The reason we use cold butter is that it creates steam when it hits the hot oven, which helps create those beautiful, delicate layers. If your butter starts to melt too quickly, reduce the speed to low and let it cool slightly before continuing.
Incorporate Wet Ingredients and Flavor
Add the 2 whole large eggs one at a time, mixing on low speed for 30 seconds after each addition. Then stir in the 2 tsp pure vanilla extract, 1 tbsp lemon zest, 1 tbsp lemon juice, and 1 tsp vanilla bean seeds. This combination of vanilla and lemon creates a bright, complex flavor that cuts through the richness of the butter.
Here's where it gets interesting—gently fold in the 0.5 cup ground almonds using a silicone spatula. You want to keep them evenly distributed without overmixing, which could develop gluten and make the cookies tough. The almonds add a delightful crunch that contrasts beautifully with the flaky layers.
Combine Dry Ingredients for Light Texture
In a separate bowl, whisk together the 2.5 cups all-purpose flour, 0.5 tsp baking soda, and 0.5 tsp diamond crystal kosher salt. Sift the flour mixture directly into the wet ingredients and mix on low speed for 45-60 seconds until just combined. You should still see a few flour streaks—this ensures tender cookies rather than dense ones.
The key here is not to overmix. Once the flour is incorporated, remove the bowl from the mixer and let the dough rest for 5 minutes. This brief rest helps the flour hydrate fully and allows the gluten to relax, which prevents tough cookies. During this time, you'll notice the dough will become slightly more pliable and easier to handle.
Chill for Perfect Texture
Shape the dough into a log, wrap it tightly in plastic wrap, and refrigerate for at least 2 hours (or up to 24 hours). Chilling is non-negotiable for these cookies—it allows the butter to solidify, which prevents excessive spreading in the oven. This step also intensifies the flavors and ensures those coveted flaky layers.
I know it's tempting to skip this step, but trust me—your cookies will thank you. The longer you chill the dough, the better the texture. If you're short on time, you can freeze the dough log for 1 hour as a shortcut, but the 2-hour chill gives the best results.
Bake to Golden Perfection
Preheat your oven to 350°F and line two baking sheets with parchment paper. Cut the chilled dough into ½-inch thick slices and place them 2 inches apart on the prepared sheets. Bake for 12-15 minutes until the edges are golden brown and the centers look slightly underdone.
Here's the thing—these cookies will continue cooking on the hot baking sheet after you remove them from the oven. Let them cool on the sheet for 5 minutes before transferring to a wire rack. The result should be cookies with delicate, flaky layers on the inside and a perfect vanilla-almond crunch on the outside. Serve warm for the ultimate experience!
Pro Tips For Making Kosher Cookies
- Use Cold Butter Cubes: I learned this the hard way—soft butter makes cookies spread like pancakes. Cut your unsalted butter into ½-inch cubes and chill them for 20 minutes before creaming. The dough stays firmer, and your cookies hold their shape better.
- Mix Brown Sugar First: Skip the pre-mixing step with granulated sugar—cream the butter and brown sugar first. The molasses in brown sugar emulsifies better with fat, giving your cookies that classic chewy texture and deeper flavor right from the start.
- Don’t Overbake: Kosher cookies turn crispy fast. Pull them from the oven when edges are just golden and centers still look slightly underdone. They’ll firm up as they cool, but overbaking turns them into hockey pucks—trust the look, not the time.
- Add Vanilla Late: Vanilla extract evaporates when heated. Fold it into the dough right before baking to preserve its bright aroma. If you’re using imitation vanilla, add it early—but with pure extract, wait until the last minute for maximum impact.
Troubleshooting this dish
Dough Too Sticky
If your dough feels like it’s gluing itself to your hands, it’s likely because the butter melted too quickly during mixing. Always use cold butter straight from the fridge, and mix on low speed to prevent warming.
I’ve found that working in a cool kitchen (below 70°F) helps too. If the dough is unworkable, chill it for 10-15 minutes before shaping—this firms up the butter and makes handling easier. 🧊
Cookies Spread Too Much
Over-spreading is usually a sign of overmixed dough or under-chilled butter. First, make sure you’re chilling the dough log for at least 2 hours—this solidifies the butter and prevents excessive spreading.
If you’re still struggling, try cutting the dough slices thinner (¼-inch instead of ½-inch) and baking on the middle rack of your oven for even heat distribution. 🔥
Dense or Cakey Texture
Dense cookies often result from overmixing the dough or using warm butter. To fix this, mix the dry ingredients into the wet only until combined—you should still see flour streaks. Also, ensure your butter is cold and cubed before mixing.
If the dough feels too stiff, add 1 teaspoon of milk or water to help bind it. For extra tenderness, let the dough rest for 5 minutes after mixing before chilling. 🍪
Pale or Underbaked Centers
If your cookies look done on the outside but still soft in the middle, they likely need 1-2 extra minutes in the oven. To avoid this, bake at 350°F and check for golden edges—the centers will firm up as they cool.
For future batches, try rotating the baking sheets halfway through for even heat exposure. A toothpick test works best: insert it into the center, and if it comes out with a few moist crumbs, they’re ready. ✨
Cracked or Broken Layers
Cracks usually appear when the dough isn’t chilled long enough or when the butter melts too quickly. To prevent this, double-wrap the dough log in plastic wrap and chill for at least 2 hours.
If cracks still form, try pressing the dough slices gently onto the baking sheet to flatten them slightly before baking. For extra flakiness, avoid overcrowding the baking sheet—leave 2 inches between cookies. 💫
Blended Flavors Missing
If your cookies lack the vanilla-lemon brightness, make sure you’re using high-quality vanilla extract (like Madagascar bourbon) and fresh lemon zest. For extra depth, scrape 1 vanilla bean and add the seeds to the dough.
If the flavor seems weak, try adding ½ teaspoon of lemon extract or a pinch of citric acid for extra zing. Taste the dough before baking—this is the best way to ensure balanced flavor. 🍋
Nutrition facts
Frequently asked questions
Can I make these cookies without eggs for a kosher-friendly version?
Yes! For a kosher egg-free version, replace the 2 eggs with 2 tablespoons ground flaxseed mixed with 6 tablespoons water (let it sit for 5 minutes to gel). Alternatively, use ½ cup unsweetened applesauce for moisture and binding. The texture will be slightly denser but still delicious. Always ensure your egg substitutes are certified kosher if needed.
How do I store these cookies to keep them fresh?
Store baked cookies in an airtight container at room temperature for up to 5 days. For longer storage, freeze the dough balls (before baking) on a tray, then transfer to a sealed bag for up to 3 months. Bake straight from frozen, adding 1-2 extra minutes. To refresh stale cookies, warm them in the oven at 300°F for 3-5 minutes or microwave for 5 seconds.
Can I add chocolate chips or nuts to this recipe?
Fold in ½ cup kosher-certified chocolate chips or ½ cup chopped walnuts/pecans with the ground almonds. For extra richness, use dark chocolate (60% or higher) that’s certified kosher. Avoid non-kosher brands like some European chocolates. Keep portions balanced—too many mix-ins can make the cookies dense.
Why does my dough keep cracking when baking?
Cracks usually happen when the butter melts too quickly or the dough isn’t chilled enough. Double-wrap the dough log in plastic and chill for at least 2 hours. If cracks still appear, gently press the dough slices onto the baking sheet before baking. Avoid overcrowding—leave 2 inches between cookies for even heat circulation. This helps maintain those beautiful flaky layers.
What’s the difference between pareve and dairy versions?
For a pareve (dairy-free) version, use kosher-certified margarine or dairy-free butter (like Earth Balance). The flavor will be slightly different but still delicious. For a dairy version, use regular butter and add ½ teaspoon cinnamon or 1 teaspoon vanilla sugar to enhance richness. Always check labels—some vanilla extracts are processed with dairy.