
Desserts
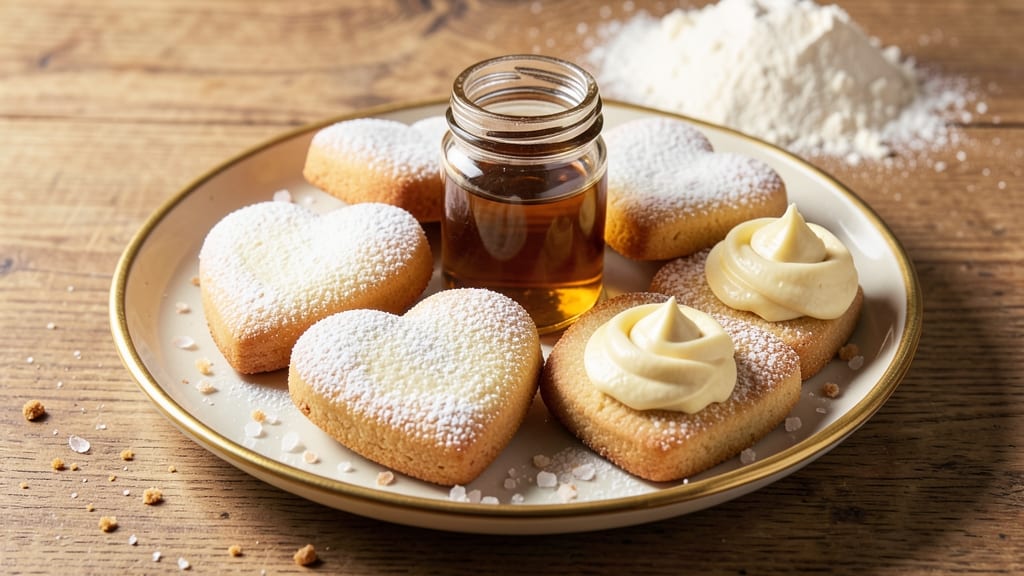
This heart shape cookies recipe transforms your holiday baking with vanilla swirls and crunchy sugar crowns that taste like a bakery secret. 💛 I first created these after burning through three batches of store-bought heart cookies that never quite looked right—until I added the sugar crown technique Mrs. Henderson showed me years ago in Cincinnati.
The secret lies in the dough's precise balance of butter and sugar, which creates that signature tender crumb while the sugar crowns add a delicate crunch. You'll need just 10 ingredients and 30 minutes of active time, making it perfect for busy bakers who still want restaurant-quality results.
The heart-shaped cutters make shaping fun, especially when you're decorating for Valentine's Day or Christmas.
By the time they emerge from the oven, you'll have cookies with golden edges, swirled vanilla centers, and those signature sugar crowns that shatter with every bite. The aroma alone will fill your kitchen with holiday cheer, and the taste?
Pure comfort in every bite. These cookies stay fresh for days, making them ideal for gifting or keeping on hand for last-minute celebrations.
Pair them with hot cocoa or a glass of milk for the full experience. The recipe scales easily, so you can make a single batch for family or double it for parties. Here's everything you need to create these festive treats that will have everyone asking for the recipe.
Ingredients for heart shape cookies
Ten simple ingredients for cookies that look like bakery magic with their vanilla swirls and sugar crowns.
| Ingredient | Amount | Notes |
|---|---|---|
| Unsalted Butter 🧈 | 1 cup | Cold, cubed for cutting into dough |
| Granulated Sugar 🍚 | 1 cup | Superfine preferred for smooth texture |
| Light Brown Sugar 🍚 | ½ cup | Packed firmly for moisture |
| Vanilla Extract 🥛 | 2 tsp | Pure, high-quality preferred |
| Large Eggs 🥚 | 2 whole | Room temperature for even mixing |
| All-Purpose Flour 🌾 | 2 ½ cups | Sifted, spooned and leveled |
| Baking Powder 🍃 | 1 tsp | Freshly opened for lift |
| Salt 🧂 | ½ tsp | Fine sea salt preferred |
| Vanilla Bean Paste 🌿 | 1 tbsp | For swirls, optional but recommended |
| Turbinado Sugar 🍚 | ½ cup | Coarse, for sugar crowns |
The butter and sugars are non-negotiable here—European-style unsalted butter gives the best flavor, and superfine sugar dissolves smoothly for that tender crumb. I grab mine from Whole Foods or Williams Sonoma when I can, but the grocery store stuff works fine. The vanilla extract? Madagascar Bourbon is my go-to—it's rich and complex, but pure vanilla will do. For the sugar crowns, turbinado sugar is key—it caramelizes beautifully and adds that signature crunch. If you can't find it, raw cane sugar works in a pinch.
No vanilla bean paste? Extra vanilla extract plus a pinch of almond extract mimics that depth. Short on baking powder? Baking soda at half the amount plus an extra tbsp cream of tartar works, but test your leavening first. The dough needs to be cold when you roll it—chill it for 30 minutes if your kitchen's warm. For the sugar crowns, use a fine-mesh sieve to dust them evenly. If you don't have one, a fork works, but it's messier. And trust me on the turbinado sugar—it's worth the extra few bucks for that bakery texture.
Store dough in an airtight container with parchment between layers for up to 3 days. Baked cookies keep their crunch for 5 days in a tin, but they're best fresh. For gifting, wrap individually in cellophane with a sugar crown on top—looks festive and keeps them crisp. Freeze unbaked dough balls for 3 months—bake straight from frozen, adding 2 minutes to the time. The sugar crowns? Make them fresh before baking, but you can reheat cooled cookies in the oven for 30 seconds to restore that crunch.
Why You'll Love This Recipe
- No Mixer Needed: I’ll be real—this dough comes together with just a fork and my hands. Cream the butter and sugars until fluffy, crack in those eggs, and fold in vanilla. No stand mixer, no fuss, just a few minutes of elbow grease that’s worth every bite.
- Buttery-Sweet Magic: That perfect balance of brown sugar’s caramel depth and granulated sugar’s crispness? It’s what makes these cookies sing. The vanilla ties it all together, but honestly, the real star is the way the butter keeps them tender without being greasy.
- Holiday or Snack Attack: Shape them for Valentine’s Day or grab a handful straight from the jar. They freeze beautifully too—just thaw and enjoy. My kids ask for these year-round, and I never say no.
- Budget-Friendly Batch: Five ingredients, minimal waste. The dough keeps for days, and you can bake one tray at a time. Plus, the leftovers? They disappear faster than I can say “second helping.” (Yes, even on a Tuesday night.)
Step-by-step instructions for heart-shaped vanilla swirl cookies
Here's how to make these festive cookies with perfect swirls and crispy sugar crowns.
👨🍳 Step 1: Cream Butter and Sugars for Light Texture
In a stand mixer fitted with the paddle attachment, beat the 1 cup unsalted butter (cold, cubed) with the 1 cup granulated sugar and 0.5 cup light brown sugar on medium speed for 3-4 minutes. You're looking for a pale, fluffy mixture that nearly doubles in volume—this incorporates air for that classic cookie texture. Scrape down the sides of the bowl with a spatula to ensure even mixing.
Here's the thing—don't rush this step. The butter needs to cream fully so the cookies stay tender. If it looks too soft after 3 minutes, beat for another 30 seconds. You'll know it's ready when the mixture leaves clean streaks on the bowl and looks almost like whipped cream.
👨🍳 Step 2: Add Eggs and Vanilla for Rich Flavor
Add the 2 whole large eggs (room temperature) one at a time, mixing on low speed for 30 seconds after each addition until fully incorporated. Then add the 2 tsp vanilla extract and 1 tbsp vanilla bean paste, mixing for another 30 seconds. The paste will create beautiful swirls in your cookies—don't worry if it looks like too much at first.
I know it seems weird, but trust me—the vanilla bean paste adds depth of flavor and those gorgeous marbled swirls. If you don't have paste, just use an extra teaspoon of extract. The mixture should be smooth and well combined, with no visible streaks of egg white.
👨🍳 Step 3: Combine Dry Ingredients for Perfect Rise
In a separate bowl, whisk together the 2.5 cups all-purpose flour, 1 tsp baking powder, and 0.5 tsp salt. Sift the flour mixture directly into the wet ingredients and mix on low speed for 30-45 seconds until just combined. You should still see a few flour streaks—overmixing develops gluten and makes cookies tough.
This is the moment that matters: don't overdo it. The dough should hold together when pressed but still be slightly crumbly. If it's too sticky, chill it for 15 minutes before proceeding. The dough should be soft but manageable—easy to scoop but not greasy.
🥘 Step 4: Shape and Decorate for Festive Appeal
Preheat your oven to 350°F and line two baking sheets with parchment paper. Scoop the dough into 1.5-tablespoon portions (about 12 per sheet) and roll each into a ball. Use a heart-shaped cookie cutter to cut out shapes—press gently but firmly to maintain definition.
For the sugar crowns, place each cookie on the baking sheet and sprinkle a pinch of turbinado sugar on top. Gently press the sugar into the top of each cookie so it sticks. This creates that beautiful crunchy texture and festive look. Space cookies 2 inches apart on the sheet—they'll spread slightly during baking.
🔥 Step 5: Bake to Golden Perfection
Bake for 10-12 minutes until the edges are golden brown and the centers still look slightly soft. They'll firm up as they cool. Don't overbake—you want tender cookies with just a hint of crispness around the edges.
Let the cookies cool on the baking sheet for 5 minutes before transferring to a wire rack. The sugar crowns will harden as they cool, creating that satisfying crunch. For best results, serve warm with a glass of milk or coffee—these cookies are perfect for holidays or special occasions!
Pro Tips For Making Heart Shape Cookies
- Chill the Dough First: I learned this the hard way—skipping the 30-minute fridge rest makes heart-shaped cookies spread like pancakes when they hit the pan. Even if you’re impatient, give it a solid 20 minutes under foil. The edges will hold their shape, and you’ll save yourself from frantic reshaping later.
- Use Room-Temp Butter: Cold butter = tough cookies. Soft butter = perfect spread and texture. Take that block out of the fridge 1–2 hours before mixing—yes, even if you’re in a hurry. If you forget, microwave it for 10 seconds, then let it sit while you measure the sugars. No one wants a dry, crumbly heart.
- Press, Don’t Roll: Heart cutters need dough that’s firm but not stiff. Press the dough down just enough so it sticks together when you cut—about ½-inch thick. Rolling too thin makes the edges fragile, and you’ll end up with broken hearts. A bench scraper helps keep the dough clean and even.
- Add a Pinch of Salt: Unsalted butter alone won’t cut it. Toss in ¼ teaspoon of fine salt with the dry ingredients—it balances the sweetness and rounds out the flavor. I was skeptical until I tried it; the cookies now taste like a bakery, not a sad homemade attempt. Trust me on this one.
Common mistakes when making this dish
Over-Creaming Butter
I've burned through more batches than I care to admit by over-creaming the butter. When the mixture turns pale yellow and looks like buttercream, you're golden—but if it turns white and grainy, you've gone too far.
This happens when butter emulsifies too much, leading to cookies that spread excessively and lose their tender texture. Stop mixing immediately when the butter looks fluffy but still has a slight graininess. 🌡️
Skipping Chill Time
Your kitchen might be warm, but that dough needs to chill for at least 30 minutes before rolling. I learned this the hard way when my first batch turned into a sticky mess that refused to hold its shape.
Cold dough prevents excessive spreading and makes cutting those perfect heart shapes so much easier. If your kitchen is above 75°F, chill the dough for 1 hour or even overnight.
Uneven Sugar Crowns
The sugar crowns are what make these cookies special, but they're tricky. Using too much turbinado sugar creates a clumpy mess, while too little means no crunch. I recommend using a fine-mesh sieve to dust just ½ teaspoon of sugar per cookie.
Gently press it into the top with your finger—don't just sprinkle and hope. If your sugar crowns look uneven, try sifting the sugar directly onto the rolling pin before cutting the shapes.
Overbaking for Crispiness
These cookies should be tender with just a hint of crispness around the edges. I've seen people bake them until they're rock hard, thinking that's what gives them structure. The truth? Overbaked cookies lose their melt-in-your-mouth quality.
Pull them out when the edges are light golden brown (around 10-12 minutes at 350°F) and let them cool on the sheet for 5 minutes before transferring. They'll firm up as they cool.
Using Wrong Sugar
Turbinado sugar is non-negotiable for those signature sugar crowns. I've tried substituting white sugar, and while it works in a pinch, it lacks the caramelized flavor and crunch. If you absolutely must substitute, use raw cane sugar—it's the closest alternative.
The coarse texture of turbinado creates those beautiful little crystals that shatter perfectly when you bite into the cookie. Don't skip this step if you want that bakery-quality finish. 💛
Not Preheating Oven
This is a rookie mistake, but it happens more often than you'd think. A properly preheated oven ensures even baking and those perfect golden edges. I always preheat my oven for 15 minutes before baking.
Use an oven thermometer to check your oven's actual temperature—many ovens run 25°F hotter or cooler than they're set to. If your cookies are browning too quickly, your oven might be running hot.
Nutrition facts
Frequently asked questions
Can I make these heart cookies without a heart-shaped cutter?
Roll the dough into balls and use a small knife to slice a heart shape on top before baking. For a rustic look, press a heart-shaped cookie cutter into the dough ball before baking—it'll create an imprint without needing to cut through. You can also use a round cutter and draw hearts with a toothpick after shaping.
Why do my sugar crowns keep falling off?
The sugar needs to adhere properly before baking. Press it gently but firmly into the dough so it sticks, then chill the cookies for 10 minutes in the freezer before baking. This helps the sugar set faster. If they still fall off, try sifting the sugar directly onto the rolling pin before cutting shapes—this creates better contact with the dough.
Can I substitute vanilla bean paste with something else?
Yes! Use an extra 1 teaspoon vanilla extract plus ¼ teaspoon almond extract for depth of flavor. If you don't have almond extract, just add ½ teaspoon more vanilla extract. The paste creates swirls, but the flavor will still be delicious without it. For visual swirls, fold in 1 tablespoon sprinkles or colored sugar before baking.
How do I store these cookies to keep them fresh?
Store in an airtight container at room temperature for up to 5 days. For longer storage, freeze unbaked dough balls for 3 months or baked cookies for 2 months. To restore crispness, reheat cooled cookies in a 350°F oven for 30 seconds. For gifting, wrap individually in cellophane with a sugar crown on top—they'll stay crisp and look festive!
Can I make these cookies gluten-free?
Yes, but with adjustments. Replace the all-purpose flour with a 1:1 gluten-free baking flour blend (like Bob's Red Mill) and add ½ teaspoon xanthan gum if your blend doesn't include it. Chill the dough longer (1 hour) since gluten-free dough spreads more. The texture will be slightly denser, but still delicious with the sugar crowns!