
Desserts
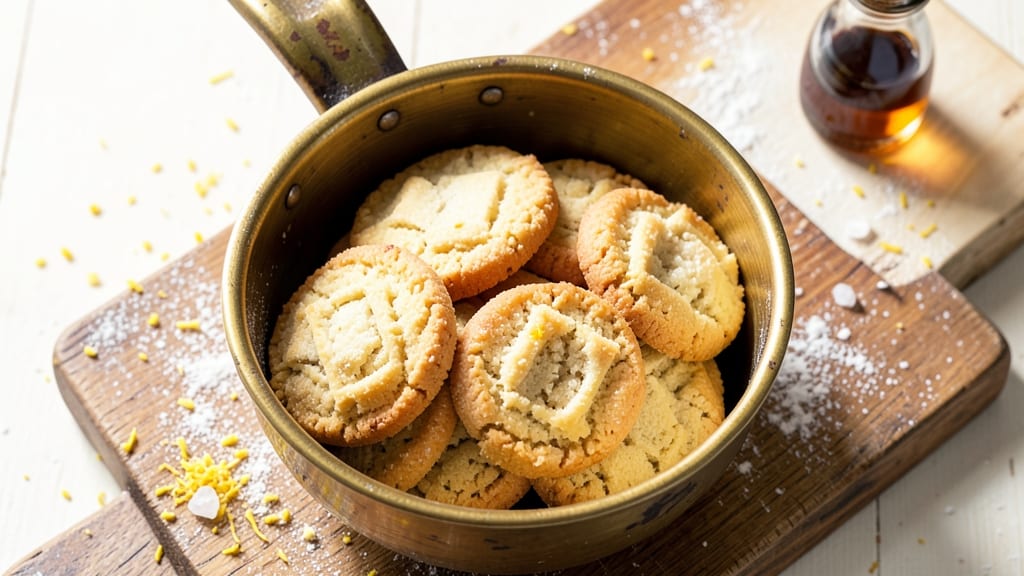
There’s something about Grandma’s shortbread cookies that feels like a warm hug—crisp edges, buttery layers, and that unmistakable vanilla kiss that makes every bite feel like home.
This recipe captures the classic texture and flavor I grew up with, where cold butter and minimal mixing create the perfect balance of crunch and tenderness. The secret lies in precision: too much flour, and they’ll be tough; too little, and they’ll crumble.
But when done right, these cookies are foolproof and irresistibly delicious.
What sets this shortbread apart is the technique—using cold butter cut into the flour creates pockets of air that yield those signature flaky layers. A 30-minute chill in the fridge ensures clean cuts, and baking at 325°F guarantees even golden edges without over-browning.
The vanilla extract infuses every bite with warmth, while a pinch of salt balances the sweetness for depth. It’s the kind of recipe that tastes like nostalgia, but with a professional touch.
By the time these cookies emerge from the oven, you’ll have buttery, melt-in-your-mouth shortbread with a crispy exterior and a tender, crumbly center—just like Grandma used to make.
The aroma alone will fill your kitchen with comfort, and the texture is so satisfying that even the most skeptical eaters will ask for seconds. Perfect for holidays, gifts, or a simple treat, these cookies are a timeless classic.
For extra flair, try adding a sprinkle of citrus zest or a touch of almond extract to the dough—small tweaks that still honor the tradition. The recipe scales easily, so you can bake a single batch for a cozy night in or double it for sharing.
Let’s get started on a batch that’ll taste like home.
Ingredients for grandma's shortbread cookie
Cold butter, sifted flour, and a whisper of vanilla—just seven ingredients for cookies that taste like home.
| Ingredient | Amount | Notes |
|---|---|---|
| Unsalted Butter 🧈 | 1 cup | Cold, cut into cubes |
| All-Purpose Flour 🌾 | 2 ½ cups | Sifted, plus extra for dusting |
| Granulated Sugar 🍚 | ½ cup | Superfine preferred |
| Pure Vanilla Extract 🍯 | 1 tbsp | High-quality, no imitation |
| Fine Sea Salt 🧂 | ¼ tsp | Kosher preferred |
| Lemon Zest 🍋 | 1 tsp | Optional, for brightness |
| Almond Extract 🌿 | ½ tsp | Optional, for depth |
The butter makes or breaks these. Cold cubes are non-negotiable—room temp butter means tough cookies. Grab Land O’Lakes or Plugrá from the dairy case; they’re consistently reliable. If your butter’s been sitting out, pop it in the freezer for 10 minutes. The flour? King Arthur or Gold Medal are my go-tos—they’re finely milled and consistent. Sift it first, or you’ll end up with dense cookies. Pro tip: use a food processor to pulse the butter and flour together—it creates those signature flaky layers faster than rubbing by hand.
No vanilla extract? Vanilla sugar or a scraped vanilla bean works in a pinch, but real extract is worth the splurge. Short on almond extract? Skip it or use a pinch of ground almonds—the flavor’s subtle but adds depth. For the sugar, superfine dissolves faster, but if you’ve only got regular, pulse it in a food processor for 10 seconds. The lemon zest is totally optional, but it brightens the whole batch—just use the outer layer of an organic lemon. Salt is key: too little, and the sweetness overpowers; too much, and it’s harsh. Kosher or sea salt dissolves evenly.
These keep for 5 days in an airtight container, though they’ll likely disappear faster. For longer storage, freeze the dough balls (before baking) for up to 3 months. Bake straight from frozen—just add 2-3 minutes to the time. Once baked, store in layers with parchment between them to keep them crisp. I always make a double batch and freeze half; perfect for last-minute gifts or holiday treats. The aroma alone will have your kitchen smelling like Grandma’s kitchen in minutes.
Why You'll Love This Recipe
- Four-Handful Mix: Just butter, sugar, flour, and a pinch of salt—no fancy gadgets, no measuring cups that confuse you. I swear by this: dump everything in a bowl, cut it with your fingers, and press it into the pan. That’s it.
- Butter-Sugar Magic: The moment those golden edges form while the center stays tender? It’s like biting into a hug. Cold butter and sugar create this melt-in-your-mouth richness that’s impossible to resist—no frosting, no fillings, just pure, buttery satisfaction.
- Holiday or Snack Attack: These disappear at Christmas, but they’re just as welcome with afternoon tea or packed in lunchboxes. (Yes, even on a Tuesday night.) The dough’s forgiving—shape them into logs, cut them into squares, or press them into tart shells. They’re always a crowd-pleaser.
- No-Waste Wonder: A single batch makes 24 cookies, and they keep for weeks in an airtight container. Honestly, I’ve had them last through birthdays, last-minute gifts, and “I forgot to pack a snack” moments. Plus, butter and flour are the ultimate budget staples—this recipe costs pennies per cookie.
Step-by-step instructions for Grandma's shortbread cookies
Here's how to make these melt-in-your-mouth shortbread cookies with perfect buttery layers.
Cut and Chill the Butter
Place the 1 cup unsalted butter in a mixing bowl and cut it into small cubes using a sharp knife. This helps it chill more evenly. Pop the bowl in the freezer for 15 minutes while you prepare the rest. You want the butter to be cold but not rock-hard when you start mixing—it should still yield slightly when pressed.
Here's the thing—cold butter creates those signature flaky layers. If you skip this step, your cookies will turn out dense instead of light and crumbly. I've learned this the hard way after making a batch with room-temperature butter that ended up tasting more like butterfat than shortbread.
Mix Dry Ingredients and Add Flavors
In a separate bowl, whisk together the 2.5 cups all-purpose flour, 0.5 cup granulated sugar, 0.25 teaspoon fine sea salt, 1 teaspoon lemon zest, and 0.5 teaspoon almond extract. The lemon zest adds a bright citrus note that cuts through the richness, while the almond extract gives subtle depth. Sift the flour first if you have any lumps—this ensures even distribution and prevents gritty cookies.
Next, add the 1 tablespoon pure vanilla extract to the dry ingredients and mix gently. The vanilla will infuse the flour, creating a fragrant base for your dough. Don't worry if it doesn't look completely combined yet—we'll mix everything together in the next step. The key here is to distribute the extracts evenly so every bite has that vanilla-kissed flavor.
Combine Wet and Dry Ingredients
Remove the cold butter cubes from the freezer and add them to the dry ingredients. Using a pastry cutter, fork, or your fingers, work the butter into the flour mixture until you reach a crumbly consistency with pea-sized butter pieces remaining. This texture is crucial—it ensures those beautiful flaky layers when baked. If the mixture feels too sticky, it means your butter wasn't cold enough.
Press the dough together gently and divide it into two equal discs. Wrap each disc tightly in plastic wrap and flatten them into ½-inch thick rounds. Place them back in the freezer for 30 minutes to firm up. This chilling step prevents the dough from spreading too much in the oven, giving you those perfect shortbread shapes.
Roll and Cut the Shortbread
After chilling, remove one disc of dough and place it on a lightly floured surface. Roll it out to ¼-inch thickness using a rolling pin. I like to use a ruler and rolling pin to keep the thickness consistent—this ensures even baking. Dust the top with extra flour if the dough sticks to your hands or the surface.
Use a 2½-inch round cutter to cut out shapes, pressing down firmly but not too hard. You should get about 24 cookies from one disc (remember, we're making 24 servings). Place the cutouts on a parchment-lined baking sheet, spacing them about 1 inch apart. The dough will expand slightly during baking, so don't crowd the pan. Repeat with the second disc of dough.
Bake to Golden Perfection
Preheat your oven to 325°F—this lower temperature is key for even baking without browning. Bake the shortbread for 18-22 minutes until the edges are just beginning to turn light golden brown and the centers still look slightly pale. You're looking for cookies that are set but not colored—they'll firm up as they cool.
Here's where patience pays off: remove the baking sheet from the oven and let the cookies cool on the pan for 5 minutes before transferring them to a wire rack. This resting period prevents them from cracking as they cool completely. The cookies should be firm to the touch but still tender when you break one open—this is the perfect shortbread texture.
Store for Maximum Freshness
Let the cookies cool completely before storing them in an airtight container at room temperature. They'll keep for up to 5 days, though I promise you won't have any left that long. For longer storage, freeze the cookies for up to 3 months—just thaw them at room temperature before serving.
These shortbread cookies are perfect for holiday gifting, afternoon tea, or pairing with your favorite cup of coffee. The buttery layers and vanilla-kissed flavor make them a classic for a reason. And trust me, once you try these, you'll want to make them again and again—they're that good.
Pro Tips For Making Grandma'S Shortbread Cookie
- CHILL THE DOUGH: After mixing, pop the dough in the fridge for at least 30 minutes—yes, even if you’re eager to bake. I used to skip this and end up with cookies that spread too much and lost that signature crumbly texture. Cold butter behaves better, and your cookies will hold their shape like they’re supposed to.
- USE COLD BUTTER: Take your unsalted butter straight from the fridge and cut it into cubes—no softening needed. Warm butter makes shortbread greasy and flat, and I’ve learned this the hard way after throwing out a batch of sad, greasy cookies. Keep it cold, and you’ll get that perfect tender crumb.
- WEIGH THE FLOUR: Spoon the all-purpose flour into your measuring cup, then level it off with a knife—don’t pack it down. I used to scoop and shake, and my cookies turned out dense. Shortbread relies on that light, airy texture, so measure it right, or you’ll regret it when they taste more like cake than buttery heaven.
- SALT THE EDGES: Sprinkle fine sea salt on the edges of your dough before baking—just a pinch per cookie. My grandma swore by this, and it makes a real difference. The salt caramelizes slightly, adding a subtle contrast that elevates the whole bite. Skip it, and you’re missing out on that little extra magic.
Dietary considerations for these flavors
Gluten-Free Adaptation
For a gluten-free version, replace the 2.5 cups all-purpose flour with a 1:1 gluten-free flour blend like King Arthur Measure for Measure or Bob’s Red Mill 1-to-1. Add ½ teaspoon xanthan gum to mimic the structure of gluten.
Chill the dough longer—45 minutes instead of 30—since gluten-free doughs are more delicate. Bake at 325°F for 16-18 minutes to prevent over-browning. 🌾
Nut-Free Option
Skip the almond extract and omit any nut-based ingredients. For extra flavor, add ½ teaspoon ground cardamom or ¼ teaspoon orange zest instead. The vanilla and lemon zest still shine, keeping the cookies rich and aromatic without nuts. Store in a nut-free kitchen to avoid cross-contamination. 🍋
Lower-Sugar Version
Reduce the 0.5 cup granulated sugar to 0.25 cup and replace the rest with 0.25 cup coconut sugar or erythritol for a lower-glycemic option. The texture remains tender, but the caramelization will be slightly less pronounced.
Balance with an extra ¼ teaspoon salt to enhance flavor. Perfect for those watching sugar intake! 💡
Dairy-Free Substitution
Use 1 cup dairy-free butter like Miyoko’s or Earth Balance in place of unsalted butter. Chill the dough for 45 minutes to compensate for the softer texture of plant-based fats.
Bake at 325°F for 14-16 minutes—dairy-free doughs can dry out faster. The result is still crisp and buttery, just with a neutral flavor profile. ❄️
Allergen-Friendly Packaging
Label your cookies clearly if sharing with others. Use separate utensils and surfaces to avoid cross-contamination. For gifting, package in cellophane bags with allergen warnings or airtight containers. I always include a note about the adaptations—it shows thoughtfulness and keeps everyone safe. 💛
Nutrition facts
Frequently asked questions
Why does the recipe call for cold butter instead of room temperature?
Cold butter is essential for creating those signature flaky layers in shortbread cookies. When cut into the flour, it creates tiny pockets of air that expand during baking, resulting in a tender, crumbly texture. Room-temperature butter would melt too quickly, leading to dense cookies instead. Think of it like creating little butter clouds in your dough!
Can I make these cookies without a rolling pin?
If you don't have a rolling pin, use a wine bottle or even a clean, heavy can wrapped in parchment paper. The key is to roll the dough evenly to ¼-inch thickness. Just be gentle—shortbread dough is delicate. For extra precision, place the dough between two sheets of parchment before rolling.
What's the best way to store leftover shortbread?
Store cookies in an airtight container at room temperature for up to 5 days to maintain crispness. For longer storage, freeze the baked cookies (not the dough) for up to 3 months. Thaw at room temperature—no microwave needed! The texture stays perfect when stored properly.
Why did my shortbread cookies spread too much?
Over-spreading usually means the dough wasn't chilled long enough or the butter was too warm. Next time, ensure the dough rests for the full 30 minutes before cutting and bake at 325°F—higher temps cause faster spreading. Also, use a cookie cutter with sharp edges for clean cuts. Patience is key!
Can I add chocolate chips to this recipe?
While traditional shortbread avoids mix-ins, you can absolutely add chocolate chips—but keep them small (like mini chips) and use only ½ cup total. Fold them into the dough after mixing the wet and dry ingredients. For best results, use high-quality dark or semi-sweet chocolate that melts smoothly.