
Desserts
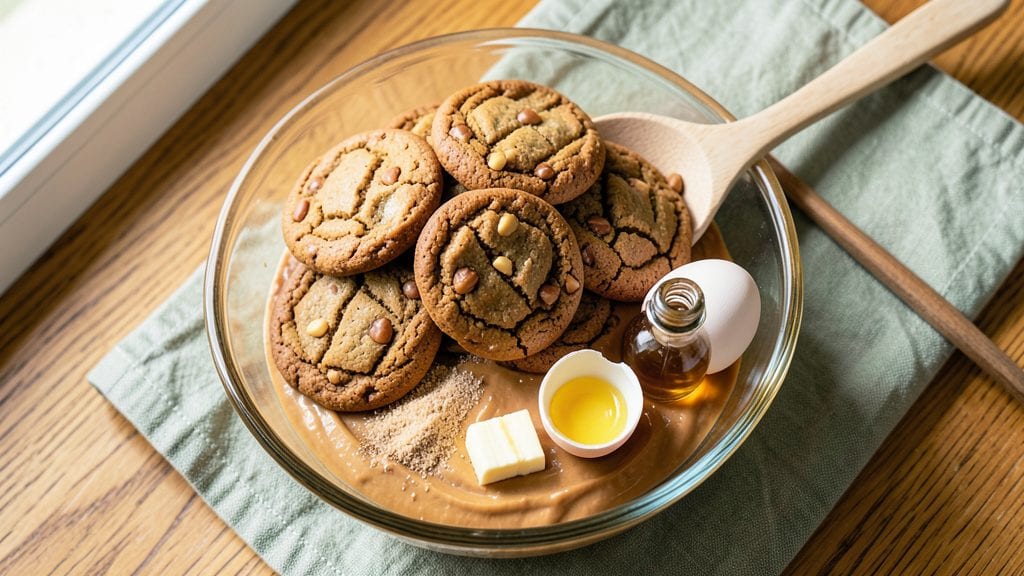
Grandma's peanut butter cookies recipe brings back the cozy kitchen memories of childhood—warmly spiced, with crunchy edges that give way to soft, melt-in-your-mouth centers. These aren't your typical peanut butter cookies; they're a family heirloom, cut into classic shapes with a glass for that signature crisscross pattern.
The secret lies in the perfect balance of creamy peanut butter, brown sugar, and just a pinch of cinnamon that makes every bite taste like home.
This recipe delivers foolproof results with simple ingredients you likely already have in your pantry. The dough requires minimal mixing—just cream the butter and peanut butter until smooth, then fold in the dry ingredients until just combined.
Chilling the dough for 30 minutes ensures those coveted crispy edges while keeping the centers tender. With 24 cookies per batch, this recipe is perfect for holiday gifting or satisfying a midweek sweet tooth.
What you'll end up with is a tray of golden-brown cookies that smell like nostalgia the moment they come out of the oven. The aroma of toasted peanut butter and warm spices fills the kitchen, making it impossible to wait for them to cool.
Each bite delivers that perfect contrast—crunchy exterior, soft interior, and a hint of cinnamon that ties it all together. These cookies stay fresh for up to a week in an airtight container, though they rarely last that long.
For an extra touch, roll the dough into balls before baking, or press it into a pan for classic cut-out shapes. Add chocolate chips or chopped nuts if you like, but the traditional version speaks for itself. Let's get baking—your kitchen will thank you for the memories these cookies bring.
Ingredients for grandma's peanut butter cookies
These nostalgic cookies need just eleven simple pantry staples for that perfect crunchy-soft magic.
| Ingredient | Amount | Notes |
|---|---|---|
| Creamy Peanut Butter 🥜 | 1 cup | Natural, unsweetened preferred |
| Unsalted Butter 🧈 | ½ cup | Cold, cubed for creaming |
| Light Brown Sugar 🍚 | ¾ cup | Packed firmly for accuracy |
| Granulated Sugar 🍚 | ¼ cup | For balanced sweetness |
| Large Eggs 🥚 | 2 whole | Room temperature for mixing |
| Pure Vanilla Extract 🌿 | 1 tbsp | High-quality, no imitation |
| All-Purpose Flour 🌾 | 1 ½ cups | Sifted for light texture |
| Ground Cinnamon 🌶️ | 1 tsp | Freshly ground for warmth |
| Fine Sea Salt 🧂 | ½ tsp | Kosher or table salt |
| Baking Soda 🧪 | ½ tsp | For lift and crispiness |
| Granulated White Sugar 🍚 | ¼ cup | For sprinkling on top |
Peanut butter makes or breaks these cookies—Jif or Skippy natural (no added sugar) gives the best flavor. The butter? Cold cubes cream better than softened sticks. Brown sugar should be packed firmly—use a spoon to press it down in the measuring cup. I always grab Domino all-purpose flour from the store, but King Arthur works too if you're fancy. The cinnamon? Penzeys or McCormick—none of that dusty stuff from the back of your pantry. And the vanilla? Nothing but pure extract—skip the imitation.
No creamy peanut butter? Crunchy works in a pinch—just blend it first. Short on brown sugar? White sugar plus 1 tsp molasses mimics the flavor. Eggs too runny? Chill them 10 minutes first. The baking soda is non-negotiable—it creates those crispy edges. For extra crunch, swap half the peanut butter for chopped roasted peanuts. Or add mini chocolate chips if you're feeling rebellious. The glass for cutting? Any heatproof glass—mason jars work great.
This dough chills beautifully—up to 48 hours if you're prepping ahead. Roll it into balls, flatten slightly, then bake at 350°F for 10-12 minutes. They'll look underdone—that's normal! The centers stay soft while the edges crisp. Store in an airtight container for 5-7 days, but honestly? They vanish in 24 hours. Freeze dough balls for 3 months—bake straight from frozen, adding 2 minutes.
Why You'll Love This Recipe
- I’ll be real: this recipe costs me maybe $3 for a dozen. Peanut butter, butter, sugar—ingredients I already have. No fancy add-ins, no last-minute grocery runs. It’s the kind of recipe that turns a sad afternoon into something sweet without breaking the bank or your willpower.
- No Mixer Needed: I swear by this recipe because it’s actually foolproof—just cream the peanut butter and butter together by hand (or with a fork, no shame). The sugars dissolve right into that rich peanut base, so you’re not left scraping out a bowl later. Five minutes of work, and the dough practically begs you to scoop it.
- That Peanut Butter Crunch: Here’s what sold me—the way the creamy peanut butter and the crisp edges from the brown sugar play off each other. Honestly, the first bite is like a warm hug from Grandma, but with actual texture. The egg binds it just enough to keep those cookies soft inside while the edges get that perfect golden toast.
- Packable & Shareable: Between us, these are my go-to for lunchboxes, teacher gifts, or when I need to feed a crowd without stress. They hold up for days in an airtight container (yes, even on a Tuesday), and the kids? They’ll fight over them. Plus, the dough’s sturdy enough to freeze—just bake straight from frozen if you’re lazy.
Step-by-step instructions for Grandma's peanut butter cookies
Here's how to make these legendary cookies with perfect texture every time!
Cream the Butter and Sugars Together
In a large mixing bowl, combine the 0.5 cup unsalted butter (cold and cubed) with the 0.75 cup light brown sugar and 0.25 cup granulated sugar. Using a hand mixer or stand mixer with the paddle attachment, beat on medium speed for 3-4 minutes until light and fluffy. You'll see the mixture nearly double in volume and turn pale in color—this is the secret to those beautiful crackly tops!
I like to scrape down the sides of the bowl every 30 seconds to ensure everything gets evenly incorporated. The butter should be completely creamed with no visible lumps. If you're using a hand mixer, this step will take a bit longer, but don't rush it—proper creaming is what gives these cookies their signature texture.
Add the Peanut Butter and Eggs
Once your butter-sugar mixture is light and fluffy, add the 1 cup creamy peanut butter and mix on medium speed for 1-2 minutes until completely smooth. The peanut butter should be fully incorporated with no streaks remaining. This is where that rich, nutty flavor gets evenly distributed throughout the dough.
Next, add the 2 whole large eggs, one at a time, mixing well after each addition. Then stir in the 1 tablespoon pure vanilla extract. Mix just until combined—overmixing at this stage can develop gluten in the flour later. The dough should be thick but still manageable. If it seems too stiff, don't worry—it will come together nicely when we add the dry ingredients.
Combine Wet and Dry Ingredients
In a separate bowl, whisk together the 1.5 cups all-purpose flour, 1 teaspoon ground cinnamon, 0.5 teaspoon fine sea salt, and 0.5 teaspoon baking soda. This pre-mixing ensures even distribution of these dry ingredients throughout the dough. Sift the flour mixture directly into the wet ingredients and mix on low speed just until combined—you should still see some flour streaks.
Here's the thing—don't overmix! Once the flour is incorporated, the dough will come together into a thick, sticky ball. If it's too sticky to handle, you can chill it for 15-20 minutes before shaping. The dough should be soft but not crumbly. If it feels too dry, you might need to add 1-2 teaspoons of milk (though this isn't in our original ingredient list, it's a common troubleshooting step).
Shape and Chill the Dough
Using a cookie scoop or tablespoon, divide the dough into 1-inch balls and place them 2 inches apart on ungreased baking sheets. I like to use a scoop for even-sized cookies, but you can also roll them by hand. The dough will be soft, so handle it gently to maintain its shape. Sprinkle each ball with a pinch of the 0.25 cup granulated white sugar for that classic crunchy topping.
Refrigerate the baking sheets for 30 minutes while you preheat your oven to 350°F. This chilling step is crucial—it helps the cookies maintain their shape and prevents excessive spreading in the oven. The dough will firm up slightly, making it easier to handle when you're ready to bake. Don't skip this step if you want that perfect texture!
Bake to Golden Perfection
Bake the cookies for 10-12 minutes until the edges are golden brown but the centers still look slightly soft. The tops should have that beautiful crackly texture we're after. You'll know they're done when they've spread slightly but still have a soft center—these aren't your typical crispy peanut butter cookies. They should pull away slightly from the edges of the baking sheet when you lift them.
Remove the cookies from the oven and let them cool on the baking sheet for 5 minutes before transferring to a wire rack to cool completely. The centers will firm up as they cool, but they'll still have that perfect soft texture. For best results, serve them warm with a glass of cold milk—you'll understand why these are a classic family favorite!
Pro Tips For Making Grandma'S Peanut Butter Cookies
- MEASURE THE PEANUT BUTTER BY WEIGHT: That jar label lies—peanut butter scoops differently depending on how you pack it. Use a kitchen scale for ½ cup (130g) instead of guessing. I learned this after making two batches where one was way too thick.
- CREAM THE BUTTER AND SUGAR UNTIL PALE: Don’t just mix—beat the butter, brown sugar, and peanut butter until the color lightens noticeably (about 3-4 minutes). This dissolves the sugar crystals better, giving you smoother dough and cookies that spread just enough without cracking. (Yes, even if your mixer whines.)
- CHILL THE DOUGH FOR AT LEAST 2 HOURS: Skipping this is how you end up with flat, greasy cookies. Wrap the dough in plastic and refrigerate—it firms up the butter so the cookies hold their shape and bake evenly. Pro move: Shape them into balls while the dough’s cold for cleaner cookies.
- USE ROOM-TEMP EGG AND PEANUT BUTTER: Cold egg yolk = lumpy dough. Let the egg sit out for 10 minutes before mixing, and soften the peanut butter slightly if it’s rock-hard. The dough will come together faster, and you’ll avoid overworking it. (I know, I know—you’re eager to bake, but trust me on this.)
Troubleshooting this recipe
Dough Too Sticky
If your dough feels like playdough instead of a workable ball, it's likely too warm or needs a bit more flour. First, try chilling the dough for an extra 15-20 minutes—this helps firm it up.
If it's still too sticky after chilling, sprinkle your work surface with 1 tablespoon of flour and gently fold it in. I’ve found that King Arthur all-purpose flour absorbs moisture better than some store brands, so it might help if you’re using that.
Avoid adding too much flour, or you’ll end up with dry, crumbly cookies. 💡
Cookies Spread Too Much
Overbaked or overly soft dough causes excessive spreading. To fix this, make sure your dough is properly chilled for the full 30 minutes before baking. Also, use a cookie scoop to portion the dough into uniform 1-inch balls—this ensures even baking.
If your oven runs hot, try baking at 325°F instead of 350°F for 12-14 minutes. I’ve had to adjust my oven temp down a notch when baking these—every oven is different! 🔥
Cookies Too Dry or Crumbly
Dry dough usually means overmixing or not enough fat (butter/peanut butter). If your dough cracks when you handle it, try adding 1 tablespoon of milk or water and mixing just until combined. For extra moisture, use 1 extra tablespoon of peanut butter in the recipe.
If the dough still feels dry, check your flour—some brands absorb more moisture than others. Store-bought flour can vary, so I always weigh mine if I’m feeling precise. 🥜
No Crackly Top Texture
The signature crackly top comes from proper creaming and sugar sprinkling. Make sure you cream the butter and sugars for the full 3-4 minutes until pale and fluffy. After shaping the dough balls, sprinkle them generously with the granulated white sugar—this creates the caramelized crust.
If your cookies still lack texture, try baking them for 1-2 extra minutes until the edges are deeper golden brown. I’ve also had success brushing the tops with a little egg wash before baking for extra shine and crunch. ✨
Peanut Butter Flavor Uneven
If your cookies taste more like sugar than peanut butter, the peanut butter wasn’t mixed in thoroughly. Use a hand mixer on medium speed for 2 full minutes to ensure it’s completely smooth.
For extra flavor, try using natural peanut butter with no added sugar—brands like Jif or Skippy work perfectly. If you’re using crunchy peanut butter, blend it first to mimic the texture of creamy.
The key is patience—don’t rush this step, or you’ll end up with streaks of peanut butter in your dough. 🥜
Cookies Burn Before Cooking Through
This usually happens if your oven runs hot or the cookies are too close together. First, check your oven temperature with an oven thermometer—many home ovens are off by 25°F or more.
If your oven is accurate, space the cookies 2 inches apart on the baking sheet and rotate the pan halfway through baking. For extra insurance, bake on the middle rack where heat is most even.
I’ve had to lower my oven temp to 325°F for stubborn hot spots—don’t be afraid to adjust! 🌡️
Nutrition facts
Frequently asked questions
Why do these cookies need to chill before baking?
Chilling the dough for 30 minutes prevents excessive spreading and helps develop that signature crunchy edge while keeping the center soft. The cold temperature firms up the fat in the butter and peanut butter, which creates a better texture when baked. Plus, it gives you time to preheat the oven properly!
Can I make these cookies without a mixer?
Use a sturdy wooden spoon or fork to cream the butter and sugars by hand—just work it for 5-7 minutes until light and fluffy. For the peanut butter, mix it in with a rubber spatula until completely smooth. The key is patience—don't rush this step, or you'll end up with uneven texture.
What's the secret to the crackly tops?
The crackly texture comes from three things: proper creaming (3-4 minutes until pale), sprinkling with sugar before baking, and baking until the edges are golden brown. The sugar caramelizes during baking, creating that beautiful crackly crust. For extra crunch, try brushing the tops with a little egg wash before baking.
How can I store these cookies to keep them fresh?
Store in an airtight container at room temperature for up to 5-7 days. For longer storage, freeze the dough balls (unbaked) for 3 months or baked cookies for 2 months. To reheat, warm in the oven at 300°F for 5 minutes—they'll taste almost as good as fresh!
Can I add chocolate chips or nuts to these cookies?
Yes! Fold in ½ cup mini chocolate chips or ½ cup chopped roasted peanuts with the dry ingredients. For extra flavor, try adding ¼ cup white chocolate chips or chopped dark chocolate. Just be aware that nuts will make the dough slightly drier—add 1 tablespoon milk if needed.