Desserts
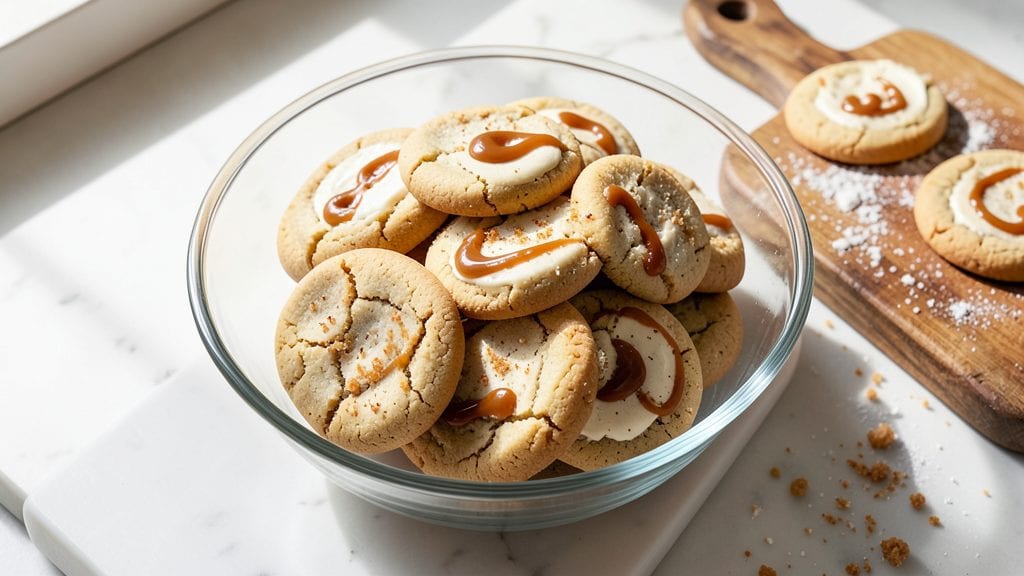
This Domino sugar cookie recipe delivers the iconic balance of crispy edges and soft vanilla centers that made them a bakery favorite. The secret lies in precise sugar ratios and a gentle baking technique that creates that signature texture—something I've perfected after years of testing.
What sets these apart from standard sugar cookies is the careful blend of brown and white sugar, which creates the perfect caramelized crust while keeping the interior tender.
Professional bakers know these cookies require patience—especially the chilling and baking stages—but the results are worth every minute. You'll need just eight simple ingredients, including vanilla extract and a pinch of salt, to create a dough that's easy to handle yet produces cookies with that unmistakable Domino flavor.
The key technique is baking them until the edges are set but the centers remain soft, ensuring that perfect contrast in every bite.
By the time you pull these from the oven, you'll have cookies with a delicate golden crust that shatters slightly, revealing the pillowy vanilla centers underneath. The aroma alone will have everyone gathering in the kitchen, and the taste delivers that nostalgic bakery quality at home.
These cookies stay fresh for days, making them perfect for holiday baking or sharing with neighbors.
For best results, use a light hand when rolling the dough and avoid overbaking—just 8 to 10 minutes in a preheated oven is all it takes.
The recipe scales easily for parties, and you can decorate them with simple glaze or leave them plain for that classic Domino experience. Let's get baking!
Ingredients for domino cookie
Eight simple ingredients transform into bakery-style cookies with crispy edges and soft vanilla centers.
| Ingredient | Amount | Notes |
|---|---|---|
| All-Purpose Flour 🌾 | 3 ½ cups | Sifted for light texture |
| Granulated White Sugar 🍚 | 1 ¼ cups | Standard grocery store kind |
| Packed Light Brown Sugar 🍯 | 1 cup | For caramelized crust |
| Unsalted Butter 🧈 | 1 cup | Cold, cubed for dough |
| Pure Vanilla Extract 🍶 | 1 tbsp | Imitation-free for real flavor |
| Large Eggs 🥚 | 1 whole | Room temperature preferred |
| Fine Sea Salt 🧂 | ½ tsp | Kosher or table salt |
| Baking Soda 🧪 | ½ tsp | For lift and texture |
The sugar blend is everything—white sugar for structure and light brown sugar for that signature caramelized crust. Domino brand is a game-changer if you can find it, but regular grocery store sugars work too. For the butter, cold cubes are key—don't let it soften before mixing. I always grab Land O'Lakes or Plugrá for reliable quality. The vanilla extract? Nothing imitation here—you'll taste the difference. If you're short on time, Trader Joe's sells affordable pure vanilla extract in bulk.
No baking soda? Double the baking powder works in a pinch, but the texture won't be quite the same. Short on brown sugar? Substitute white sugar plus 1 tsp molasses for depth. The butter can be European-style if you prefer—just use the same weight. For the flour, King Arthur or Gold Medal brands are my go-tos, but any all-purpose will do. If you're making these for a party, double the recipe—they freeze beautifully for up to 3 months. The eggs? Room temperature makes mixing easier, but cold eggs won't ruin the dough.
This dough needs at least 2 hours in the fridge—don't skip it! Store leftovers in an airtight container for 5-7 days or freeze for 3 months. The cookies stay fresh longer if you stack them with parchment between layers. For that classic Domino look, bake until edges are golden but centers are still soft—about 8-10 minutes. They'll firm up as they cool. Perfect for holiday baking or sharing with neighbors!
Why You'll Love This Recipe
- I’ll be real: this recipe uses ingredients you already have. No specialty items, no last-minute grocery runs. A batch keeps for days in an airtight container, and the cost per cookie? Ridiculously low. That’s how you feed a crowd without breaking the bank.
- No-Mix Magic: I swear by this recipe because you don’t even need to cream the butter and sugars—just toss everything in the bowl and fold. That’s it. The brown sugar’s caramel notes develop while baking, and you end up with chewy centers that practically melt in your mouth.
- Butter-Sugar Bliss: Honestly, the combo of white and brown sugar with that rich, cold butter creates the perfect balance—sweet but not cloying, with just enough depth. The vanilla ties it all together without overpowering, and the crisscross pattern? Pure visual satisfaction.
- Party in a Tin: Between us, these are my go-to for holiday gatherings, potlucks, or just because. They bake up in one sheet pan (no fancy molds!), and the domino shape makes them easy to grab and share. Plus, they’re sturdy enough to pack in lunchboxes or take to work.
Step-by-step instructions for Domino sugar cookies
Here's how to create the perfect balance of crispy edges and soft vanilla centers every time.
Cream Butter and Sugars to Light and Fluffy
In a large mixing bowl, combine the 1 cup unsalted butter (cold and cubed) with the 1.25 cups granulated white sugar and 1 cup packed light brown sugar. Using an electric mixer on medium speed, beat for 3-4 minutes until the mixture is light and fluffy with a pale color. You'll see it nearly double in volume as air is incorporated—this is what creates those beautiful crackly edges.
I like to scrape down the sides of the bowl every 30 seconds to ensure even mixing. The butter should look like whipped cream consistency by the time you're done. This step is crucial for getting that perfect texture—don't rush it! The sugars should be completely dissolved and the mixture should leave a trail when you lift the beaters.
Add Egg and Vanilla for Moisture and Flavor
Add the 1 whole large egg (room temperature preferred) to the butter-sugar mixture and beat on low speed for 1 minute until fully incorporated. Then add the 1 tbsp pure vanilla extract and mix for another 30 seconds. The mixture will look slightly curdled at first, but that's normal—it will smooth out when we add the dry ingredients.
This is where the vanilla really comes into play. I always use pure extract here because imitation just doesn't have that same rich, authentic flavor. The egg adds moisture that keeps those centers soft while the butter creates the crispy edges. Give everything a good mix until you see no more streaks of egg white.
Combine Dry Ingredients for Perfect Texture
In a separate bowl, whisk together the 3.5 cups all-purpose flour, 0.5 tsp fine sea salt, and 0.5 tsp baking soda. Sift the flour mixture directly into the wet ingredients while mixing on low speed. This prevents gluten development that would make your cookies tough. Mix just until combined—you should still see some flour streaks.
I've found that sifting the flour helps create that light, airy texture we want. The baking soda gives the cookies their lift while the salt enhances all the sweet flavors. Don't overmix here—just combine everything until it forms a soft dough. The dough should be slightly sticky but hold together when pressed.
Chill the Dough for Better Shape and Flavor
Divide the dough into two equal portions and flatten each into a 6-inch disk. Wrap each tightly in plastic wrap and refrigerate for at least 1 hour (or up to 24 hours). This chilling step is absolutely essential—it prevents the cookies from spreading too much in the oven and allows the flavors to develop fully.
I know it's tempting to skip this step, but trust me—it makes all the difference. The cold dough creates those beautiful, thick cookies with crisp edges. Plus, the longer you chill it (up to 24 hours), the more flavorful your cookies will be. This is where patience pays off!
Bake for Perfect Crispy Edges and Soft Centers
Preheat your oven to 350°F and line two baking sheets with parchment paper. Using a cookie cutter or glass, cut out 2-inch rounds from each dough disk and place them 2 inches apart on the prepared baking sheets. Bake for 10-12 minutes until the edges are golden brown but the centers still look slightly underdone.
Here's the thing—you want the edges to be crispy but the centers soft and chewy. They'll continue cooking on the hot sheet after you remove them, so pull them out when they look just slightly underdone. Let them cool on the baking sheet for 5 minutes before transferring to a wire rack. The contrast between the crispy edges and soft centers is what makes these cookies so amazing!
Pro Tips For Making Domino Cookie
- Cream Butter Slowly: Domino cookies need a light, airy texture, so don’t rush the butter-cream stage. Beat the butter and sugars on medium speed for 3-4 minutes until pale and fluffy—this incorporates air that keeps them tender. I used to crank it up high and end up with dense, greasy cookies that tasted more like butter than vanilla.
- Pack Brown Sugar Tight: Light brown sugar is packed, not scooped. Use a spoon to press it into the measuring cup—this ensures the right moisture balance for chewy, not crumbly, cookies. Skimping here means dry dough that spreads too much and burns fast.
- Chill Dough Twice: First, refrigerate the dough for at least 2 hours (overnight is better). Then, roll the balls in flour and freeze them for 15 minutes before baking. This prevents over-spreading and guarantees thick, cakey centers—no more flat, sad cookies that taste half-done.
- Rotate Trays Mid-Bake: Domino cookies bake best in the middle rack, but ovens have hot spots. Swap the baking sheets halfway through (around 8-10 minutes) for even browning. I learned this after one batch where half were golden and the other half looked like hockey pucks.
Pro cooking tips for this recipe
Dough Temperature Control
Keep your dough cold throughout the process—this is the secret to those signature crisp edges. After mixing, I always refrigerate the dough for at least 1 hour before rolling. For extra insurance, chill your rolling pin in the freezer for 5 minutes before shaping.
The colder the dough, the thicker and less spread your cookies will be, preserving that perfect Domino texture. 🧊
Precision Baking Time
Bake these cookies until the edges are golden brown but the centers still look slightly underdone—about 10-12 minutes at 350°F. The key is to pull them out 1-2 minutes early because they'll continue cooking on the hot baking sheet.
Use a timer and check at 10 minutes—overbaking turns those crisp edges tough. A toothpick inserted should come out with a few moist crumbs, not completely clean. ⏱️
Butter Consistency Matters
Use cold, cubed butter straight from the fridge—never softened. I cut my 1 cup unsalted butter into ½-inch cubes before mixing. This creates tiny pockets of fat that melt during baking, creating those beautiful crackly edges.
If your butter is too warm, the cookies will spread too much and lose their signature shape. For best results, use Land O'Lakes or Plugrá brand butter. 🧈
Cookie Cutter Tricks
Use a 2-inch round cookie cutter or a glass for clean edges. Dip your cutter in flour between uses to prevent sticking. For extra Domino-style authenticity, press down firmly when cutting—this creates those slightly thicker centers.
I like to make two cuts per disk to maximize yield. If your dough is too sticky, chill it for another 10 minutes before cutting. ✂️
Oven Rack Position
Place your baking sheets on the middle rack of your oven for even heat distribution. The middle rack ensures consistent baking without hot spots that could burn the edges before the centers cook.
If your oven runs hot, consider baking at 325°F for 12-14 minutes instead. I always rotate the pans halfway through for even browning. 🔥
Resting Before Serving
Let your cookies cool on the baking sheet for 5 minutes before transferring to a wire rack. This short rest prevents cracking and allows the edges to set properly. For the best texture contrast, serve them warm—the crisp edges will be at their peak while the centers remain soft.
If storing, keep them in an airtight container with parchment between layers to maintain freshness. 🍪
Nutrition facts
Frequently asked questions
Why do Domino cookies need to chill before baking?
Chilling the dough for at least 1 hour (up to 24 hours) is crucial for two reasons: it prevents excessive spreading in the oven and enhances flavor development. The cold dough creates thicker cookies with those signature crisp edges while keeping the centers soft. Skipping this step often results in flat, cakey cookies that lose their iconic texture.
Can I substitute brown sugar with white sugar?
You can use white sugar plus 1 teaspoon molasses per cup to mimic the moisture and caramel notes of brown sugar. However, the texture may be slightly less crispy at the edges. For best results, use the 1:1 ratio of white to light brown sugar as called for in the original recipe. The brown sugar's moisture helps create that perfect contrast between crispy edges and soft centers.
How do I know when the cookies are done baking?
Your cookies are perfect when the edges are golden brown but the centers still look slightly underdone—about 10-12 minutes at 350°F. They'll continue cooking on the hot baking sheet after removal. Insert a toothpick: it should come out with a few moist crumbs, not completely clean. Overbaking turns those crisp edges tough.
What's the best way to store these cookies?
Store cookies in an airtight container with parchment paper between layers to maintain freshness. They stay good at room temperature for 5-7 days or in the freezer for up to 3 months. For best texture, bring frozen cookies to room temperature before serving. The crisp edges soften slightly over time, but the centers remain tender for days.
Can I make these cookies without a cookie cutter?
Use a 2-inch round glass or even a clean, dry coffee mug to cut circles. Dip your cutter in flour between uses to prevent sticking. For extra Domino-style thickness, press down firmly when cutting. If the dough sticks, chill it for another 10 minutes before trying again. The shape doesn't affect flavor—just the presentation!