
Desserts
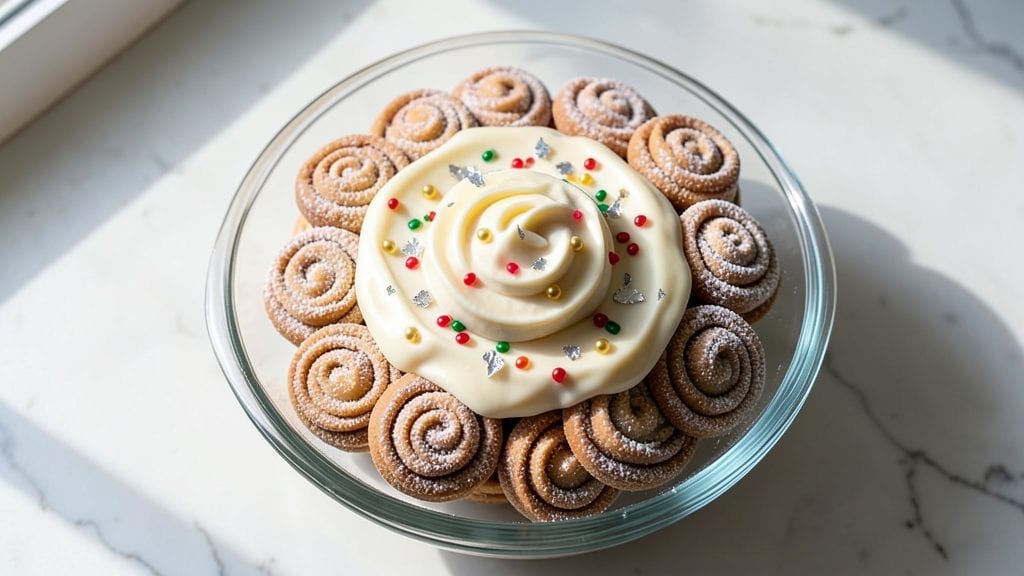
Decorated cookies recipe transforms simple dough into edible holiday art that brings joy to every celebration. The secret lies in balancing crisp edges with tender centers while mastering frosting techniques that turn ordinary cookies into showstopping centerpieces.
I've perfected this method over years of holiday baking, ensuring your cookies look as magical as they taste.
This recipe starts with a foolproof vanilla sugar cookie dough that bakes to golden perfection every time, using precise measurements and a 350°F oven for consistent results. Once cooled, we'll create three signature frostings—smooth vanilla, rich chocolate, and tangy cream cheese—each designed for different decoration styles.
The real magic happens when you pipe intricate borders, drizzle contrasting colors, and add edible glitter for that festive sparkle.
What you'll achieve is a tray of professionally decorated cookies that look like they came from a bakery window. The frosting stays perfectly piped, sprinkles adhere without sliding, and every bite delivers that perfect balance of sweet, buttery cookie and creamy frosting.
These cookies are ideal for holiday gift-giving, party favors, or simply treating yourself to something extra special.
Whether you're a beginner or experienced baker, this step-by-step guide breaks down each technique clearly. We'll cover everything from proper dough handling to advanced piping methods, ensuring your decorated cookies turn out flawless every time. Let's create something truly festive together.
Ingredients for decorated cookies
Foolproof dough meets three signature frostings—vanilla, chocolate, and cream cheese—for cookies that dazzle.
| Ingredient | Amount | Notes |
|---|---|---|
| All-Purpose Flour 🌾 | 4 cups | Sifted for light texture |
| Granulated Sugar 🍚 | 1 cup | White or turbinado for color |
| Unsalted Butter 🧈 | 1 cup | Cold, cubed for dough |
| Vanilla Extract 🍃 | 2 tsp | Pure, high-quality extract |
| Large Eggs 🥚 | 1 whole | Room temperature |
| Baking Powder 🧂 | 1 tsp | Aluminum-free preferred |
| Diamond Crystal Kosher Salt 🧂 | ½ tsp | Fine grain for even baking |
| Powdered Sugar 🍚 | 4 cups | For smooth frosting |
| Heavy Whipping Cream 🥛 | 1 cup | Cold for stiff peaks |
| Unsweetened Chocolate 🍫 | 8 oz | For chocolate frosting |
| Cream Cheese 🧀 | 8 oz | Room temperature for tang |
| Edible Gold Leaf 💛 | 1 sheet | For festive accents |
| Sprinkles 🎀 | 1 cup | Assorted holiday colors |
| Food Coloring 🎨 | 1 tbsp | Gel for vibrant hues |
| Edible Glitter ✨ | 2 tbsp | Fine, non-toxic glitter |
The flour matters here. King Arthur or Gold Medal brands give the best texture, but any all-purpose works if it's fresh. Butter should be cold—press the cubes into the flour first to create a crumbly base before mixing. Trader Joe's sells pre-cubed butter in perfect sizes, saving time. For vanilla, McCormick Pure or Nielsen-Massey extracts add depth without artificial aftertaste. The powdered sugar? Domino is my go-to—it dissolves smoothly in frostings without clumping. Buy a 10-pound bag if you're decorating a crowd; you'll thank me later.
No powdered sugar? Confectioners' sugar from a squeeze bottle (like Sugar 'n Spice) works in a pinch—just shake well before using. Substituting butter for shortening? Crisco gives a slightly denser cookie, but the frosting will still pipe beautifully. For the chocolate frosting, Ghirardelli squares melt smoother than chips. Cream cheese frosting too tangy? Add 1 tbsp powdered sugar** for balance. The edible gold leaf? Amazon or specialty baking stores carry it—just handle it with tweezers to avoid fingerprints on your masterpieces.
Dough keeps 5 days in the fridge wrapped tightly in plastic. Frostings stay fresh 3 days in airtight containers between layers of parchment. For holiday prep, bake cookies 2 weeks ahead—they taste even better as flavors meld. Store decorated cookies in a single layer in a tin with a slice of bread to absorb moisture. Freeze unbaked dough balls for 3 months; thaw overnight before baking.
Why You'll Love This Recipe
- Foolproof Dough: I swear by this recipe—just mix the flour, sugar, and softened butter until it’s like crumbly sand, then add the eggs and vanilla. No stand mixer needed; my hands do just fine.
- Butter-Sugar Magic: That creamy butter-sugar combo? It’s the secret weapon here. The dough stays tender without being greasy, and the vanilla makes every bite smell like a bakery fresh out of the oven.
- Holiday or Hangry: These cookies are my go-to for gift baskets, teacher appreciation, or when I’m craving something sweet at 3 PM. Decorate them fancy or keep it simple—either way, they disappear fast.
- No-Waste Leftovers: Between us, I always bake an extra batch. The dough keeps for days in the fridge, and the decorated cookies stay fresh for a week. Plus, they’re cheap to make—just flour, sugar, and butter.
Step-by-step instructions for festive holiday cookie decorations
Transform simple cookies into dazzling holiday centerpieces with these professional techniques.
Prepare the Base Frosting with Cream Cheese and Powdered Sugar
In a large mixing bowl, beat the 8 oz cream cheese and 1 cup unsalted butter together on medium speed until completely smooth and creamy—this usually takes about 3-4 minutes. The mixture should be light and fluffy, with no lumps remaining. This buttercream base is the secret to that silky, pipeable frosting that holds its shape beautifully under sprinkles.
Gradually add the 4 cups powdered sugar while continuing to mix on medium speed. Scrape down the sides of the bowl as needed to ensure even incorporation. Add the 2 tsp vanilla extract and 0.5 tsp diamond crystal kosher salt, mixing just until combined. The frosting should be thick but still pipeable—if it's too stiff, add 1-2 tablespoons of heavy whipping cream at a time until you reach the perfect consistency. Cover and refrigerate for 30 minutes to firm up slightly before decorating.
Create Colorful Chocolate Frosting for Contrast
Melt the 8 oz unsweetened chocolate in a heatproof bowl set over a pot of simmering water, stirring constantly until completely smooth. Remove from heat and let cool slightly for 2 minutes. Add the 1 cup heavy whipping cream and whisk until the mixture is glossy and fully combined. Transfer to a piping bag fitted with a small round tip for precise detailing.
Divide the chocolate mixture into separate bowls and tint each with food coloring to create your holiday color palette—think deep reds, forest greens, and golds. For extra shimmer, gently fold in 1 teaspoon of edible glitter to each color. Chill all colored frostings in the refrigerator for 15 minutes before using to prevent melting when piped onto cookies.
Master the Piping Techniques for Professional Results
Transfer the cream cheese frosting to a piping bag fitted with a star tip (size 1M works perfectly). Pipe borders around the edges of each cookie, working quickly to create clean, even lines. For the center, pipe a rosette by holding the bag upright and twisting gently as you pipe. The frosting should hold its shape immediately—if it collapses, your frosting needs to chill longer or your piping bag needs to be more firmly pressed.
Use the chocolate frostings to create intricate details. Pipe small dots for holiday accents, thin lines for snowflake patterns, or swirls for elegant designs. Work in small batches to prevent the frostings from warming up. For metallic effects, carefully place the edible gold leaf onto freshly piped chocolate designs while they're still slightly wet—press gently with your finger to adhere.
Apply Sprinkles with Precision for Long-Lasting Decoration
Sprinkle the 1 cup assorted sprinkles immediately after piping while the frosting is still wet but not dripping. Use a fine-mesh sieve or sprinkle sparingly by hand to avoid overloading. For a professional finish, shake off any excess sprinkles that don't stick immediately. Allow the cookies to set at room temperature for 15 minutes before stacking to prevent smudging.
For extra durability, especially in humid conditions, lightly mist the finished cookies with a 50/50 water and rubbing alcohol mixture using a spray bottle. This creates a protective seal that keeps decorations vibrant and prevents them from dissolving. Store decorated cookies in an airtight container at room temperature for up to 5 days, or freeze for up to 3 months by wrapping individually in plastic wrap.
Pro Tips For Making Decorated Cookies
- Chill the Dough First: I learned this the hard way—skipping the fridge means your cookies spread like pancakes on a hot griddle. Wrap the dough in plastic and refrigerate for at least 1 hour (24 hours is better if you can wait). This firms up the butter and keeps those delicate decorations from sliding off mid-bake.
- Use Room-Temp Butter: Cold butter = tough cookies. Warm it up by slicing the block into cubes and letting them sit on the counter for 30-60 minutes until they’re soft but not melted. This ensures even mixing and a tender crumb—critical when you’re planning to pipe intricate designs.
- Pipe Before Baking: Decorate your cookies before they hit the oven, not after. The heat will melt most store-bought icing, and even royal icing won’t hold up if you try to add it post-bake. Use a piping bag with a small tip for precision, and let the icing set for 10 minutes before baking at 350°F (175°C).
- Weigh Your Flour: Scooping flour from the bag is a disaster waiting to happen—you’ll end up with cookies that’re either dense or crumbly. Use a kitchen scale and measure by weight (typically 1 cup = 125g for all-purpose flour). This keeps your texture consistent, especially when you’re working with delicate decorations that need a stable base.
Storing and reheating your decorated cookies
Frosting Freshness
Store all frostings in airtight containers between layers of parchment paper to prevent sticking. The cream cheese frosting stays fresh for 3 days in the refrigerator—just cover tightly and avoid temperature fluctuations.
For longer storage, pipe decorated cookies onto parchment-lined trays and freeze for up to 3 months. Thaw at room temperature for 1-2 hours before serving to restore crispness. 💫
Cookie Storage Secrets
Keep unbaked dough balls in a single layer in the fridge for 5 days or freeze for 3 months. Baked cookies last 1 week at room temperature in a tin with a slice of bread to absorb moisture.
For decorated cookies, store in a cool, dry place—humidity is their enemy. If transporting, use a cookie carrier with compartments to prevent smudging. 🥖
Reheating Decorated Cookies
Decorated cookies don't reheat well, but you can revive their texture by placing them in a single layer on a baking sheet at 300°F for 2-3 minutes.
This warms the cookie without melting the frosting. For extra crispness, sprinkle with powdered sugar after reheating. If frosting looks dull, pipe a fresh border before serving. 🔥
Freezer-Friendly Decorations
Freeze decorated cookies before adding sprinkles—pipe the frosting, then freeze for 1 hour to set. After thawing, apply sprinkles for a cleaner look. Wrap each cookie in plastic wrap before placing in a freezer bag to prevent freezer burn.
Label with the date—most designs stay vibrant for 2 months in the freezer. 🧊
Humidity-Proofing Tips
In humid climates, mist decorated cookies with a 50/50 water and rubbing alcohol spray before storing. This creates a protective seal that keeps frosting crisp and decorations intact. For extra protection, store in a container with a silica gel packet to absorb excess moisture.
Avoid stacking until completely set—15 minutes at room temperature prevents smudging. ✨
Nutrition facts
Frequently asked questions
Can I make these decorated cookies without a piping bag?
Use a ziplock bag with a tiny corner snipped off for borders, or a spoon for rosettes. For chocolate details, spread melted chocolate with a toothpick or small offset spatula. The key is working quickly—keep frostings chilled to maintain shape.
How do I prevent my cookie decorations from sliding off?
Let frosting set for 10-15 minutes before adding sprinkles. For extra grip, lightly spray cookies with a 50/50 water and rubbing alcohol mix after decorating. Avoid humid environments while drying—place cookies on a wire rack in a cool, dry spot.
What's the best way to decorate cookies for kids?
Use large sprinkles and simple piping techniques like straight borders or dots. Let kids pipe frosting with plastic bags (no sharp tips) and decorate with their hands. Pre-cut shapes with cookie cutters make it even easier. Supervise closely when using edible glitter or gold leaf.
Can I bake the cookies ahead and decorate later?
Yes! Bake cookies 2 weeks ahead and store in an airtight container with parchment between layers. Bring to room temperature before decorating. The flavor actually improves as cookies sit. For best results, decorate within 3 days of baking for crispest texture.
What if my frosting is too runny?
Chill the frosting for 30 minutes before using. If still too thin, add 1-2 tablespoons powdered sugar** at a time until it holds shape. For chocolate frosting, ensure the chocolate is completely cooled before adding cream. Work in a cool kitchen to help frosting set properly.