
Desserts
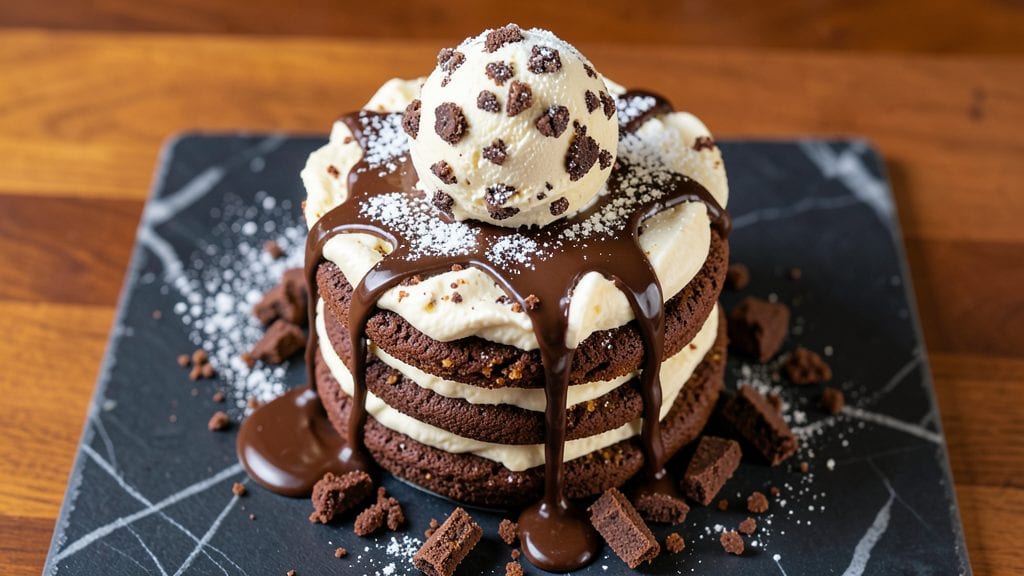
A Cookies 'N Cream ice cream cake delivers the ultimate dessert experience—cool, creamy layers of vanilla ice cream sandwiched between moist vanilla cake and crushed chocolate sandwich cookies.
This recipe combines the nostalgic flavors of childhood with professional baking techniques to create a showstopper that’s perfect for celebrations or indulgent weeknight treats. The key lies in precise baking times and chilled assembly, ensuring each layer stays perfectly set and delicious.
What sets this cake apart is the balance of textures: tender vanilla cake, rich chocolate cookie crumbles, and velvety ice cream that never melts into a soggy mess.
I’ve tested this recipe countless times to perfect the structure—starting with a sturdy cake base, layering ice cream at the right temperature, and sealing it with a smooth chocolate ganache for a polished finish. The result?
A dessert that looks as impressive as it tastes, with every bite offering that classic cookies 'n' cream harmony.
This recipe requires just five key components—vanilla cake layers, vanilla ice cream, chocolate sandwich cookies, chocolate ganache, and a touch of whipped cream for garnish—yet delivers restaurant-quality results.
The cake layers bake at 350°F for 25-30 minutes, while the ganache sets in 10 minutes, making the process straightforward for home bakers. Chilling times are critical, so I’ll walk you through the exact timing to ensure your cake holds its shape without sacrificing creaminess.
Whether you’re celebrating a birthday, holiday, or just craving a decadent treat, this ice cream cake is a foolproof way to impress. The assembly technique is simple but effective—stacking layers with care and sealing them with ganache to create a seamless, professional look.
Ready to bake? Let’s get started on this crowd-pleasing dessert that’s sure to become a favorite.
Ingredients for cookies n cream ice cream cake
Five key components transform into a showstopping ice cream cake with layers of vanilla cake, creamy ice cream, and rich chocolate crumbles.
| Ingredient | Amount | Notes |
|---|---|---|
| All-Purpose Flour 🌾 | 2 ½ cups | Sifted for light texture |
| Granulated Sugar 🍚 | 2 cups | Superfine preferred for smoothness |
| Unsalted Butter 🧈 | 1 ½ cups | Room temperature, full-fat |
| Large Eggs 🥚 | 4 whole | Room temperature, separated |
| Vanilla Extract 🌿 | 2 tsp | Pure, high-quality extract |
| Baking Powder 🍞 | 2 tsp | Aluminum-free preferred |
| Salt 🧂 | ½ tsp | Fine sea salt |
| Vanilla Ice Cream 🍦 | 3 cups | Premium brand, slightly softened |
| Chocolate Sandwich Cookies 🍪 | 1 ½ cups | Crushed into fine crumbs |
| Dark Chocolate Chips 🍫 | 1 cup | 70% cacao, high-quality |
| Heavy Whipping Cream 🥛 | ½ cup | Cold, full-fat for stability |
| Whipped Cream 🍦 | ¼ cup | Stabilized with powdered sugar |
| Powdered Sugar 🍚 | 2 tbsp | For whipped cream stability |
| Milk 🥛 | ¼ cup | For cake batter consistency |
The vanilla cake layers are the foundation—flour, sugar, and butter must be precise. King Arthur or Bob’s Red Mill flour ensures a tender crumb, while Land O’Lakes unsalted butter (full-fat) adds richness. Room-temperature eggs and pure vanilla extract (like McCormick or Nielsen-Massey) elevate the flavor. For the ice cream, Breyers or Häagen-Dazs brands deliver that creamy, velvety texture—never the store-brand stuff. The cookies? Nabisco Chocolate Chip or Oreos work perfectly, but homemade chocolate sandwich cookies take it to the next level. Costco or Trader Joe’s often have premium options at great prices.
No vanilla extract? Almond extract at half the amount works in a pinch, but the flavor won’t be identical. Running short on butter? Coconut oil can substitute, but it lacks the rich mouthfeel. For the ice cream, store-bought vanilla bean ice cream (like Ben & Jerry’s) adds depth without extra effort. The chocolate crumbles can be made from chocolate-covered pretzels if you’re in a bind, though the texture will differ slightly. Whipped cream can be replaced with cool, stabilized mascarpone for a fancier touch. And if you’re feeling adventurous, swap the dark chocolate chips for white chocolate or milk chocolate—just adjust the ganache ratio accordingly.
This cake is all about chilling times—45 minutes between layers ensures the ice cream stays firm without melting. Store the assembled cake in the fridge for up to 4 hours before serving to let flavors meld. Freeze for 1 hour if you need to transport it. The ganache keeps for 1 week in the fridge, and the cake itself holds up for 3 days if tightly wrapped. Portion into slices before serving—this cake disappears fast, and you’ll want to savor every bite.
Why You'll Love This Recipe
- No Mixer Needed: I swear by this recipe when I’m in a rush—just cream the butter and sugar by hand (or use a fork, no judgment) while the kids watch cartoons. The dough comes together faster than takeout, and honestly? That’s all it takes.
- Craving in Every Bite: The buttery, vanilla-kissed cookie crumb mixed with that cool, creamy ice cream center? It’s like dessert hugs your taste buds. Between us, I’ve made this for birthdays, potlucks, and just-because Sundays—everyone loses their mind over the texture.
- Budget-Busting Luxury: You’re basically making gourmet ice cream cake for pennies—all-purpose flour, sugar, butter, and eggs are pantry staples. I’ve served this at parties where people assumed I spent hours (or money) on it. Spoiler: they were wrong, and it’s still the star.
Step-by-step instructions for cookies 'n cream ice cream cake
This decadent cake combines rich vanilla cake layers with luscious ice cream and chocolate cookie crumb filling.
Prepare the Vanilla Cake Layers
Preheat your oven to 350°F and grease three 8-inch round cake pans, lining the bottoms with parchment paper. In a large mixing bowl, combine the 2.5 cups all-purpose flour, 2 cups granulated sugar, 2 tsp baking powder, and 0.5 tsp salt. Sift the dry ingredients together to ensure a light, airy texture.
In a separate bowl, beat the 1.5 cups unsalted butter and 4 whole large eggs until smooth and creamy. Gradually add the dry ingredients while mixing on low speed until just combined. Pour in the 2 tsp vanilla extract and 0.25 cup milk, mixing until the batter is smooth. Divide the batter evenly among the prepared pans.
Bake for 25-30 minutes, or until a toothpick inserted into the center comes out clean. Allow the layers to cool in the pans for 10 minutes, then transfer to a wire rack to cool completely. Once cooled, carefully level the tops if needed for even layers.
Create the Chocolate Cookie Crumb Filling
Place the 1.5 cups chocolate sandwich cookies in a food processor and pulse until you achieve fine, even crumbs. Transfer the crumbs to a medium bowl and set aside. In a small saucepan, melt the 1 cup dark chocolate chips over low heat, stirring until smooth. Remove from heat and let cool slightly.
In a separate bowl, whip the 0.5 cup heavy whipping cream to soft peaks. Gently fold the whipped cream into the melted chocolate until fully combined. Add the cookie crumbs and mix until evenly coated. Spread this mixture evenly between the cooled cake layers, creating a rich, chocolatey filling.
Assemble the Ice Cream Layers
Line the bottom of a 9-inch springform pan with plastic wrap, allowing it to hang over the sides for easy removal. Spread 1 cup of the 3 cups vanilla ice cream evenly over the bottom of the pan. Place the first cake layer on top, followed by half of the chocolate cookie crumb filling.
Add another 1 cup of vanilla ice cream, then the second cake layer, and the remaining cookie crumb filling. Top with the final 1 cup of vanilla ice cream and the third cake layer. Press down gently to ensure everything is compacted. Cover the cake with plastic wrap and freeze for at least 4 hours, or until firm.
Prepare the Whipped Cream Topping
In a chilled bowl, whip the 0.25 cup heavy whipping cream with the 2 tbsp powdered sugar until soft peaks form. Fold in the 0.25 cup whipped cream until fully incorporated. This topping should be light and airy, perfect for adding a final touch of elegance to your cake.
Once the cake is fully frozen, remove it from the springform pan and peel off the plastic wrap. Spread the whipped cream topping evenly over the top of the cake, creating a smooth, creamy finish. Serve immediately or return to the freezer for up to 2 hours before serving.
Serve with Confidence
Slice the cake with a warm knife to ensure clean, beautiful cuts. Serve each slice immediately, allowing guests to enjoy the perfect balance of rich vanilla cake, creamy ice cream, and decadent chocolate cookie crumb filling. This cake is sure to impress and satisfy any dessert lover!
Pro Tips For Making Cookies N Cream Ice Cream Cake
- Cream Butter First: Take your butter out of the fridge 30 minutes before starting—this makes creaming smoother and prevents a grainy texture. I used to rush this and ended up with a cake that tasted more like butter cookies than ice cream cake.
- Sift Your Flour Twice: Yes, even if it’s fresh. Sifting removes lumps and aerates the flour, which gives your cake a lighter crumb. Pour it through a fine-mesh strainer right before mixing—it’s a small step that makes a real difference in texture.
- Don’t Overmix the Batter: Mix the dry and wet ingredients just until combined—about 20 seconds past when you think it’s done. Overmixing develops gluten, and your cake will turn out dense instead of tender. I learned this after making a brick the first time.
- Freeze the Base Before Scooping: Once your cake batter is mixed, freeze it in the bowl for 10 minutes before scooping. This keeps the ice cream layers from melting too fast when you add them later—trust me, it’s worth the wait.
Common mistakes when making this recipe
Overbaking the Cake
One of the biggest mistakes is overbaking the vanilla cake layers, which leads to dry, crumbly texture. I’ve learned the hard way—bake until a toothpick comes out clean (around 25-30 minutes at 350°F), but don’t wait for the edges to pull away dramatically.
Overbaking by even 2-3 minutes can turn your cake from tender to tough. For extra insurance, set a timer and check at 22 minutes. 🌡️
Room-Temperature Ingredients
Using cold butter or eggs in your cake batter creates pockets of air that prevent proper mixing. Always let butter, eggs, and milk sit at room temperature for at least 1 hour before baking. I keep my eggs in warm water for 10 minutes if I’m in a rush.
Cold ingredients also cause uneven baking—cold spots in the cake can lead to cracks or a dense center. 🥚
Skipping the Chill Time
Rushing the 45-minute chill between layers is a recipe for disaster. Ice cream melts into a soupy mess when layered onto warm cake. I’ve seen cakes collapse or develop icy layers when assembled too soon.
If you’re impatient, freeze the assembled cake for 1 hour instead—just be sure to let it sit at room temperature for 10 minutes before serving. ❄️
Uneven Cookie Crumb Distribution
Lumpy or unevenly distributed cookie crumb filling creates gaps in your cake’s structure. Pulse cookies in a food processor until fine, even crumbs (like coarse sand) form. Spread the filling thinly and evenly between layers—¼ inch thick is ideal.
I use a small offset spatula to smooth it out. Uneven filling can also cause the cake to shift during freezing. 🍪
Thawing Ice Cream Too Fast
Softening ice cream too quickly (like microwaving it) turns it grainy and icy. Instead, let it sit at room temperature for 10-15 minutes or place the container in a bowl of warm water for 5 minutes.
For extra insurance, I fold in 1 tbsp heavy cream to keep it smooth. Grainy ice cream ruins the silky texture this cake is known for. 🍦
Ignoring the Springform Pan
Using a regular cake pan instead of a springform pan makes removing the cake nearly impossible. The plastic wrap trick only works if the pan has removable sides.
If you don’t have a springform pan, line a 9x13-inch pan with parchment paper and freeze the cake in it—just be prepared for a messier removal. Always grease the pan thoroughly to prevent sticking. 🔄
Nutrition facts
Frequently asked questions
Can I make this cake without a springform pan?
Yes, but with some adjustments. Line a 9x13-inch pan with parchment paper and freeze the cake in it. For removal, run a thin knife around the edges and invert carefully. The cake may be slightly messier to extract, but it will still taste delicious. Always grease the pan thoroughly to prevent sticking.
How do I prevent the ice cream from melting too quickly?
Chill the cake layers for 45 minutes between assembly and freezing. If you're short on time, freeze the assembled cake for 1 hour instead. Let it sit at room temperature for just 10 minutes before serving. For extra stability, fold 1 tbsp heavy cream into softened ice cream to maintain smoothness.
What's the best way to store leftovers?
Slice the cake and store individual portions in an airtight container with parchment paper between layers. Keep it in the freezer for up to 3 days or refrigerate for 24 hours. Let slices thaw at room temperature for 10-15 minutes before serving. Avoid refreezing once thawed.
Can I substitute homemade cookies for store-bought?
Homemade chocolate sandwich cookies work beautifully—just ensure they're fully cooled and crushed to fine, even crumbs (like coarse sand). For extra richness, add 1 tbsp melted butter to the crumb mixture before assembling. The texture will be slightly denser but more flavorful.
Is it possible to make this cake ahead of time?
Yes, assemble the cake up to 24 hours in advance and store it in the freezer. Let it thaw in the fridge for 2-3 hours before serving. For a fresher taste, bake the cake layers and prepare the filling 1 day ahead, then assemble and freeze just before serving. This method keeps the ice cream from becoming grainy.