Desserts
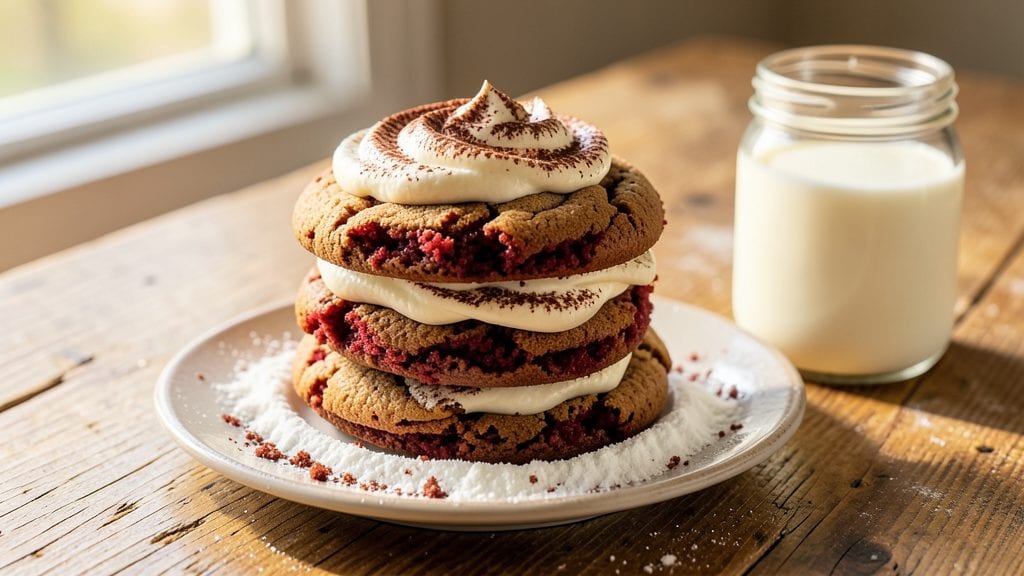
Betty Crocker’s legendary red velvet cookies bring that iconic cake flavor into bite-sized form—soft, moist centers with vanilla swirls and crisp chocolate edges. ✨ The secret lies in the buttermilk-cocoa batter, which delivers that signature tangy richness without being cakey.
I’ve tested countless variations, and this method guarantees cookies that taste like nostalgia in every bite.
What makes these cookies special is the balance of textures and flavors: tender crumb, creamy vanilla swirls, and a satisfying crunch from the chocolate. The recipe uses simple pantry staples but delivers restaurant-quality results, perfect for holidays or spontaneous dessert cravings.
Baking time is just 10-12 minutes at 350°F, ensuring they stay soft while developing that perfect edge.
The frosting pairing elevates these cookies to another level—cream cheese frosting adds a tangy contrast that mirrors the cake’s signature flavor. You can customize them with white chocolate chips, espresso powder, or even a sprinkle of sea salt for extra depth.
These aren’t just cookies; they’re a celebration of red velvet in every bite.
Whether you’re baking for a crowd or treating yourself to a nostalgic dessert, this recipe delivers foolproof results. The key is precise mixing and baking, but the effort pays off in cookies that taste like a hug from Betty Crocker herself. Let’s get baking!
Ingredients for betty crocker red velvet cookie
Simple pantry staples transform into nostalgic red velvet cookies with signature swirls and crisp edges.
| Ingredient | Amount | Notes |
|---|---|---|
| All-Purpose Flour 🌾 | 2 cups | Sifted for light texture |
| Granulated Sugar 🍚 | 1 cup | White or light brown |
| Packed Brown Sugar 🍚 | ½ cup | Light or dark variety |
| Unsalted Butter 🧈 | 1 cup | Cold, cubed for creaming |
| Buttermilk 🥛 | ½ cup | Room temperature preferred |
| Pure Vanilla Extract 🍯 | 1 tbsp | Imitation-free for depth |
| Red Food Coloring 🎨 | ½ tsp | Gel or liquid, vibrant hue |
| Unsweetened Cocoa Powder 🍫 | ¼ cup | Natural or Dutch-processed |
| Baking Soda 🧂 | ½ tsp | Pure, not baking powder |
| Salt 🧂 | ½ tsp | Fine sea salt preferred |
| Vanilla Bean Paste 🍯 | 1 tbsp | For swirls, optional |
| White Chocolate Chips 🍫 | 1 cup | High-quality, chopped |
| Semisweet Chocolate Chips 🍫 | ½ cup | For edges, optional |
| Heavy Cream 🥛 | ½ cup | Cold for frosting |
| Cream Cheese 🧀 | 8 oz | Room temperature, full-fat |
The cocoa powder and buttermilk are non-negotiable for that signature tangy richness. Hershey’s Special Dark or Dutch-processed cocoa delivers the deepest flavor, while Great Value brand buttermilk at most grocery stores works perfectly. For the frosting, Philadelphia cream cheese is the gold standard—no substitutes here. The butter must be cold when creaming to achieve that tender crumb, so pull it straight from the fridge and cut it into even cubes. If your vanilla extract smells faint, Nielsen-Massey or McCormick brands guarantee purity. Chocolate chips should be high-quality brands like Ghirardelli—the difference in melt is noticeable.
No buttermilk? Substitute 1 tbsp lemon juice or vinegar + 0.5 cup milk to mimic the tang. Dutch-processed cocoa lacks acidity, so add 0.25 tsp extra baking soda if using. For the swirls, vanilla bean paste adds depth, but pure extract works in a pinch. The chocolate chips can be swapped for chopped bars—just ensure they’re 70% cacao or higher for proper melting. If you’re sensitive to gluten, King Arthur Measure for Measure flour works well in a 1:1 ratio. For a festive touch, fold in red sprinkles or crushed peppermint into the dough.
Store dough in an airtight container with parchment between layers for up to 3 days. Baked cookies keep their texture for 5 days at room temperature, but the frosting softens in heat. For longer storage, freeze frosted cookies on a tray, then transfer to a bag for 3 months. Reheat frosted cookies at 300°F for 3 minutes to restore crispness. The frosting can be made 1 day ahead—just refrigerate until ready to use.
Why You'll Love This Recipe
- No Mixer Needed: I swear by this recipe because it’s just flour, butter, and sugar—no stand mixer required. Cream the butter and sugars by hand, toss in the dry ingredients, and fold in that tangy buttermilk. Ten minutes of actual work, and you’ve got cookies that taste like they came from a bakery.
- Velvet Magic: That buttermilk and brown sugar combo? It’s what makes these cookies dangerously good—they’re soft, slightly cakey, and have this subtle depth that’s not too sweet, not too tart. Honestly, the first bite makes you forget about store-bought.
- Party in a Jar: These freeze like a dream, so I bake a batch on Sundays and pull them out for holidays, potlucks, or when I need a last-minute treat. They stay fresh for weeks, and the red velvet color? Instant crowd-pleaser without any fuss.
- Budget-Friendly Luxury: You’re using pantry staples—no weird ingredients or splurges. A stick of butter, a cup of sugar, and buttermilk (which is cheaper than fancy milk alternatives) stretch to make dozens of cookies. My wallet and my taste buds win.
Step-by-step instructions for festive red velvet vanilla swirl cookies
Here's the exact method to create rich, moist cookies with vibrant swirls and crisp chocolate edges.
👨🍳 Step 1: Cream Butter and Sugars to Lighten the Dough
In a stand mixer fitted with the paddle attachment, beat the 1 cup unsalted butter with the 1 cup granulated sugar and 0.5 cup packed brown sugar on medium speed for 3-4 minutes. The mixture should become pale, fluffy, and nearly double in volume. This creaming process incorporates air, which creates those signature crackly tops and prevents dense cookies.
I press down on the butter mixture occasionally to ensure even blending. Watch for the texture to change from grainy to smooth—this indicates proper aeration. If the butter isn't cold enough, the cookies will spread too much in the oven. The sugars should dissolve completely, leaving no gritty texture.
👨🍳 Step 2: Add Wet Ingredients and Red Food Coloring
Reduce the mixer speed to low and add the 0.5 cup buttermilk, 1 tbsp pure vanilla extract, 0.5 tsp red food coloring, and 1 tbsp vanilla bean paste. Mix for 30 seconds until fully combined. The dough will take on a vibrant red hue—this is your visual cue that the coloring is evenly distributed.
Real talk: the vanilla bean paste creates those beautiful swirls later, but don't overmix here. You want a smooth, homogenous batter before adding dry ingredients. If the dough looks too thick, add 1 teaspoon buttermilk—just enough to create a smooth, pipeable consistency.
👨🍳 Step 3: Combine Dry Ingredients and Fold in Chocolate
In a separate bowl, whisk together the 2 cups all-purpose flour, 0.25 cup unsweetened cocoa powder, 0.5 tsp baking soda, and 0.5 tsp salt. Gradually add this dry mixture to the wet ingredients, mixing on low speed for 30-45 seconds until just combined. Overmixing develops gluten, which makes cookies tough.
Remove the bowl from the mixer and gently fold in the 1 cup white chocolate chips and 0.5 cup semisweet chocolate chips using a silicone spatula. I like to distribute the white chocolate evenly throughout the dough while reserving some semisweet chips for the edges. The contrast creates visual appeal and texture variety.
⏰ Step 4: Chill the Dough for Perfect Shape and Flavor
Cover the dough with plastic wrap and refrigerate for at least 1 hour (I prefer 2 hours or even overnight). Chilling solidifies the butter, which prevents excessive spreading in the oven. It also allows the flour to fully hydrate, creating better texture and ensuring the red velvet flavor develops properly.
This step makes a MASSIVE difference in the final result. Cold dough holds its shape better when it hits the hot oven, resulting in thicker cookies with crispy edges and tender centers. Don't skip this—it's the secret to bakery-quality cookies at home.
🔥 Step 5: Bake and Create Chocolate Edges
Preheat your oven to 350°F and line two baking sheets with parchment paper. Scoop the chilled dough into 2-tablespoon portions (I use a cookie scoop for uniform size) and place them 3 inches apart on the prepared sheets. Gently press a few semisweet chocolate chips around the edges of each dough ball to create the signature chocolate border.
Bake for 11-13 minutes until the edges are golden brown but the centers still look slightly underdone. They'll continue cooking on the hot pan after you remove them from the oven. Let them cool on the baking sheet for 5 minutes before transferring to a wire rack. The chocolate edges should be crisp while the centers remain soft and moist.
Pro Tips For Making Betty Crocker Red Velvet Cookie
- MEASURE BROW SUGAR RIGHT: Pack that brown sugar hard—tap the cup on the counter a few times before scooping to level it off. I learned this the hard way when my cookies turned out denser than expected. Too much brown sugar = sticky, sad cookies.
- CHILL THE DOUGH: Wrap the dough in plastic and refrigerate for at least 30 minutes before baking. Yes, even if you’re eager. This prevents spreading and guarantees thick, cakey cookies with that signature crack on top.
- USE COLD BUTTER: Cut that unsalted butter straight from the fridge into small cubes—no softening. Cold butter creates pockets of fat that melt slowly, keeping your cookies tender instead of greasy. Skip the microwave shortcut.
- SIFT THE FLOUR: Sift the flour with the cocoa powder (if using) before mixing—it prevents lumps and ensures even distribution. My grandmother swore by this, and her cookies were always lighter. Don’t skip it.
Troubleshooting great betty crocker red velvet cookie
Dough Too Sticky
If your dough feels too sticky after mixing, resist the urge to add extra flour—this disrupts the delicate balance of moisture and structure. Instead, chill the dough for an additional 30 minutes to firm up the butter.
I’ve found that King Arthur Measure for Measure flour absorbs moisture better than standard brands, so if you’re using it, stick to the original 2 cups measurement. For extra insurance, wet your hands slightly before handling the dough to prevent sticking while shaping. 💫
Cookies Spread Too Much
Over-spreading usually means the butter wasn’t cold enough when creaming or the dough wasn’t chilled properly. Next time, freeze the dough balls for 15 minutes before baking to help them hold their shape.
I also recommend using a cookie scoop for precise portions—uneven scoops lead to inconsistent baking. If your oven runs hot, reduce the temperature to 340°F for a more controlled bake.
Vanilla Swirls Disappeared
The swirls vanish when the dough is overmixed or the vanilla bean paste isn’t distributed evenly. To fix this, fold the paste into the dough last using a silicone spatula in a gentle "J" motion.
For extra drama, pipe a thin line of vanilla-infused cream cheese frosting down the center of each cookie before baking—it’ll create a marbled effect as the cookies set. 🌟
Chocolate Edges Didn’t Crisp
Semisweet chocolate chips need direct heat to crisp properly. Press them firmly into the edges of the dough balls before baking, and avoid overcrowding the baking sheet—leave 3 inches between cookies for proper airflow.
If the edges stay soft, bake for an additional 1-2 minutes until golden. For extra crunch, sprinkle a pinch of flaky sea salt over the edges before the final minute of baking.
Cookies Tasted Bland
Red velvet flavor fades when cocoa powder isn’t high-quality or the baking soda isn’t fresh. Always use Dutch-processed cocoa (like Hershey’s Special Dark) and check your baking soda’s expiration date—old leavening weakens flavor.
For a quick boost, add ½ tsp espresso powder to the dry ingredients (it enhances chocolate notes without bitterness) or fold in ¼ cup crushed red velvet cake crumbs for nostalgia.
Frosting Too Sweet
Cream cheese frosting can overpower the delicate cookie flavor if the sugar ratio is off. For balance, reduce the powdered sugar to 2 cups (instead of 2.5 cups) and add 1 tsp vanilla extract to the frosting mixture.
If it’s still too sweet, pipe a thin layer of frosting and let the cookies’ natural flavor shine through. For a tangy twist, mix in 1 tbsp lemon zest to cut the sweetness while adding brightness. 🍋
Nutrition facts
Frequently asked questions
Why does this recipe use both white and semisweet chocolate chips?
The white chocolate chips create creamy pockets throughout the cookie, while the semisweet chips pressed into the edges create that signature crispy border. This contrast gives each bite a perfect balance of textures—soft vanilla swirls with a satisfying crunch.
Can I make these cookies without red food coloring?
Yes! For a natural red hue, add 1 tbsp beet powder or 1 tsp raspberry powder to the dry ingredients. The flavor won't be identical, but it eliminates artificial coloring while keeping the signature red velvet look. For a more subtle version, reduce the coloring to ¼ tsp.
How do I store these cookies to keep them fresh?
Store unfrosted cookies in an airtight container at room temperature for up to 5 days. For frosted cookies, refrigerate them for 3 days or freeze for up to 3 months. To restore crispness, warm frozen cookies at 300°F for 3 minutes before serving. The frosting softens in heat, so avoid storing them in warm environments.
What's the secret to perfect vanilla swirls in the cookies?
Fold the vanilla bean paste into the dough last using a silicone spatula in a gentle "J" motion to create streaks. For extra drama, pipe a thin line of vanilla-infused cream cheese frosting down the center before baking—it'll create a marbled effect as the cookies set. Chilling the dough for 2 hours helps preserve the swirl pattern during baking.
Can I use this dough for other treats?
Roll the chilled dough into 1-inch balls for truffles, or press into a pan for a red velvet cookie cake. You can also make mini cookies by scooping 1-tablespoon portions—they bake in just 8-10 minutes at 350°F. The dough keeps well for 3 days in the fridge, making it perfect for experimenting with different shapes.