Desserts
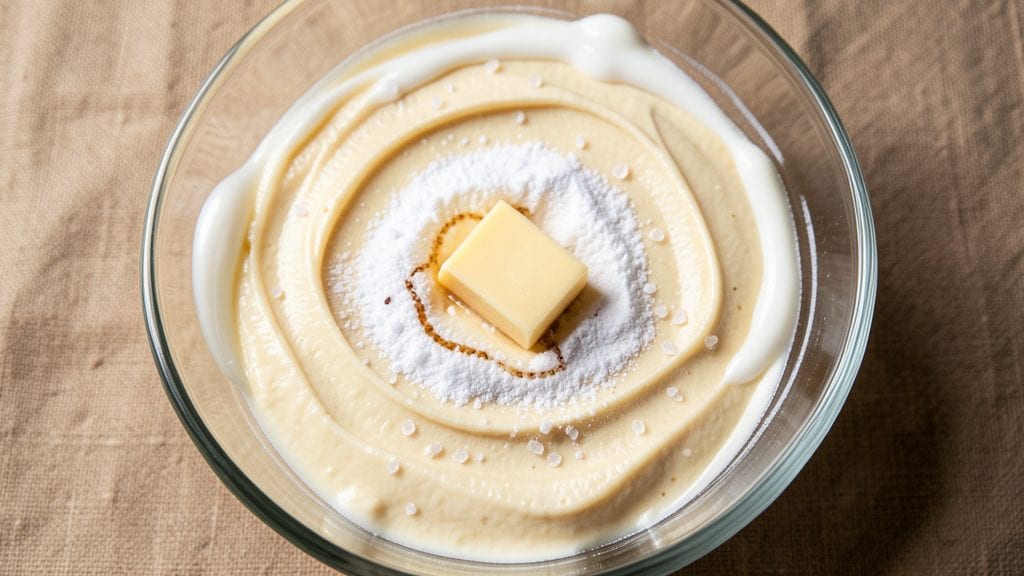
Betty Crocker’s iconic cookie frosting delivers that perfect balance of sweetness and creaminess that turns any cookie into a showstopper. This no-fuss vanilla swirl recipe recreates that nostalgic taste in just 5 minutes—no fancy techniques required, just simple ingredients and a few precise steps.
The secret lies in the ratio of butter to powdered sugar, which creates that signature smooth, spreadable texture that’s neither too stiff nor too runny.
What makes this frosting foolproof is its versatility—it works with store-bought or homemade cookies, and you can easily customize it with extracts, food coloring, or even a sprinkle of crushed cookies for extra flavor.
The recipe relies on just 4 ingredients (plus optional flavorings), making it a pantry staple for bakers of all levels. Whether you’re decorating sugar cookies or filling cupcakes, this frosting delivers that classic Betty Crocker taste without the guesswork.
By the time you pipe or spread this frosting, you’ll have a creamy, velvety finish that stays smooth at room temperature and holds its shape beautifully. The vanilla bean extract adds depth, while the butter ensures it’s rich and tender—not too sweet, not too heavy.
This is the kind of frosting that makes cookies feel like a bakery treat, and it’s easier to make than you’d think.
Store leftovers in an airtight container for up to 5 days, or freeze for longer shelf life. For extra flair, pipe swirls, rosettes, or simply spread with a knife—either way, your cookies will look (and taste) like they came straight from a bakery.
Let’s get started on that perfect batch.
Ingredients for betty crocker cookie frosting
Four essentials plus two optional boosters—this frosting delivers that nostalgic Betty Crocker taste in minutes.
| Ingredient | Amount | Notes |
|---|---|---|
| Unsalted Butter 🧈 | ½ cup | Room temperature for smooth mixing |
| Powdered Sugar 🍚 | 2 cups | Sifted for fluffy texture |
| Pure Vanilla Extract 🌿 | 1 tbsp | High-quality, not imitation |
| Heavy Whipping Cream 🥛 | ¼ cup | Cold for stability |
| Vanilla Bean Extract 🌿 | ½ tsp | Optional for depth |
| Fine Sea Salt 🧂 | ¼ tsp | Balances sweetness |
The butter is non-negotiable—European-style unsalted like Plugrá or Kerrygold gives the richest flavor. Grab it from the deli section (not the baking aisle) for the best quality. Powdered sugar? Domino or C&H work fine, but sift it first—lumps ruin the smooth texture. The vanilla extract should be pure, not imitation—McCormick or Nielsen-Massey are reliable brands. Heavy whipping cream is a game-changer for stability, but if you're avoiding dairy, coconut cream works in a pinch (though it adds a subtle coconut note).
No vanilla bean extract? Double the pure vanilla extract—it won’t be identical, but you won’t miss it. Out of heavy cream? Whipped cream cheese (like Philadelphia) at half the amount keeps the frosting stable. For a tangy twist, add 1 tsp lemon juice. Want it sweeter? Add 1 tbsp more powdered sugar. The salt is key—skip it, and the frosting will taste flat. If you’re using food coloring, add it to the butter first for even distribution. And if your frosting gets too stiff? Warm the butter slightly (30 seconds in the microwave) to loosen it up.
This frosting keeps beautifully—5 days in the fridge, covered tightly. For longer storage, freeze portions in 1-tbsp dollops on parchment paper, then transfer to a bag. Thaw at room temp before using. Pro tip: Pipe it into a ziplock bag with a corner snipped off for easy decorating later. Works on cookies, cupcakes, or even brownies—just let it sit at room temp for 10 minutes before serving so the flavors meld.
Why You'll Love This Recipe
- No Mixing Madness: I swear by this recipe because it’s three ingredients, one bowl—just softened butter, powdered sugar, and vanilla. No electric mixer required, no lumps to fight, just a fork and elbow grease. (Yes, I’ve tried the fancy stand mixer route—overkill for this.)
- Vanilla Overload: That combo of pure vanilla and vanilla bean extract? It’s like a flavor hug. The butter keeps it rich but not greasy, while the cream adds just enough tang to balance the sweetness. Spread it on cookies, and you’ll get that nostalgic Betty Crocker taste—no artificial shortcuts needed.
- Party in a Bowl: This frosting is my go-to for cookie exchanges, bake sales, or when I’m lazy. It doubles easily, keeps for days in the fridge, and even freezes well. Slather it on sugar cookies, dip pretzels, or—honestly—eat it straight from the bowl. (Don’t judge.)
- Budget Magic: Unsalted butter and powdered sugar are pantry staples, and a little vanilla goes a long way. I’ve made gallons of this for under $10—enough to frost 50 cookies or fill a dozen cupcakes. Plus, leftovers turn into a quick ice cream topping or cake glaze. Efficiency at its finest.
Step-by-step instructions for Betty Crocker cookie frosting
Here's how to whip up that classic Betty Crocker frosting—smooth, creamy, and ready in record time.
Prepare Your Ingredients for Perfect Texture
Begin by ensuring your 0.5 cup unsalted butter is at room temperature—press your finger into it; it should leave a slight indent but not be fully melted. This ensures smooth incorporation without lumps. In a separate bowl, sift the 2 cups powdered sugar to eliminate any clumps, which guarantees a fluffy, not grainy, frosting.
Measure the 0.25 cup heavy whipping cream and place it in the freezer for 10 minutes to keep it cold—this prevents the frosting from becoming too runny. The 1 tablespoon pure vanilla extract and 0.5 teaspoon vanilla bean extract (if using) should be ready to add once everything else is combined. The salt is key here: 0.25 teaspoon fine sea salt balances the sweetness and enhances all the flavors.
Whip the Butter to Light and Fluffy
In a large mixing bowl, use a hand mixer or stand mixer fitted with the whisk attachment to beat the 0.5 cup unsalted butter on medium speed for 1-2 minutes until it becomes pale and fluffy. You're looking for a light, airy texture—almost like whipped cream. This step is crucial because it incorporates air, which gives the frosting its signature lightness and helps it hold its shape when spread.
If the butter isn't soft enough, it won't whip properly and will result in a dense, greasy frosting. If it's too warm, it might turn into buttercream instead of frosting. You'll know it's ready when it forms soft peaks when the whisk is lifted.
Gradually Add Powdered Sugar for Smooth Frosting
With the mixer running on low speed, slowly add the 2 cups powdered sugar in a steady stream. This gradual addition prevents the sugar from settling at the bottom and ensures even distribution. Once all the sugar is incorporated, increase the speed to medium and beat for another 2-3 minutes until the mixture is smooth and fully combined.
Here's the thing—if you add the sugar too quickly, you'll end up with a grainy texture. The powdered sugar should dissolve completely, leaving no visible traces. If you notice any lumps, press the mixture through a fine-mesh sieve to achieve that silky smoothness.
Incorporate Vanilla and Cream for Rich Flavor
Add the 1 tablespoon pure vanilla extract and 0.5 teaspoon vanilla bean extract (if using) to the butter-sugar mixture and mix on medium speed for 30 seconds until fully combined. The vanilla bean extract adds a subtle depth that takes this frosting from basic to extraordinary. Next, add the 0.25 cup cold heavy whipping cream and mix for another 1-2 minutes until the frosting is light, fluffy, and holds its shape when spread.
The cold cream helps stabilize the frosting, preventing it from becoming too soft or runny. If the frosting starts to look too thick, add 1 teaspoon milk or cream at a time until it reaches your desired consistency. This is also when you add the 0.25 teaspoon fine sea salt—mix it in just until dissolved to ensure even flavor distribution.
Pipe or Spread for Decorative Perfection
Transfer the frosting to a piping bag fitted with a star tip for classic swirls, or simply spread it onto your cookies using an offset spatula. For that signature Betty Crocker look, pipe rosettes or swirls onto the centers of your cookies before they cool completely. The frosting should be thick enough to hold its shape but still spreadable—it should leave a clean, smooth finish without dripping.
Let the frosted cookies sit at room temperature for 10-15 minutes before serving to allow the frosting to set slightly. This ensures it doesn't smear when you pick up the cookies. Store any leftovers in an airtight container in the refrigerator for up to 5 days, though they rarely last that long!
Pro Tips For Making Betty Crocker Cookie Frosting
- SOFTEN BUTTER FIRST: DESCRIPTION: Betty Crocker’s recipe calls for softened butter—not melted, not fridge-cold, but pliable when pressed lightly. I learned this the hard way: room-temp butter (about 65°F) blends smoother and won’t turn your frosting greasy. If your kitchen’s warm, pop it in the microwave for 10-second bursts until it yields to gentle finger pressure.
- SIFT THE SUGAR: DESCRIPTION: Powdered sugar clumps like a grumpy old man if you don’t handle it right. Use a fine-mesh sieve or sifter to break up any lumps before measuring—this keeps your frosting silky, not grainy. (Yes, even if the recipe doesn’t say it.) Trust me, your piping bags will thank you later.
- WHIP THE CREAM STIFF: DESCRIPTION: The heavy whipping cream is the frosting’s backbone—don’t skimp on whipping it to stiff peaks. Soft peaks? You’ll end up with a sad, runny mess. Use a chilled bowl and beaters, and whip until the cream holds its shape when you lift the beaters. This isn’t the time to rush.
- ADD VANILLA LAST: DESCRIPTION: Vanilla extract (especially vanilla bean paste) is the flavor hero, so save it for the end. Mixing it in early can mute its aroma and let it cook off if you’re not careful. Stir it in after the butter and sugar are fully combined—your cookies will taste like a bakery, not a science experiment.
Essential equipment for betty crocker cookie frosting
Stand Mixer Must-Have
If you bake often, a stand mixer like the KitchenAid Artisan Series is a game-changer for this frosting. The whisk attachment whips the butter to perfect fluffiness in 2 minutes—no hand straining required.
I use mine on medium speed to avoid overheating the butter, which keeps the frosting light and stable. For occasional bakers, a hand mixer like the Cuisinart Power Advantage works just as well for small batches. 💡
Piping Bags & Tips
For that classic Betty Crocker swirl, invest in disposable piping bags (available at Walmart or Amazon) and a star tip (size Wilton 1M). Fill the bag halfway with frosting, twist the top tightly, and snip the corner.
The 1M tip creates those iconic rosettes. Pro tip: Chill the piping bag in the freezer for 5 minutes before use—this prevents the frosting from oozing out too quickly. 🎨
Offset Spatula
An offset spatula (like the OXO Good Grips) is my go-to for spreading frosting evenly. The angled blade lets you control thickness while keeping your fingers clean. For thin, even layers, hold the spatula at a 45-degree angle and spread in smooth strokes.
If you’re decorating cupcakes, use the spatula to create peaks or swirls by dragging it through the frosting in a circular motion. ✨
Fine-Mesh Sieve
A fine-mesh sieve (like the Microplane Food Mill) is non-negotiable for sifting powdered sugar. It eliminates clumps that would otherwise make your frosting grainy. I also use it to press any lumps out of the finished frosting if they sneak in.
For extra smoothness, press the frosting through the sieve twice—once before mixing and once after. 🍚
Digital Kitchen Scale
While measuring cups work, a digital kitchen scale (like the Escali Primo) ensures precision—especially for the powdered sugar and butter. Weighing ingredients like 2 cups powdered sugar (≈240g) guarantees consistency batch after batch.
I keep mine on my counter for all baking tasks—it’s the most accurate way to measure by weight. 💪
Mixing Bowls
Use a large stainless-steel bowl (like the Pyrex 5-quart) for mixing—it’s durable and easy to clean. For smaller batches, a glass bowl works too, but stainless steel won’t absorb odors or flavors.
Avoid plastic bowls, as they can retain grease from butter and affect future recipes. I also keep a small bowl handy for sifting sugar separately. 🥣
Nutrition facts
Frequently asked questions
Can I make this frosting without a mixer?
Use a sturdy wooden spoon or rubber spatula to mix the ingredients by hand. Start by creaming the butter with a fork until light and fluffy (about 3-5 minutes of vigorous stirring). Then gradually fold in the powdered sugar with the spatula until smooth. The heavy cream and vanilla can be mixed in last. Just be prepared for more elbow grease—this frosting is easier with a mixer, but doable by hand if needed.
Why did my frosting turn out grainy?
Graininess usually means unsifted powdered sugar or butter that wasn't creamed properly. Always sift the sugar first, and make sure your butter is at room temperature but not melted. If lumps appear during mixing, press the frosting through a fine-mesh sieve to achieve that silky texture. For future batches, chill the bowl before mixing to help stabilize the sugar.
How can I make this frosting chocolate-flavored?
Replace 1 tablespoon of vanilla extract with 1 tablespoon instant cocoa powder and add 1-2 tablespoons of milk or cream to balance the dryness. For a richer chocolate taste, melt 1 ounce of dark chocolate and let it cool slightly before mixing it in. The key is to maintain the same total liquid volume to keep the frosting's consistency.
Can I use margarine instead of butter?
While it's possible, margarine lacks the flavor depth and stability of butter. For the best results, stick with unsalted butter. If you must substitute, use a high-quality European-style margarine and reduce the heavy cream by 1 tablespoon to compensate for its higher water content. The frosting will still work, but the texture and taste won't be quite the same.
How do I store leftover frosting?
Transfer any remaining frosting to an airtight container and refrigerate for up to 5 days. For longer storage, freeze portions in 1-tablespoon dollops** on parchment paper before transferring to a freezer bag. Thaw in the fridge overnight before using. To prevent a skin from forming, press plastic wrap directly onto the frosting's surface before sealing the container.