Desserts
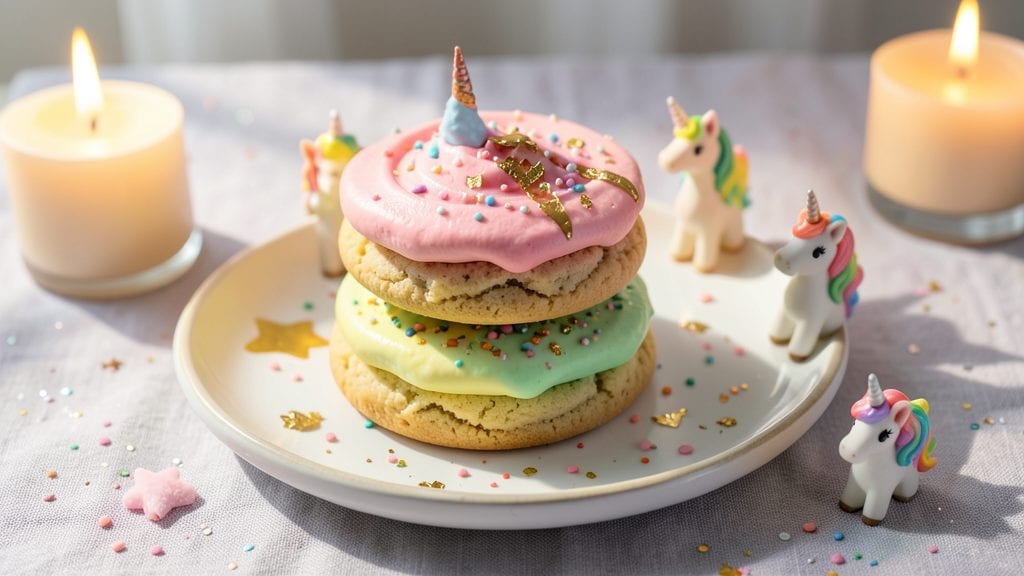
Transforming your kitchen into a pastel wonderland starts with these unicorn cookies—soft, buttery swirls that burst with edible glitter and rainbow sprinkles. The secret lies in a foolproof dough recipe that bakes to a tender yet sturdy texture, perfect for holding vibrant decorations without crumbling.
I developed this recipe after testing dozens of variations, ensuring each batch delivers that magical combination of melt-in-your-mouth flavor and eye-catching presentation.
The process begins with a classic sugar cookie dough, enriched with vanilla and a touch of almond extract for depth. Once baked to a golden edge in just 10 minutes at 350°F, the cookies cool enough to handle but stay warm enough to pipe frosting without cracking.
This is where the magic happens—using a piping bag fitted with a star tip to create swirls that mimic a unicorn's mane, then dusting with pastel-colored edible glitter for that ethereal shimmer.
What you’ll end up with is a plate of cookies that looks like they belong in a fantasy world—soft, buttery centers with swirls of frosting that catch the light, and a sprinkle of glitter that makes every bite feel like a celebration.
The frosting is light enough to pipe neatly but sturdy enough to hold sprinkles without sliding off, ensuring each cookie is as delicious as it is visually stunning.
These cookies are perfect for birthdays, holidays, or simply treating yourself to something whimsical. The recipe scales easily, so you can make a single batch for a small gathering or double it for a crowd.
Whether you're decorating with your kids or crafting them for a special occasion, this recipe delivers results that are both professional and magical.
Ingredients for unicorn cookies
Buttery dough, dreamy frosting, and a sprinkle of magic—here’s everything you need for unicorn cookies that look like they belong in a fairy tale.
| Ingredient | Amount | Notes |
|---|---|---|
| Unsalted Butter 🧈 | 1 cup | Cold, cubed for cutting into dough |
| Granulated Sugar 🍚 | 1 ½ cups | Superfine preferred for smooth texture |
| Light Brown Sugar 🍚 | ½ cup | Packed, for chewy centers |
| Large Eggs 🥚 | 2 whole | Room temperature for even mixing |
| Pure Vanilla Extract 💧 | 1 tbsp | High-quality for best flavor |
| Almond Extract 🌿 | ½ tsp | For subtle depth of flavor |
| All-Purpose Flour 🌾 | 3 ½ cups | Sifted for light texture |
| Baking Powder 🍃 | 1 tsp | Ensures proper rise |
| Salt 🧂 | ½ tsp | Fine sea salt preferred |
| Powdered Sugar 🍚 | 3 cups | For light, fluffy frosting |
| Heavy Whipping Cream 🥛 | 1 cup | Cold for stiff peaks |
| Pastel Food Coloring 🎨 | 1 tsp | Gel-based for vibrant hues |
| Edible Glitter ✨ | ¼ cup | Pastel colors for magical shimmer |
| Rainbow Sprinkles 🌈 | 1 cup | Nonpareils for classic look |
| Piping Gel 🎂 | 1 tsp | Optional for extra stability |
The butter is non-negotiable here—European-style or Plugrá makes all the difference. Grab it cold from the fridge (not the butter tub—it gets too warm). The pastel food coloring? Wilton gel or AmeriColor are the gold standards—they don’t bleed like liquid dyes. For the sprinkles, Sprinkles Galore or Jolly Rancher nonpareils are my go-to—they’re vibrant and don’t melt into the frosting. If you’re using edible glitter, Lily’s Sugar Glass or Sugar Magic brands stay put best. Pro tip: measure your powdered sugar first, then sift it—this cuts down on dust everywhere.
No almond extract? A pinch of ground almonds (1/2 tsp) adds a similar nutty depth, though it’s not quite the same. Short on butter? Coconut oil works in a pinch, but the flavor won’t be as rich. For the frosting, if you can’t find heavy whipping cream, Cool Whip thawed overnight gives similar texture (though it won’t be quite as stable). The piping gel is optional but worth it—it helps the frosting hold its shape under sprinkles. If you skip it, chill your frosting for 30 minutes before piping for better structure. And if you’re feeling fancy, swap the rainbow sprinkles for edible pearls or gold leaf flakes for a luxe touch.
Dough keeps for 5 days in the fridge, wrapped tightly in plastic. Frosting? 3 days max—it starts to dry out after that. For the glitter and sprinkles, store them in airtight containers away from light (they fade fast). If you’re prepping ahead, bake the cookies, then freeze them on a tray before transferring to a bag. Once frosted, they’re best eaten the same day—the glitter loses its sparkle if left out too long. And trust me, the first batch won’t be perfect (mine never is)—save the ‘oops’ cookies for ice cream toppings. They’re still delicious!
Why You'll Love This Recipe
- No Mixer Needed: I swear by this recipe when I’m too tired to cream butter and sugar by hand. Just toss the softened butter with both sugars—granulated and that rich brown kind—and let the stand mixer (or your arms) do the work. The eggs and vanilla blend right in without a fight.
- Buttery Vanilla Bomb: That combo of brown and white sugar? It’s pure magic—caramel undertones with a soft, melt-in-your-mouth crunch. Add the vanilla extract at the end, and suddenly, every bite tastes like a hug from a bakery. (Yes, even when I burn the edges.)
- Party in a Jar: These freeze like champs, so I bake a batch on Sundays and pull them out for birthdays, potlucks, or when my kid’s soccer team needs snacks. Toss them in a container, and they’ll stay fresh for weeks—no sad, dry cookies here.
- Pantry Staple Power: Honestly, you’re using ingredients you already own. Butter, sugar, eggs, vanilla? That’s it. No weird substitutions or last-minute grocery runs. My wallet (and my time) thank me every time I pull this recipe out.
Step-by-step instructions for pastel swirl cookies with edible magic
Here's how to create dreamy pastel cookies with shimmering frosting that looks straight out of a fairy tale.
Cream the Butter and Sugars Together
In a stand mixer fitted with the paddle attachment, combine the 1 cup unsalted butter and 1.5 cups granulated sugar with 0.5 cup light brown sugar. Beat on medium speed for 3-4 minutes until light and fluffy, scraping down the sides as needed. You'll know it's ready when the mixture nearly doubles in volume and looks pale and airy.
This step is crucial for creating those signature crackly tops and soft centers. If your butter isn't cold enough, the cookies will spread too much. If it's too cold, they'll be dense. The butter should be soft enough to leave a slight indent when pressed but still hold its shape. I like to let my butter sit at room temperature for about 30 minutes before starting.
Mix in Eggs and Extracts for Depth of Flavor
Add the 2 whole large eggs, one at a time, mixing well after each addition. Then stir in the 1 tablespoon pure vanilla extract and 0.5 teaspoon almond extract. The mixture will look slightly curdled, but don't worry—this will smooth out when you add the dry ingredients.
The almond extract adds a subtle depth that pairs perfectly with the sweetness. I always use room temperature eggs for even mixing. If your eggs are cold, they might not incorporate smoothly, leading to dense cookies. Let them sit out for about 20 minutes before using if they're straight from the fridge.
Combine Dry Ingredients for Light Texture
In a separate bowl, whisk together the 3.5 cups all-purpose flour, 1 teaspoon baking powder, and 0.5 teaspoon salt. Gradually add this mixture to the wet ingredients, mixing on low speed just until combined. Be careful not to overmix—you should still see small flour streaks. This ensures tender cookies rather than tough ones.
For even better texture, I like to sift the dry ingredients before adding them to the mixer. This aerates the flour and helps create that perfect light, fluffy crumb. The baking powder will give your cookies that gentle lift, while the salt balances the sweetness. Once combined, fold in the 1 cup rainbow sprinkles by hand using a spatula.
Chill the Dough for Perfect Shape
Divide the dough into two equal portions. In one portion, mix in 1 teaspoon pastel food coloring until evenly distributed. In the other portion, mix in 0.25 cup edible glitter along with an additional 1 teaspoon pastel food coloring of a contrasting color. Wrap both portions tightly in plastic wrap and refrigerate for at least 1 hour, or up to 24 hours for best results.
Chilling the dough is essential for two reasons: it prevents excessive spreading in the oven, and it allows the flavors to meld together. The food coloring and glitter will be more vibrant after chilling, and the dough will be easier to handle when you're ready to roll and cut. If you're short on time, you can chill the dough in the freezer for 20 minutes instead.
Roll, Swirl, and Bake to Golden Perfection
Preheat your oven to 350°F. On a lightly floured surface, roll out one portion of dough to about 1/8-inch thickness. Cut out circles using a cookie cutter. Place these on a parchment-lined baking sheet. Repeat with the second portion, then place a small spoonful of the glitter dough in the center of each circle. Swirl gently with a knife to create a marbled effect.
Bake for 10-12 minutes, or until the edges are just beginning to turn golden. The centers should still look slightly soft when you remove them from the oven—they'll firm up as they cool. Let the cookies cool on the baking sheet for 5 minutes before transferring them to a wire rack. They'll continue to set as they cool.
Frost with Whipped Cream Magic
In a large bowl, beat the 1 cup heavy whipping cream and 3 cups powdered sugar together on high speed until stiff peaks form. Add the 1 teaspoon piping gel and mix for an additional 30 seconds to stabilize the frosting. Pipe or spread this frosting onto the cooled cookies, then immediately press the remaining 1 cup rainbow sprinkles onto the frosting.
The piping gel helps create a smoother, more stable frosting that won't melt as quickly. Work quickly when adding the sprinkles—they stick best to fresh frosting. For extra sparkle, you can dust the frosted cookies with additional edible glitter using a fine-mesh sieve. Let the frosting set for 30 minutes before serving to give you that perfect, professional finish.
Pro Tips For Making Unicorn Cookies
- CREAM THE BUTTER SLOW: Mix the butter and sugars until pale yellow—not white, not beige, but that soft buttercream hue. I used to rush this, and the cookies turned out dense. Take 3-4 minutes with a stand mixer on medium; the butter needs to emulsify fully.
- USE ROOM-TEMP EVERYTHING: Cold butter and eggs straight from the fridge? Skip it. Let the butter sit out for 1 hour, crack eggs into a bowl first to check for shells, and let them warm to room temp. Cold ingredients = tough cookies. (Yes, even if you’re impatient like me.)
- WEIGH THE EGGS: Don’t eyeball those eggs—use a scale for 2 large eggs (about 100g total). I learned this the hard way when I swapped in extra yolks for richness and ended up with cookies that spread like pancakes. Stick to the weight for consistent texture.
- FOLD IN VANILLA LAST: Add the vanilla extract after all other wet ingredients are mixed. I was skeptical until I tried it—I used to add it with the butter, and the flavor felt muted. A splash at the end guarantees that bright, sweet aroma cuts through the sugar.
Pro cooking tips for great unicorn cookies
Butter Temperature Matters
Your butter’s temperature is the single most critical factor for perfect unicorn cookies. Use European-style butter or Plugrá—they have higher fat content for better flavor and texture.
Let it sit at room temperature for 30 minutes before creaming, until it’s soft enough to leave a slight indent when pressed but still holds its shape. If your butter is too warm, your cookies will spread excessively; if too cold, they’ll bake dense.
I test by pressing a piece between my fingers—it should feel pliable but not greasy. 🧈
Mix Just Until Combined
When combining the dry ingredients with the wet mixture, resist the urge to overmix. Mix on low speed just until you see small flour streaks remain—this ensures tender, cake-like cookies rather than tough, chewy ones.
Overmixing activates the gluten too much, leading to dense texture. I use a spatula to gently fold in the rainbow sprinkles by hand after the dough comes together to avoid breaking them up. 🌈
Chill Dough Properly
Chilling the dough for at least 1 hour (or up to 24 hours) is non-negotiable. This step prevents excessive spreading and allows the flavors to meld.
For the glitter-infused dough, I like to wrap it tightly in plastic wrap and press it flat in the fridge to make rolling easier. If you’re short on time, a 20-minute freezer chill works in a pinch, but the texture won’t be as consistent.
The food coloring and glitter will also be more vibrant after chilling. ❄️
Precision in Rolling
Roll your dough to a consistent 1/8-inch thickness for even baking. Use a rolling pin with measurements (like the OXO Good Grips brand) to ensure uniformity. If the dough feels too sticky, chill it for 10-15 minutes before rolling again.
For the swirl effect, place a small spoonful of glitter dough in the center of each circle and gently drag a knife through it in a spiral motion. This creates the marbled look without overmixing the colors. 🎨
Bake Until Just Golden
Bake at 350°F for 10-12 minutes, or until the edges are just beginning to turn golden. The centers should still look slightly soft when removed—they’ll firm up as they cool. Overbaking dries out the cookies, so pull them out when they look almost done.
Let them cool on the baking sheet for 5 minutes before transferring to a wire rack. This prevents cracking when you add the frosting. 🔥
Frosting Stability Secrets
For the frosting, chill the heavy whipping cream and bowl beforehand to help achieve stiff peaks. Add the piping gel last—it’s a game-changer for stability, especially when pressing on sprinkles. If your frosting isn’t holding its shape, try chilling it for 30 minutes before piping.
For extra sparkle, dust the frosted cookies with edible glitter using a fine-mesh sieve right before serving. The glitter loses its shimmer if left out too long, so work quickly! ✨
Nutrition facts
Frequently asked questions
Can I make these without edible glitter?
While edible glitter adds that magical sparkle, you can skip it and still get gorgeous cookies. Try using rainbow sprinkles, colored sugar crystals, or even gold leaf flakes for a luxurious touch. The swirl frosting and pastel colors will still make them look enchanting—just without the extra shimmer.
How do I store these cookies to keep them fresh?
Store unfrosted cookies in an airtight container at room temperature for up to 5 days. For frosted cookies, keep them in the fridge for 2-3 days max—the frosting softens in heat. To preserve the glitter's sparkle, avoid stacking them and store them flat in a single layer. If making ahead, bake the cookies, then freeze them on a tray before transferring to a bag.
Why did my cookies spread too much?
Over-spreading usually means your butter was too soft when creamed. Always use cold butter (let it sit at room temp for 30 minutes max) and chill the dough for at least 1 hour before baking. Pro tip: Place your dough between two sheets of parchment paper when rolling—it prevents sticking and makes handling easier. If they still spread, reduce your oven temp by 25°F.
Can I use this recipe for a gluten-free version?
Yes! Swap the all-purpose flour for a 1:1 gluten-free baking flour blend (like Bob's Red Mill) and add 1/4 cup extra powdered sugar to the dough. Note that gluten-free cookies often spread more, so chill the dough longer (2+ hours) and bake at 325°F instead of 350°F. The frosting will still work the same way.
What's the best way to decorate these for a party?
For a showstopping display, arrange cookies on a pastel-colored cake stand with edible pearls cascading down the sides. Use a toothpick to gently press extra sprinkles into the frosting for a 3D effect. For a unicorn theme, add mini fondant horns or gold-dusted sugar leaves to a few cookies as focal points.