Desserts
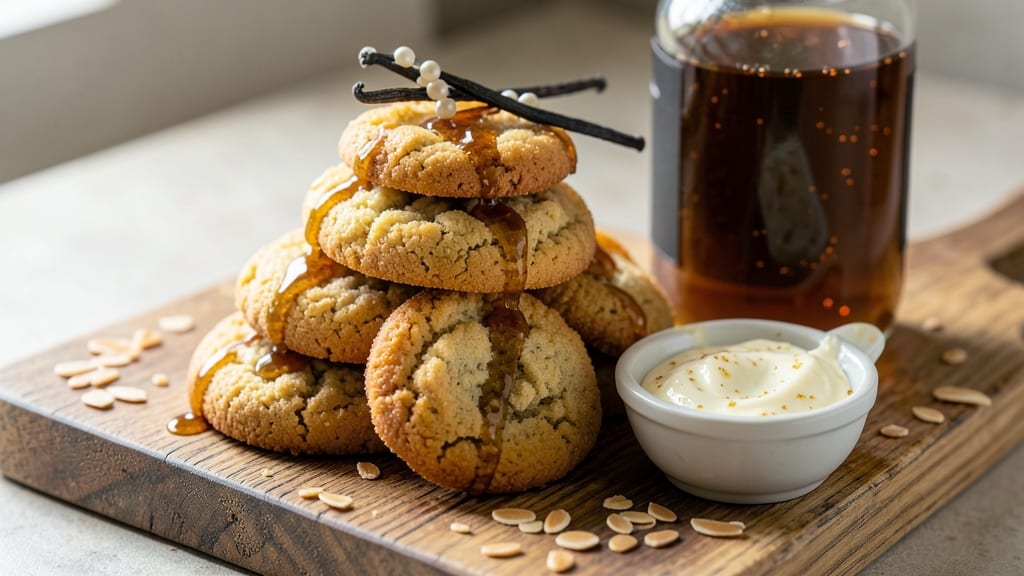
This stevia cookie recipe delivers all the buttery crunch and satisfying sweetness of classic cookies—without the sugar crash or empty calories. ✨ I developed this formula after years of experimenting with plant-based baking, and the results are cookies that taste indulgent yet align with mindful eating goals.
The key lies in balancing stevia’s natural sweetness with a touch of maple syrup for depth, creating a dough that behaves just like traditional cookie dough but with a lighter hand.
The secret to perfect texture is using a blend of almond flour and all-purpose flour, which creates that signature crispy edge while keeping the centers tender. Plant-based butter adds richness without dairy, while a pinch of salt and vanilla extract elevate the flavor profile.
These cookies bake up golden brown with just a hint of caramelization, offering that familiar comfort without compromising on health-conscious ingredients.
What you’ll end up with is a batch of cookies that’s impossible to resist—crisp at the edges, soft in the middle, and sweetened naturally. The stevia provides zero calories per teaspoon, making these perfect for guilt-free indulgence, while the buttery crunch delivers that classic cookie experience.
They’re ideal for sharing, gifting, or enjoying with a glass of almond milk.
Ready in just 20 minutes of prep and 12 minutes of baking, this recipe proves that healthy desserts can be both effortless and extraordinary. Let’s get baking!
Ingredients for stevia cookie
Eleven simple, plant-based ingredients transform into cookies that taste indulgent but align with mindful eating goals.
| Ingredient | Amount | Notes |
|---|---|---|
| Plant-Based Butter 🧈 | ½ cup | Vegan, unsalted preferred |
| Pure Maple Syrup 🍯 | ¼ cup | Grade B for depth of flavor |
| Pure Liquid Stevia 🍃 | 1 tbsp | Adjust to taste (zero-calorie) |
| Almond Flour 🌰 | 1 cup | Finely ground, blanched preferred |
| All-Purpose Flour 🌾 | ½ cup | White or whole wheat blend |
| Pure Vanilla Extract 🌿 | 1 tsp | Alcohol-free for vegan option |
| Sea Salt 🧂 | ¼ tsp | Fine grain for even distribution |
| Baking Soda 🍞 | ¼ tsp | Ensures proper rise |
| Chopped Walnuts 🥜 | ½ cup | Toasted for enhanced flavor |
| Unsweetened Almond Milk 🥛 | 2 tbsp | For dough consistency |
| Dark Chocolate Chips 🍫 | ½ cup | Vegan, 70% cocoa minimum |
The plant-based butter is non-negotiable for that signature buttery crunch—Miyoko’s or Earth Balance are my go-tos, but any vegan butter with at least 80% fat content works. The almond flour should be finely ground; Bob’s Red Mill or Anthony’s Goods are reliable brands. For the stevia, SweetLeaf or Truvia liquid varieties provide consistent sweetness without aftertaste. The maple syrup adds depth, so Grade B (darker, richer) is ideal—Wilder’s or Unhappy Camper are great options. Toast your walnuts for 5 minutes at 350°F to enhance their flavor before chopping.
No almond flour? Oat flour works in a pinch—just add an extra tablespoon of all-purpose flour to compensate for texture. Short on stevia? Monk fruit sweetener can be substituted at a 1:1 ratio, but it has a slightly different profile. The dark chocolate chips should be vegan-certified—Enjoy Life or Pascha brands are foolproof. For extra richness, replace half the almond milk with coconut cream. If your dough feels too dry, add 1 teaspoon more almond milk; if it’s sticky, chill it for 30 minutes before scooping. The baking soda is crucial—don’t swap for baking powder unless you adjust the recipe.
Store cookies in an airtight container at room temperature for up to 5 days, though they’ll likely disappear faster. For longer storage, freeze portions on a parchment-lined tray, then transfer to a bag—lasts 3 months. Reheat in the oven at 300°F for 3-5 minutes to restore crispiness. These cookies pair perfectly with chilled almond milk or a cup of herbal tea. Double the batch and freeze half for future cravings—trust me, you’ll want to.
Why You'll Love This Recipe
- No-Fuss Mixing: I swear by the 5-minute prep—just cream the plant-based butter and maple syrup, then fold in the dry stuff. No eggs, no waiting for dough to chill, just dump-and-bake simplicity.
- Maple-Stevia Magic: Honestly, the flavor combo is chef’s kiss—the maple syrup adds caramel depth while stevia keeps it from tasting cloying. That buttery almond flour edge? Pure satisfaction.
- Crowd-Pleaser Flex: Between us, these work for everything: a quick snack, holiday gifts (they freeze beautifully), or even a "healthy-ish" dessert for guests who ask for sugar-free swaps. My kids’ friends beg for seconds.
- Zero-Waste Leftovers: Bake a batch Sunday, and you’ve got breakfast (crumbled in yogurt), lunch (with peanut butter), or midnight cravings covered. The almond flour keeps them fresh for days—no sad, dry cookies here.
Step-by-step instructions for stevia cookies recipe
Here's how to create perfectly balanced cookies with zero-guilt sweetness and a satisfying crunch.
👨🍳 Step 1: Cream the Plant-Based Butter and Sweeteners
In a medium mixing bowl, combine the 0.5 cup plant-based butter with the 0.25 cup pure maple syrup and 1 tbsp pure liquid stevia. Use a hand mixer or stand mixer fitted with the paddle attachment to beat on medium speed for 2-3 minutes until the mixture becomes light and fluffy.
The butter should be soft but not melted when you start—if it's too firm, let it sit at room temperature for 10-15 minutes first. This creaming process incorporates air, which gives your cookies that signature tender yet crisp texture. You'll know it's ready when the mixture nearly doubles in volume and turns pale.
👨🍳 Step 2: Mix in Dry Ingredients and Wet Additions
In a separate bowl, whisk together the 1 cup almond flour, 0.5 cup all-purpose flour, 0.25 tsp sea salt, and 0.25 tsp baking soda. Gradually add this dry mixture to the butter-sweetener blend while mixing on low speed until just combined—you should still see small flour streaks.
Add the 1 tsp pure vanilla extract and 2 tbsp unsweetened almond milk to the dough. Mix on low speed for another 30 seconds until fully incorporated. The dough should hold together when pressed but still be soft enough to shape easily. If it feels too dry, add 1 tsp more almond milk.
🥘 Step 3: Fold in Walnuts and Chocolate Chips
Using a silicone spatula, gently fold in the 0.5 cup chopped walnuts and 0.5 cup dark chocolate chips until evenly distributed throughout the dough. Be careful not to overmix—just combine until the nuts and chocolate are dispersed in the batter.
Here's the thing—walnuts should be toasted before adding for maximum flavor. If you haven't toasted them yet, spread them on a baking sheet and toast in a 350°F oven for 8-10 minutes until fragrant. Let them cool before folding into the dough. The chocolate chips will melt slightly during baking, creating pockets of gooey goodness in each bite.
🔪 Step 4: Chill and Portion the Dough
Cover the mixing bowl with plastic wrap and refrigerate for at least 30 minutes (or up to 24 hours for best results). Chilling the dough prevents excessive spreading in the oven and allows the flavors to meld. The dough will firm up enough to handle without sticking to your fingers.
Once chilled, preheat your oven to 350°F and line a baking sheet with parchment paper. Using a cookie scoop or tablespoon, portion the dough into 12 equal balls (about 1 tablespoon each) and place them 2 inches apart on the prepared baking sheet. Flatten each ball slightly with your palm to create ¼-inch thick cookies.
🔥 Step 5: Bake to Golden Perfection
Bake the cookies for 10-12 minutes until the edges are golden brown and the centers still appear slightly underdone. The cookies will continue to set as they cool, so don't overbake. I know it's tempting to check early, but resist—underbaked cookies in the center ensure that perfect chewy texture.
Remove the baking sheet from the oven and let the cookies cool on the sheet for 5 minutes before transferring them to a wire rack. This brief resting period prevents them from cracking as they cool completely. The walnuts should be toasty, the chocolate chips slightly melted, and the edges crisp while maintaining a soft center. Enjoy warm with a glass of almond milk for the full experience!
Pro Tips For Making Stevia Cookie
- Chill the Dough: Stevia throws off texture if the dough’s too warm—it makes cookies spread like pancakes. Press the dough into a flat disc, wrap it in plastic, and refrigerate for at least 2 hours (overnight is better). Yes, even if you’re impatient like me, the edges will stay crisp instead of turning into a sad, flat disc.
- Measure Stevia Precisely: Liquid stevia is sneaky—one drop too much and your cookies taste like artificial sweetener. Use a dropper or syringe for accuracy, and mix it directly into the maple syrup before adding wet ingredients. Trust me, your taste buds will notice the difference.
- Bake in Stages: Plant-based butter burns faster than regular butter, so start with 350°F (175°C) for 8–10 minutes, then drop to 325°F (160°C) until golden. This two-step bake gives you even edges without a single crispy disaster.
- Mix Almond Flour First: Almond flour clumps like a grumpy cat if you toss it in dry. Whisk it with the all-purpose flour before adding wet ingredients—this keeps the dough smooth and prevents lumpy cookies. I learned this the hard way after scraping dough off my fingers for 10 minutes.
Regional styles of this recipe
Southern Almond-Crunch Style
Inspired by classic Southern cookie traditions, this variation swaps walnuts for pecans and adds a touch of cinnamon—just ½ teaspoon—for warmth. I like to toast the pecans with a pinch of sea salt and ½ teaspoon brown sugar (or maple syrup) before folding them in.
This creates a caramelized crunch that’s pure Southern comfort. Serve with a glass of sweet tea or peach iced tea for the ultimate regional pairing. 🥜
European Almond Joy Twist
For a European-inspired take, replace the walnuts with sliced almonds and add ½ cup shredded coconut (unsweetened, toasted lightly). A splash of orange zest—about 1 teaspoon—brings a citrusy brightness that mimics the flavors of Almond Joy bars.
Bake these slightly longer (13-15 minutes) for a firmer texture, perfect with a cup of Earl Grey tea. The coconut adds a tropical flair that feels like a vacation in every bite. 🌴
Nut-Free Adaptation
If you’re avoiding nuts, swap the walnuts for chopped dried apricots or raisins—both add natural sweetness and chewiness. For extra richness, fold in ½ cup vegan white chocolate chips instead of dark.
This version works beautifully with spiced chai tea or a sprinkle of cinnamon sugar after baking. The dried fruit keeps the texture satisfying while making the cookies more inclusive. 🍯
Mexican Cinnamon-Spiced
Give your cookies a fiesta flair by adding ½ teaspoon ground cinnamon and ¼ teaspoon smoked paprika to the dry ingredients. Replace half the chocolate chips with chopped dried pineapple for a tropical touch.
These cookies pair perfectly with Mexican hot chocolate or a horchata latte. The spices add depth, making them feel like a cozy dessert with a global twist. 🌶️
Japanese Matcha Green Tea
For a sophisticated twist, replace 1 tablespoon of almond flour with 1 tablespoon matcha powder (ceremonial grade) and reduce the stevia to ½ tablespoon. The earthy, umami notes of matcha balance the sweetness beautifully.
Top with white sesame seeds before baking for an elegant finish. Serve with jasmine green tea or genmaicha for an authentic Japanese-inspired treat. 🍵
Classic Oatmeal Raisin
Swap the almond flour for 1 cup rolled oats (blended into oat flour) and add ½ cup raisins or chopped dates. Reduce the all-purpose flour to ¼ cup to maintain texture.
These cookies taste like a nostalgic childhood favorite but with natural sweetness. Pair with warm apple cider or vanilla almond milk for a comforting, homestyle dessert. 🍂
Nutrition facts
Frequently asked questions
Can I use powdered stevia instead of liquid?
Yes, but you'll need to adjust the ratio. Liquid stevia is typically 1:1 with sugar, while powdered versions vary by brand—check the packaging for conversion guidelines. For this recipe, start with 1 teaspoon powdered stevia (about 1/4 teaspoon by volume) and taste test before baking. Powdered stevia can sometimes have a bitter aftertaste if overused.
Why do my stevia cookies taste bitter?
Bitter flavor usually comes from overusing stevia or using low-quality brands. Stick to reputable liquid stevia like SweetLeaf or Truvia, and measure carefully—1 tablespoon is perfect for this recipe. The maple syrup helps balance the sweetness, so don't skip it. If your batch tastes off, try adding 1/4 teaspoon vanilla extract or a pinch of sea salt to enhance flavor.
How do I store these cookies to keep them fresh?
Store in an airtight container at room temperature for up to 5 days, though they'll likely disappear faster! For longer storage, freeze portions on a parchment-lined tray, then transfer to a bag—lasts 3 months. To restore crispiness, reheat in a 300°F oven for 3-5 minutes. The almond flour keeps them fresh longer than traditional cookies.
Can I make these cookies gluten-free?
Replace the 0.5 cup all-purpose flour with 0.5 cup gluten-free 1:1 baking flour (like Bob's Red Mill). For best texture, also add 1/4 cup cornstarch to the dry ingredients. The almond flour already makes these naturally lower in gluten, so this substitution works well without compromising structure.
What's the best way to adjust sweetness for kids?
For younger palates, add 1/2 teaspoon extra vanilla extract and 1/4 teaspoon cinnamon to enhance sweetness perception. You can also lightly toast the walnuts with 1/8 teaspoon cinnamon before adding them to the dough. The chocolate chips provide natural sweetness too—just make sure to use vegan chips with at least 70% cocoa for balanced flavor.