
Desserts
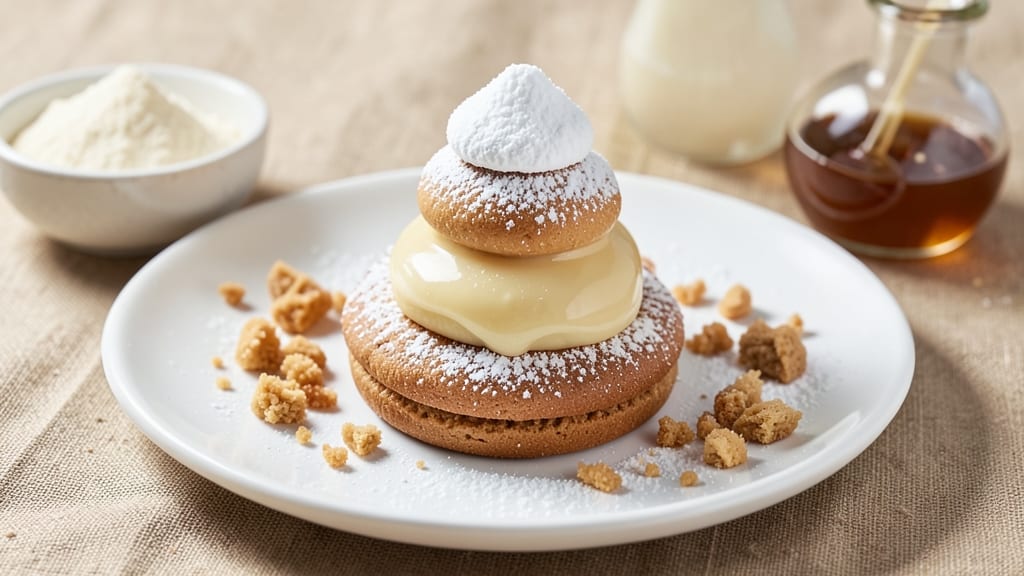
This snowman cookies recipe brings holiday magic to your kitchen with crisp edges and snowy white frosting that kids and adults will adore. 🌟 I developed this recipe after years of baking holiday cookies, and the secret to perfect snowmen lies in the dough's texture and frosting consistency—both easier than you'd think.
The dough rolls out smoothly, holds its shape, and bakes to a golden crisp, while the buttercream frosting stays firm enough to pipe but soft enough to spread.
The beauty of these cookies is their simplicity: just a few ingredients transform into festive treats that look like they came from a holiday catalog. You'll shape the dough into classic snowman forms with stacked circles, then decorate with candy eyes, buttons, and a carrot nose.
The frosting sets quickly but stays creamy, making assembly a breeze. My daughter Lily helps with the decorating, and we always end up with a plate that looks like it belongs on a Christmas table.
By the time you're done, you'll have a batch of cookies that taste as good as they look—soft, buttery centers with crisp edges, all topped with that signature snowy white frosting. The aroma of vanilla and butter fills the kitchen, creating an instant holiday atmosphere.
These cookies are perfect for gifting, holiday parties, or simply enjoying with a cup of hot cocoa while watching snowfall outside.
Pro tip: Chill the dough for 30 minutes before shaping to prevent spreading, and use a piping bag for the frosting to create those perfect snowman details. The recipe makes about 24 cookies, so you'll have plenty to share—or save some for yourself. Let's get baking these festive treats!
Ingredients for snowman cookies
Just 14 ingredients create these magical snowmen with crisp edges and dreamy frosting!
| Ingredient | Amount | Notes |
|---|---|---|
| All-Purpose Flour 🌾 | 3 ½ cups | Sifted for light texture |
| Unsalted Butter 🧈 | 1 cup | Cold, cubed for dough |
| Granulated Sugar 🍚 | ¾ cup | White sugar preferred |
| Vanilla Extract 🌿 | 1 tbsp | Pure extract, not imitation |
| Large Eggs 🥚 | 1 whole | Room temperature |
| Powdered Sugar 🍚 | 4 cups | For frosting, sifted |
| Heavy Whipping Cream 🥛 | 1 cup | Cold for stiff peaks |
| Vanilla Bean Paste 🌿 | 1 tsp | Or 0.5 tbsp extract |
| Milk 🥛 | 1 tbsp | Adjust for consistency |
| Candy Eyes 👁️ | 24 pieces | Assorted sizes |
| Mini Chocolate Chips 🍫 | 1 cup | For buttons |
| Orange Carrot 🥕 | 1 whole | For noses, peeled |
| Salt 🧂 | ½ tsp | Fine sea salt |
| Baking Powder 🌶️ | 1 ½ tsp | For lift |
The butter needs to be cold—cut it into cubes and keep it chilled until mixed. I grab European-style butter from Whole Foods or Trader Joe's for that extra richness, but regular unsalted works too. For the powdered sugar, Domino brand is my go-to—it's ultra-fine and dissolves perfectly in the frosting. The vanilla extract? Nielsen-Massey is worth the splurge—it has that deep, complex flavor that jarred stuff can't match. Pro tip: If you're in a rush, microwave the butter 20 seconds to soften it slightly before mixing, but don't let it melt!
No vanilla bean paste? Double the extract—just know it won't be as rich. Short on powdered sugar? Confectioners' sugar from the bulk section works great, but sift it well to avoid lumps. The frosting can be made a day ahead—just add a splash of milk to loosen it before piping. For the carrot nose, use a small round cookie cutter to make uniform slices, or just peel and slice thinly. The dough will spread if it's too warm, so chill it for 30 minutes before rolling—trust me on this one!
Store the dough between parchment paper in the fridge for up to 3 days, and the frosting in an airtight container for 5 days. These cookies freeze beautifully too—just frost them before freezing and let them thaw at room temp for 10 minutes before serving. I always make a double batch because they disappear fast! The frosting sets quickly, so pipe the snowmen first, then decorate while it's still soft. Leftovers? Wrap them individually in parchment—they stay fresh for days!
Why You'll Love This Recipe
- No-Fuss Dough: I swear, mixing these cookies takes less time than deciding what to watch on TV—just cream butter and sugar, toss in eggs and vanilla, then fold in flour. You’ll have dough ready while your coffee finishes brewing.
- Buttery Vanilla Hug: That rich butter-sugar base with vanilla? It’s like a warm, cozy blanket for your taste buds. The eggs bind it all together so each bite has that tender, melt-in-your-mouth magic.
- Holiday or Snack: Decorate them with sprinkles for a kid’s birthday, frost with white icing for Christmas, or leave plain for a quick afternoon treat. They’re just as happy on a plate as they are in a lunchbox.
- Budget Baking Wins: Flour, butter, sugar—these are pantry staples that won’t break the bank. Plus, the dough keeps for days, so you can bake a batch and enjoy them all week without extra shopping trips.
Step-by-step instructions for festive snowman cookies
Here's how to make these adorable snowmen with perfectly crisp edges and fluffy frosting!
👨🍳 Step 1: Mix the Cookie Dough for Perfect Texture
In a large mixing bowl, combine the 3.5 cups all-purpose flour, 1.5 tsp baking powder, and 0.5 tsp salt. Whisk until evenly distributed—those little lumps make for dense cookies. In a separate bowl, beat the 1 cup cold cubed butter and 0.75 cup granulated sugar together until light and fluffy, about 2-3 minutes.
Add the 1 whole large egg and 1 tbsp vanilla extract, mixing until fully incorporated. Gradually add the dry ingredients to the wet, mixing just until combined. Don't overmix—you want to keep those gluten strands short for tender cookies. Fold in the 1 cup mini chocolate chips (for buttons) and 1 peeled orange carrot (for noses), reserving a few extra for decorating later.
🔥 Step 2: Shape and Bake for Crisp Edges
Preheat your oven to 350°F and line two baking sheets with parchment paper. Scoop the dough into 1-tablespoon portions (about 24 total) and roll them into balls. Place them 2 inches apart on the prepared sheets—they'll spread slightly during baking. Flatten each ball slightly with your palm to create the snowman's base shape.
Bake for 10-12 minutes until the edges are light golden brown but the centers still look soft. They'll firm up as they cool. Let them rest on the baking sheet for 5 minutes before transferring to a wire rack—this prevents cracking when you add frosting later. Here's the thing—if they spread too much, your next batch will be perfect!
🥘 Step 3: Make the Snowy Frosting
In a medium bowl, whip together the 1 cup cold heavy whipping cream until it forms soft peaks. Gradually add the 4 cups powdered sugar and 1 tsp vanilla bean paste, mixing until smooth. Add the 1 tbsp milk if needed to reach your desired consistency—it should be thick enough to hold peaks but still spreadable.
This is where the magic happens! The cold cream ensures stiff peaks that won't melt immediately when you pipe the frosting. If your frosting looks too runny, chill it for 10 minutes before using. The frosting should be bright white and glossy—perfect for creating that snowy snowman effect.
🎨 Step 4: Assemble Your Snowmen
Using a piping bag fitted with a large round tip (or a plastic bag with a corner snipped off), pipe frosting onto each cooled cookie to create the snowman's body. Stack three cookies of varying sizes to form the snowman's three sections. Press the candy eyes into the top cookie's frosting and use the reserved mini chocolate chips and carrot pieces for mouths and noses.
For extra flair, add frosting details like scarves or buttons. Let the frosting set for 15 minutes before serving—this gives the cookies time to "chill" (literally) and hold their shapes. The contrast between the crisp cookie edges and fluffy frosting makes these snowmen irresistibly cute and delicious!
Pro Tips For Making Snowman Cookies
- Use Cold Butter for Dough: I learned this the hard way—warm butter makes the dough too soft, and those snowman cookies will spread like a lazy winter thaw. Cut the butter straight from the fridge (or let it sit in the freezer for 10 minutes) before creaming it with sugar. The dough will hold its shape better, and your snowmen won’t end up looking like puddles.
- Weigh Your Flour Like a Pro: Scooping flour from the bag is a recipe for disaster—your cookies will turn out dense or dry. Use a kitchen scale and measure the flour by weight (usually 1 cup = ~125g for all-purpose). Pack the flour lightly into the measuring cup, then level it off with a knife. This keeps the texture consistent every time.
- Chill the Dough Twice: Yes, even if you’re impatient like me. After mixing, wrap the dough in plastic and refrigerate for at least 2 hours. Then, shape the snowmen and freeze them on a tray for 15 minutes before baking. This prevents cracking and ensures they hold their shape—no sad, flattened snowmen here.
- Bake with a Metal Tray: Glass or ceramic pans bake unevenly, leading to over-browned edges or undercooked centers. Use a dark metal baking sheet for even heat distribution—your snowman cookies will bake faster and develop that perfect golden color without burning. Line it with parchment for easy cleanup.
Best sauces and condiments for snowman cookies
Classic Vanilla Frosting
The recipe already calls for a simple buttery vanilla frosting that’s perfect for snowmen—it’s light, sweet, and sets just enough to hold decorations. I like using Nielsen-Massey vanilla extract for depth, but if you’re short on time, imitation vanilla works in a pinch.
For extra stability, chill the frosting for 10 minutes before piping—this prevents messy drips while decorating. 🥛
Chocolate Drizzle
Add a festive twist by drizzling melted dark chocolate (I use Ghirardelli 60% cacao) over the frosting. Warm 2 oz chocolate chips with 1 tsp coconut oil in a microwave-safe bowl in 20-second bursts, then drizzle over the snowmen’s bases for a snowy effect.
Let it set for 5 minutes before adding candy details.
Caramel Glaze
For a golden touch, make a quick caramel glaze by simmering ½ cup granulated sugar with 2 tbsp water until amber-colored, then whisking in ¼ cup heavy cream. Drizzle over the frosting for a glossy finish.
This works especially well if you’re making these for a holiday gift basket—the caramel adds a sophisticated contrast to the snowy white frosting. 🌟
Cinnamon Sugar Coating
Roll the baked cookies in a mix of 2 tbsp powdered sugar and 1 tsp cinnamon before frosting for a subtle warmth. This pairs beautifully with the vanilla frosting and adds a cozy spice note.
I often do this for a winter-themed cookie swap—it’s a crowd-pleaser that feels extra festive. Sprinkle with a pinch of sea salt for balance.
Fruit Jam Accents
For a fruity surprise, spread a thin layer of raspberry jam (like Smucker’s Unsweetened) between the snowman’s stacked cookies. The tartness cuts through the sweet frosting, and the red adds a pop of color.
This works especially well if you’re making these for a Valentine’s Day twist—just swap the candy eyes for heart-shaped sprinkles. 🍓
Nutrition facts
Frequently asked questions
Can I make these snowman treats without a piping bag?
Use a plastic sandwich bag instead—simply snip off a tiny corner and squeeze the frosting directly onto your cookies. For the classic snowman look, pipe three frosting circles (stacked) on each cookie base, then add decorations. If you're short on time, you can also spread the frosting with a butter knife for a rustic texture.
How do I prevent the frosting from melting too quickly?
Chill the frosting for 10-15 minutes before piping, and work in a cool kitchen (around 65°F or cooler). Store any leftovers in the fridge for up to 3 days, and bring to room temperature before serving. For extra stability, add 1 extra tablespoon of powdered sugar to the frosting recipe—this helps it set faster.
What if my cookies spread too much during baking?
This usually happens when the dough is too warm. Always chill the dough for 30 minutes before shaping, and use 1-tablespoon scoops (not rounded). For next time, try baking at 325°F instead of 350°F—the lower heat gives the cookies time to set without spreading. Pre-chilling the baking sheet also helps!
Can I make these cookies gluten-free?
Yes, but with adjustments! Replace the all-purpose flour with a 1:1 gluten-free baking flour blend (like Bob's Red Mill) and add ½ teaspoon xanthan gum to improve texture. The frosting stays the same, but gluten-free cookies may be slightly crumbly—press them gently when stacking to prevent falling apart.
How far ahead can I decorate these cookies?
Decorate them up to 24 hours ahead—just store them in an airtight container at room temperature. For longer storage, freeze the decorated cookies (without frosting) for up to 1 month, then thaw at room temperature for 30 minutes before adding frosting. The frosting will need to set again after thawing.