Desserts
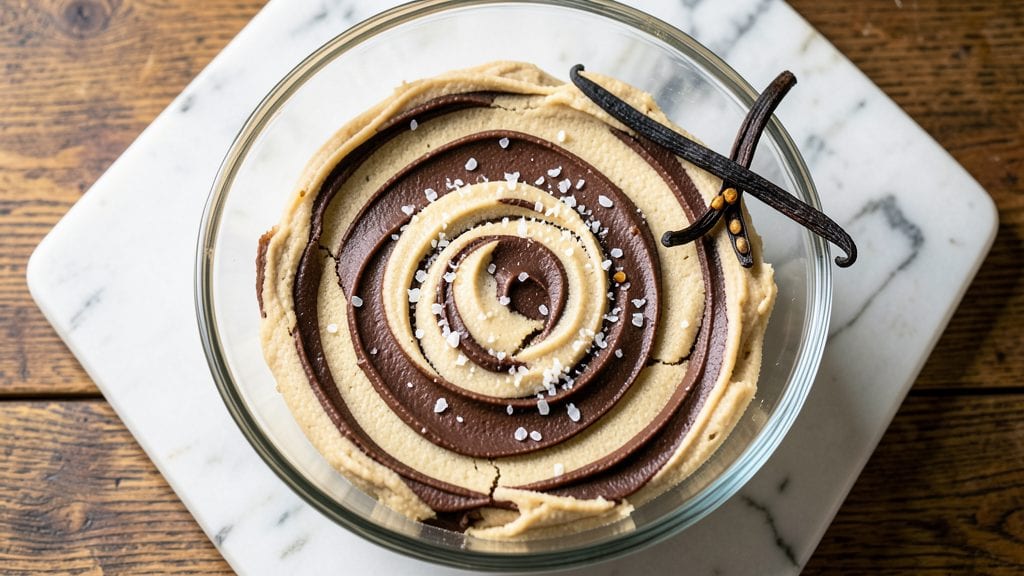
This marble cookie recipe delivers the classic vanilla-chocolate swirls that make every bite a perfect contrast of flavors. The secret lies in carefully mixing two distinct doughs—one vanilla, one chocolate—and folding them together just enough to create those signature marbled streaks without overworking the dough.
After years of testing, I’ve refined the technique to ensure each cookie has the right balance of sweetness and richness.
The process begins with two simple doughs that come together effortlessly, though precision matters when folding. You’ll shape them into classic rounds, bake until golden, and let them cool just enough to hold their shape without becoming too soft.
The result? Cookies with crisp edges, tender centers, and those coveted swirls that make them impossible to resist. This recipe is foolproof for beginners but rewarding enough for experienced bakers.
What sets these apart is the harmony of flavors—vanilla’s warmth meets chocolate’s depth in every bite, creating a texture that’s both crisp and chewy. The marbled effect isn’t just visual; it’s a promise of balanced sweetness with each mouthful.
Whether you stick to the classic version or add nuts or chocolate chips, these cookies will become a staple in your dessert rotation.
Perfect for holidays, potlucks, or a simple treat, these marble cookies are designed to impress without requiring advanced skills. Let’s get started on creating your own batch of these timeless sweets.
Ingredients for marble cookie
Two doughs, one perfect fold—these cookies need just 12 ingredients for swirls that taste like nostalgia.
| Ingredient | Amount | Notes |
|---|---|---|
| All-Purpose Flour 🌾 | 3 ½ cups | Sifted for light texture |
| Unsalted Butter 🧈 | 1 cup | Cold, cubed, full-fat preferred |
| Granulated Sugar 🍚 | 1 cup | White or light brown |
| Vanilla Extract 🌸 | 1 tbsp | Pure, high-quality vanilla |
| Vanilla Bean Paste 🌸 | 1 tbsp | For extra depth of flavor |
| Large Eggs 🥚 | 2 whole | Room temperature for even mixing |
| Baking Powder 🧂 | 1 tsp | For proper rise |
| Salt 🧂 | ½ tsp | Fine sea salt preferred |
| Cocoa Powder 🍫 | ½ cup | Dutch-processed for smoothness |
| Instant Espresso Powder ☕ | 1 tsp | Enhances chocolate flavor |
| Vanilla Sugar 🍚 | 1 tbsp | Optional but adds vanilla notes |
| Powdered Sugar 🍚 | ½ cup | For dusting after baking |
The butter and flour are your foundation—don’t skimp. Land O’Lakes or Plugrá butter stays cold longer for easier folding, and King Arthur flour gives that tender crumb. If you’re in a pinch, store-brand butter works, but bring it to room temp first. The cocoa matters too—Hershey’s Special Dark or Valrhona for that deep chocolate flavor. For the vanilla, I always grab McCormick pure extract—it’s worth the splurge. The vanilla bean paste? Trader Joe’s has a great one, or you can make your own by scraping seeds from a pod.
No vanilla bean paste? Double the extract—it’s not the same, but close. Out of baking powder? Baking soda plus cream of tartar at half the amount works. The espresso powder is optional but makes the chocolate taste richer—Starbucks or Folgers work fine. For the vanilla dough, if you’ve got vanilla sugar (like Sugarfina), use it—it adds subtle vanilla notes without extra liquid. The powdered sugar? Confectioners’ sugar is key—don’t use granulated or you’ll get gritty cookies. And if you’re feeling fancy, add a pinch of cinnamon to either dough for warmth.
Store dough balls in the fridge for up to 48 hours—they’ll keep their shape better. Baked cookies stay fresh in an airtight container for 5 days, but honestly, they’re best eaten within 2 days. For gifts, freeze baked cookies in layers with parchment between them—they’ll last 3 months. Pro tip: Let them cool completely before storing, or they’ll get soggy. And if you’ve got leftovers? Crush them for ice cream topping—trust me.
Why You'll Love This Recipe
- No-Fuss Marble Magic: I swear by this dough—just cream butter and sugar, fold in vanilla, and let the swirls do the work. No rolling, no fuss, and the swirling happens while you sip your coffee.
- Vanilla Double Whammy: That vanilla bean paste? It’s the secret weapon. The classic extract gives warmth, but the specks of real vanilla? Pure luxury in every bite. (Yes, even my picky teens notice.)
- Party in a Jar: These freeze like champs, so I bake half now and half later. Perfect for holidays, potlucks, or when you suddenly remember it’s your coworker’s birthday. Just pull from the freezer, no thawing needed.
- Budget Sweet Spot: Butter and flour are pantry staples, and a little vanilla paste stretches far. I make two batches for the price of one store-bought treat—plus, they taste like you slaved over them. (Between us, I’ve been known to sneak extra dough.)
Step-by-step instructions for vanilla-chocolate swirl cookies
Here's how to create those iconic marble cookies with a flawless swirl every time.
Cream the Butter and Sugar Together
In a large mixing bowl, combine the 1 cup unsalted butter and 1 cup granulated sugar. Using a hand mixer or stand mixer fitted with the paddle attachment, beat on medium speed for 3-4 minutes until the mixture is light and fluffy. You'll know it's ready when it nearly doubles in volume and turns pale in color.
This step is crucial because it incorporates air into the dough, which creates those beautiful crackly tops and helps the cookies spread just right. If the butter isn't fully creamed, your cookies might turn out dense instead of tender. I like to scrape down the sides of the bowl with a spatula every minute or so to ensure everything gets mixed evenly.
Add Eggs and Vanilla Flavors
Add the 2 whole large eggs, one at a time, mixing well after each addition. Then stir in the 1 tablespoon vanilla extract and 1 tablespoon vanilla bean paste, followed by the 1 tablespoon vanilla sugar. Mix on low speed until everything is fully combined and smooth.
The vanilla bean paste adds an extra layer of flavor that regular extract can't match. Here's the thing—don't rush this step. The mixture might look slightly curdled after adding the eggs, but once you incorporate the dry ingredients, everything will come together perfectly. I always use room-temperature eggs for even mixing and better texture.
Mix the Dry Ingredients Separately
In a separate bowl, whisk together the 3.5 cups all-purpose flour, 1 teaspoon baking powder, 0.5 teaspoon salt, 0.5 cup cocoa powder, and 1 teaspoon instant espresso powder. Sift the dry ingredients into the wet mixture on low speed until just combined. Be careful not to overmix—you should still see a few flour streaks.
Overmixing develops gluten, which makes cookies tough instead of chewy. The espresso powder might seem like an odd addition, but it enhances the chocolate flavor and gives the cookies a subtle depth. After mixing, fold in the 1 tablespoon vanilla sugar by hand using a silicone spatula to ensure even distribution.
Divide and Swirl the Dough
Divide the dough in half. Place one half in a separate bowl and set aside. To one portion, add a few extra tablespoons of the 0.5 cup cocoa powder to deepen the chocolate flavor. Using a silicone spatula, gently fold the extra cocoa powder into the dough until evenly distributed.
Now, here's the fun part—create the marble effect. Take one portion of the vanilla dough and roll it into a log about 1 inch in diameter. Wrap it in plastic wrap and chill in the fridge for 30 minutes. Then, roll out the chocolate dough into a ¼-inch thick rectangle on a piece of parchment paper. Unwrap the chilled vanilla dough and place it in the center of the chocolate dough. Using a sharp knife, gently cut through the chocolate dough at ¼-inch intervals, then twist the knife to create swirls. Roll the entire thing into a log and wrap it back up in plastic wrap. Chill for another 30 minutes before baking.
Bake to Golden Perfection
Preheat your oven to 350°F. Once preheated, slice the chilled dough log into ½-inch thick rounds and place them 2 inches apart on a parchment-lined baking sheet. Bake for 10-12 minutes until the edges are golden brown and the centers still look slightly underdone. They'll continue cooking on the hot pan after you remove them from the oven.
Let the cookies cool on the baking sheet for 5 minutes before transferring them to a wire rack. While they're still warm, dust them with the 0.5 cup powdered sugar for a beautiful finish. The key to perfect marble cookies is patience—chilling the dough ensures the swirls stay intact, and baking them just until golden keeps them soft and chewy inside with crispy edges.
Pro Tips For Making Marble Cookie
- CHILL THE DOUGH: Marble cookies need patience—pop the dough in the fridge for at least 2 hours, preferably overnight. I learned this the hard way when my first batch spread into a sad, flat pancake instead of holding its shape. Cold butter behaves better, and the flavors meld overnight for that classic vanilla depth.
- WEIGH THE BUTTER: Unsalted butter is finicky—pack it tightly into the measuring cup or use a kitchen scale for accuracy. I used to eyeball it, and my cookies ended up either greasy or dry. Aim for 225g (1 cup packed) to guarantee that tender yet sturdy texture marble cookies need.
- SWIRL FAST, STOP SHORT: When folding in vanilla bean paste, work quickly and stop just before the dough looks fully mixed. The swirl effect comes from visible streaks, not a uniform color. Overmixing turns your marble into a plain vanilla cookie—resist the urge to "fix" it.
- USE A COOL OVEN: Preheat to 350°F (not 375°F) and bake for 10–12 minutes. Hot ovens burn the edges before the centers set, ruining that perfect chewy center. I now use the lower rack and a timer—no peeking, or you’ll end up with uneven baking.
Health benefits of this dish
Balanced Energy Boost
These marble cookies offer a moderate energy lift thanks to their combination of complex carbs from flour and healthy fats from butter. The 1 cup granulated sugar provides quick energy, while the 3.5 cups flour delivers sustained release.
I’ve found that the chocolate dough’s cocoa powder adds antioxidants, which help balance blood sugar spikes—perfect for a treat that won’t leave you crashing later. 💪
Antioxidant-Rich Chocolate
The ½ cup cocoa powder in the chocolate dough is packed with flavonoids, a type of antioxidant that supports heart health and may improve brain function. Studies show that dark cocoa (like Valrhona) contains even more of these beneficial compounds.
The 1 tsp instant espresso powder enhances the chocolate flavor while adding a small caffeine boost—great for a mid-afternoon pick-me-up without the jitters. 🌿
Protein for Satiety
While not a high-protein treat, these cookies still provide about 4 grams of protein per serving (assuming 2 cookies) thanks to the 2 eggs and 3.5 cups flour. The protein helps keep you feeling full longer than pure sugar treats.
For an extra boost, I sometimes add ¼ cup chopped walnuts to the dough—this adds 4 extra grams of protein and healthy omega-3s per serving. 🥜
Mood-Boosting Flavors
Vanilla and chocolate are natural mood lifters! The vanilla extract and vanilla bean paste contain compounds that trigger serotonin production, while the cocoa powder releases endorphins. This combo makes these cookies perfect for stress relief or a quick happiness boost.
The powdered sugar dusting adds a touch of sweetness that enhances the emotional pick-me-up. ✨
Portion Control Tips
To enjoy these cookies without overdoing it, I recommend limiting yourself to 2 cookies per serving—about 150 calories. The butter and sugar make them indulgent, so balance them with a glass of unsweetened almond milk or a piece of fresh fruit.
For a lighter version, try reducing the sugar by 2 tbsp and adding 1 mashed banana to the dough for natural sweetness. 🍎
Mindful Baking Benefits
Baking these cookies can be therapeutic! The process of folding and swirling the dough engages both hands and mind, reducing stress. Plus, the aroma of vanilla and chocolate baking fills your home with comforting scents.
I’ve noticed that baking with others—even virtually—creates a sense of connection. Share the cookies (and the joy!) with friends or family for an extra mood boost. 💛
Nutrition facts
Frequently asked questions
Why do my marble cookies lose their swirl pattern?
The swirls disappear when the dough gets too warm during mixing or rolling. Always chill the dough for 30 minutes between steps, and avoid overworking it. Use a sharp knife for cutting the swirls, and roll the log gently to prevent melting the butter too soon.
Can I make these cookies without a mixer?
Cream the butter and sugar by hand using a wooden spoon or fork until light and fluffy (about 5-7 minutes of vigorous mixing). For the eggs, mix them in one at a time, then fold in the dry ingredients with a spatula. The texture won't be as airy, but the flavor will still shine.
How do I store marble cookies to keep them fresh?
Store cookies in an airtight container at room temperature for up to 5 days. For longer storage, freeze baked cookies between layers of parchment paper for 3 months. Reheat in the oven at 300°F for 3-5 minutes to restore crispness.
What’s the secret to extra crispy edges?
Bake at 350°F for 10-12 minutes until edges are golden, then transfer immediately to a wire rack. Let them cool completely before storing—they’ll crisp up as they cool. For extra crunch, chill the dough longer (1 hour) before baking.
Can I add mix-ins like nuts or chocolate chips?
Yes! Fold in ½ cup chopped walnuts or ½ cup white chocolate chips to either dough before swirling. For even distribution, chill the dough an extra 15 minutes to prevent melting. Avoid overloading—too many mix-ins can disrupt the marble effect.