Desserts
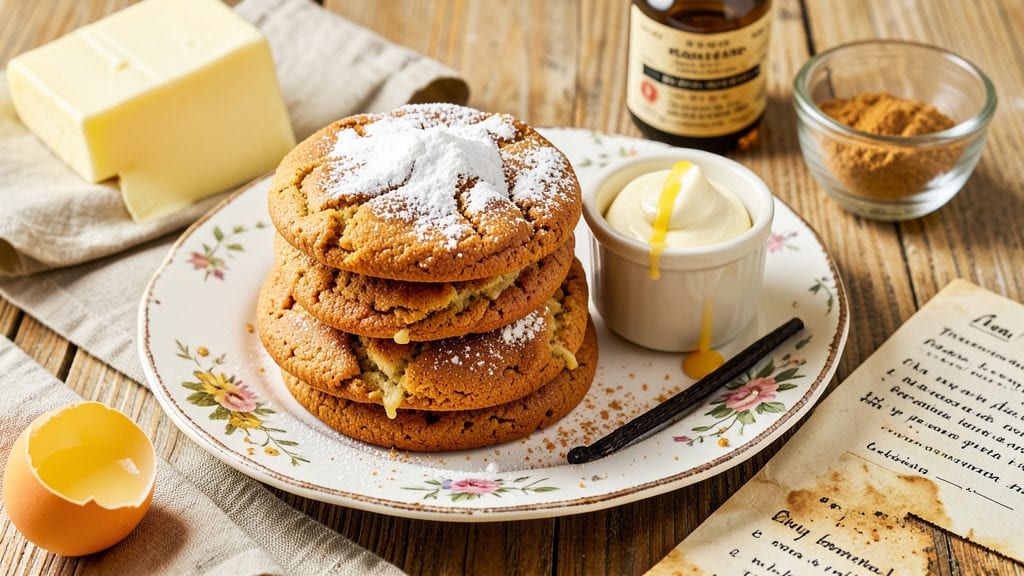
Grandma's classic cookies recipe brings back the warm, spiced aroma of childhood kitchens—where flour dusted the air and every bite carried a touch of nostalgia. ✨ These aren’t just cookies; they’re a time-honored tradition with crisp edges, tender centers, and a buttery crunch that melts in your mouth.
I perfected this version after years of baking alongside my grandmother, who swore by her foolproof method of creaming butter and sugar until light and fluffy.
The secret lies in the warm spices—cinnamon, nutmeg, and a hint of clove—that infuse each cookie with cozy, familiar flavor. Unlike store-bought mixes, this recipe uses real vanilla extract and brown sugar for depth, while a pinch of salt balances the sweetness.
The dough rests just long enough to develop flavor without spreading too much, ensuring perfectly shaped cookies every time.
By the time they emerge from the oven, your kitchen will smell like holiday mornings, and the cookies will be golden-brown with caramelized edges. These aren’t just treats—they’re memories in every bite, guaranteed to bring smiles to faces young and old.
Whether you’re baking for a family gathering or simply craving comfort, this recipe delivers classic results that taste like home.
Serve them warm with a glass of milk or save a batch in an airtight container for when you need a little sweetness on a busy day. The dough can even be chilled overnight for easier handling—just like Grandma used to do. Let’s get baking!
Ingredients for grandma's cookies
Pantry staples plus a few warm spices—this is where classic cookies begin.
| Ingredient | Amount | Notes |
|---|---|---|
| Unsalted Butter 🧈 | 1 cup | Cold, cubed for creaming |
| Packed Light Brown Sugar 🍯 | 1 ½ cups | Turbinado or regular |
| Granulated White Sugar 🍚 | ½ cup | For crisp edges |
| Large Eggs 🥚 | 2 whole | Room temperature |
| Pure Vanilla Extract 🌿 | 2 tsp | Not imitation |
| All-Purpose Flour 🌾 | 3 ½ cups | Sifted for lightness |
| Ground Cinnamon 🌶️ | 2 tsp | Freshly ground preferred |
| Ground Nutmeg 🌿 | ½ tsp | Freshly grated nutmeg |
| Ground Cloves 🌶️ | ¼ tsp | A pinch is enough |
| Fine Sea Salt 🧂 | ½ tsp | Kosher or table |
| Baking Soda 🍞 | ½ tsp | For lift |
| Vanilla Bean Seeds (optional) 🌿 | 1 tsp | Scraped from 1 pod |
The butter needs to be cold—cubed and straight from the fridge. Land O'Lakes or Plugrá work best for this texture. Brown sugar matters too—Turbinado adds crunch, but regular works fine. I always grab the light brown sugar at Costco for big batches. The vanilla? Real extract only—none of that imitation stuff. For the spices, Penzeys or bulk bins have the freshest ground cinnamon and nutmeg. Cloves are the secret—just a pinch, but it makes all the difference. That warm, spiced aroma? That’s your Grandma’s kitchen right there.
No vanilla extract? Vanilla bean paste at half the amount works in a pinch. Short on brown sugar? White sugar plus 1 tbsp molasses mimics the depth. The dough can be tricky—if it’s too sticky, chill it 20 minutes. Too dry? Add 1 tbsp milk or water. For the flour, King Arthur or Gold Medal brands give the best texture. And if you’re feeling fancy, scrape a vanilla bean—the seeds add a luxurious touch. No vanilla bean? Extra extract is fine, just don’t overdo it.
Dough keeps for 3 days wrapped in the fridge, or 3 months frozen in a sealed bag. Portion it into 1-tbsp balls before freezing for easy baking later. Cookies stay fresh in an airtight container for 5 days—though they rarely last that long. I like to freeze half the batch right away so I always have cookies on hand. Grandma’s trick? Warm the oven 10 minutes before baking for perfect rise every time.
Why You'll Love This Recipe
- Five-Ingredient Magic: I swear by this combo—just butter, sugars, eggs, and vanilla. No fancy mix-ins, no stress. Honestly, the dough comes together faster than I can put on a pot of coffee.
- Buttery Vanilla Bliss: That rich brown sugar caramelizes while baking, and the vanilla? Pure, unadulterated joy. I’ll be real: my kids lick the spoon after mixing—no shame.
- Holiday or Snack Attack: Dress them up with sprinkles for Christmas or keep them plain for a quick afternoon pick-me-up. Between us, they’re the star of every potluck, no matter the season.
- No-Waste, Long-Lasting: A single batch lasts me a week (if I’m lucky), and the dough freezes like a dream. I double it, wrap it tight, and thank myself later when I’m craving something sweet at midnight.
Step-by-step instructions for Grandma's classic cookies
Let's bring Grandma's warm kitchen to life with these timeless cookies—rich, spiced, and perfectly crunchy.
👨🍳 Step 1: Cream the Butter and Sugars
In a stand mixer fitted with the paddle attachment, combine the 1 cup unsalted butter (cold, cubed) with the 1.5 cups packed light brown sugar and 0.5 cup granulated white sugar. Beat on medium speed for 3-4 minutes until light and fluffy—you'll see the mixture nearly double in volume and pale in color.
Here's the thing—this creaming step is where the magic happens. The butter should be cold enough to hold its shape when pressed, but not so cold it doesn't soften. You're incorporating air that will create those beautiful crackly tops and help the cookies spread just enough. If your kitchen runs warm, chill the butter for 15 minutes before starting.
👨🍳 Step 2: Add Eggs and Vanilla
Add the 2 whole large eggs (room temperature) one at a time, mixing on low speed for 30 seconds after each addition until fully incorporated. Then add the 2 tsp pure vanilla extract and 1 tsp vanilla bean seeds (if using), mixing for another 10 seconds. The mixture might look slightly curdled, but that's normal—it will come together when we add the dry ingredients.
I always use room temperature eggs because they blend more smoothly. If your eggs are straight from the fridge, let them sit in warm water for 5 minutes first. The vanilla bean seeds add an extra depth of flavor that makes these cookies truly special—don't skip them if you have them!
👨🍳 Step 3: Combine Dry Ingredients
In a separate bowl, whisk together the 3.5 cups all-purpose flour, 2 tsp ground cinnamon, 0.5 tsp ground nutmeg, 0.25 tsp ground cloves, 0.5 tsp fine sea salt, and 0.5 tsp baking soda. Sift the flour mixture directly into the wet ingredients while the mixer runs on low speed—this prevents gluten development that would make your cookies tough.
I like to sift the flour mixture twice to ensure there are no lumps. The spices should be freshly ground if possible—pre-ground spices lose their potency quickly. Mix just until combined, about 30-45 seconds, until you still see a few flour streaks. Overmixing develops gluten, which leads to dense, cakey cookies instead of the tender, chewy texture we want.
⏰ Step 4: Chill the Dough
Remove the bowl from the mixer and cover it tightly with plastic wrap. Refrigerate for at least 1 hour (I prefer 2 hours or even overnight). This chilling step is non-negotiable—it solidifies the butter, which prevents excessive spreading and helps develop the flavors. The dough will firm up and become easier to handle.
Real talk: Skipping this step is a common mistake that leads to flat, crispy cookies instead of the perfect balance of chewy centers and crisp edges. If you're in a hurry, at least chill for 30 minutes—but longer is always better. The spices will also have more time to infuse their warm, comforting flavors into the dough.
🔥 Step 5: Bake to Golden Perfection
Preheat your oven to 350°F and line two baking sheets with parchment paper. Scoop the dough into 1.5-tablespoon portions (about 24 cookies total) using a cookie scoop, and place them 3 inches apart on the prepared sheets. The dough will be thick and firm from chilling—don't flatten it with your fingers.
Bake for 12-14 minutes until the edges are golden brown and the centers still look slightly underdone. They'll continue cooking on the hot pan after you remove them. Here's the key: The cookies should pull away slightly from the edges of the parchment when you gently lift them. Let them cool on the baking sheet for 5 minutes before transferring to a wire rack to cool completely.
Pro Tips For Making Grandma'S Cookies
- CREAM THE BUTTER SLOWLY: I learned this the hard way—dumping cold butter and sugar into the mixer at full speed just makes a greasy mess. Start with the butter softened (press your finger in; it should dent but not smear), then mix on medium until it’s light and fluffy—about 2-3 minutes. That’s when the sugar starts dissolving properly, not when it’s already a butter blob.
- MEASURE BROWN SUGAR RIGHT: Packed light brown sugar isn’t "packed" like flour—it’s just pressed down so it doesn’t spill. Use the back of a spoon to smooth the top of the cup, then tap the bowl sharply on the counter once to settle it. Overpacking makes your cookies dense; underpacking means they’ll spread too much.
- DON’T OVERMIX THE DOUGH: Once you add the eggs and vanilla, mix just until combined—no more. I used to think more mixing = better texture, but that’s how you end up with tough, chewy cookies instead of tender, melt-in-your-mouth ones. The dough should hold its shape when you scoop it, not be sticky or crumbly.
- LET THE DOUGH REST (YES, REALLY): Chill the dough for at least 30 minutes—no, skipping this won’t ruin it, but it will make your cookies spread unevenly and bake faster on the edges. I know, I know, you’re excited to bake, but give it time. The flour absorbs the butter better, and the flavor deepens. Trust me, the wait is worth it.
Make-ahead tips for this recipe
Dough Prep Ahead
Roll the chilled dough into 1-inch balls and place them on a parchment-lined tray. Cover with plastic wrap and refrigerate for up to 3 days—this keeps the dough firm and flavorful.
For longer storage, freeze the balls on a tray first, then transfer to a ziplock bag with parchment between layers. Thaw in the fridge overnight before baking. 🧊
Baked Cookie Storage
Cool cookies completely before storing in an airtight container with parchment between layers. They’ll stay fresh for 5-7 days at room temperature. For extra freshness, freeze baked cookies in a single layer on a tray, then transfer to a ziplock bag for up to 3 months.
Reheat in a 350°F oven for 3-5 minutes to restore that warm, gooey center. ✨
Freezer-Friendly Dough
Divide the dough into 1-tbsp portions and flatten slightly on a tray. Freeze until solid, then store in a ziplock bag with parchment between layers. Bake straight from frozen, adding 1-2 extra minutes to the baking time.
Grandma’s trick: Add a pinch of salt to the dough before freezing to prevent dryness. 💡
Batch Baking Tips
Pre-scoop dough into 1-tbsp balls and freeze on a tray. Once frozen, transfer to a ziplock bag labeled with the date. Bake directly from frozen—no thawing needed! For a 24-cookie batch, bake in two 12-cookie batches to avoid overcrowding. Rotate pans halfway through for even baking. 🔥
Holiday Prep Plan
Make a double batch of dough and freeze half. Label bags with "Bake Day" and "Holiday Gift" portions. On baking day, thaw one bag while baking the other—you’ll have fresh cookies ready in no time. Wrap cooled cookies in cellophane bags tied with ribbon for festive gifts. 🎄
Flavor Boost Trick
Before baking, sprinkle cookies with a mix of ½ tsp cinnamon + ¼ tsp sugar for extra warmth. For a festive touch, add a pinch of cayenne to the dough—it deepens the spice without heat. Store cookies with a cinnamon stick in the container to keep them aromatic. 🌶️
Nutrition facts
Frequently asked questions
Why does the dough need to chill before baking?
Chilling the dough for at least 1 hour (or overnight) is essential for two reasons: it firms up the butter to prevent excessive spreading, and it lets the warm spices infuse their flavors deeper. Skipping this step often results in flat, crispy cookies instead of the perfect chewy centers with crisp edges these are known for. Grandma always said patience makes perfect cookies!
Can I substitute brown sugar with white sugar?
You can use all white sugar, but your cookies will lose that classic caramelized flavor and chewy texture. For the best results, replace half the brown sugar with white sugar plus 1 tablespoon molasses to mimic the depth. The brown sugar adds moisture and that signature warm sweetness that makes these cookies taste like home.
How do I fix cookies that spread too much?
If your cookies flatten out, the butter was likely too soft when creamed. For future batches, chill the dough longer or use more cold butter. Another trick: scoop dough balls slightly smaller (1 tablespoon instead of 1.5 tablespoons) and place them farther apart on the baking sheet. Grandma’s secret was always to use cold butter and never skip the chilling step!
Can I make these cookies without a mixer?
Use a sturdy wooden spoon or fork to cream the butter and sugars by hand—it’ll take about 5-7 minutes of vigorous mixing until light and fluffy. For the eggs and vanilla, mix by hand with a spatula, then fold in the dry ingredients gently. The texture will be slightly less airy, but still delicious. Grandma made cookies this way for decades!
What’s the best way to store these cookies for holidays?
For long-term storage, freeze baked cookies in a single layer on a tray, then transfer to an airtight container or ziplock bag with parchment between layers. They’ll stay fresh for up to 3 months. For gifts, wrap cooled cookies in cellophane bags tied with ribbon. Grandma always made extra batches to give as gifts—it’s a tradition worth keeping!