
Desserts
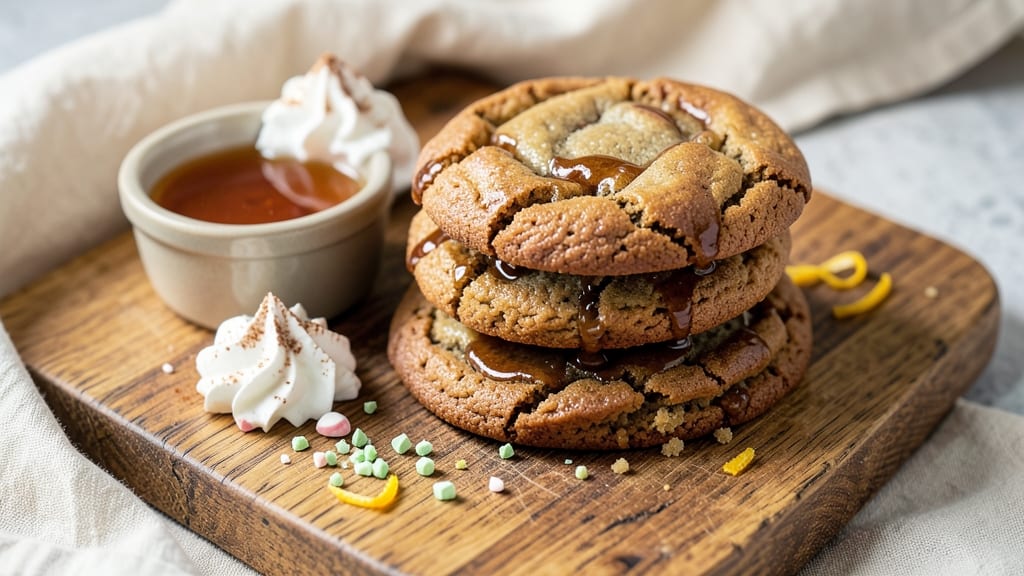
This Dr Pepper cookie recipe delivers the perfect balance of nostalgic soda flavor and rich chocolate chunks—every bite tastes like a nostalgic soda break in cookie form.
The secret lies in reducing Dr Pepper into a concentrated syrup that infuses the dough with that signature caramelized, spiced sweetness you know and love. After perfecting this recipe through countless batches (and a few too many taste tests), I can confidently say these cookies are foolproof for any occasion.
The process is simpler than you'd think, requiring just 15 minutes of active prep and 12 minutes in the oven. You'll start by creating a Dr Pepper syrup that forms the backbone of the flavor, then mix it into a classic cookie dough with brown sugar, butter, and eggs.
The chocolate chunks add a satisfying crunch that contrasts beautifully with the soft, chewy centers. These cookies spread just enough to create edges that stay crispy while maintaining a tender interior—no one will believe they're homemade.
What makes these cookies truly special is how the Dr Pepper flavor shines through without overpowering the chocolate. The syrup caramelizes slightly during baking, deepening the soda's natural notes into something complex and addictive. The result?
Cookies with a subtle fizz-like quality that reminds you of a cold glass of Dr Pepper, paired with rich chocolate that satisfies any sweet tooth. Perfect for holiday cookie platters, potlucks, or just because you deserve a treat.
One of my favorite variations is adding a touch of cinnamon to the dough—it enhances the soda's spiced undertones and makes these cookies even more irresistible. The recipe scales easily too, so you can bake a full sheet pan for gatherings or make a smaller batch for a quick dessert.
Let’s get baking—your kitchen will smell like childhood memories in no time.
Ingredients for dr pepper cookie
Pantry staples plus one nostalgic soda—this cookie recipe delivers big flavor in every bite.
| Ingredient | Amount | Notes |
|---|---|---|
| Dr Pepper 🥤 | 1 ½ cups | Regular or zero sugar variety |
| Unsalted Butter 🧈 | 1 cup | Cold, cubed, full-fat preferred |
| Light Brown Sugar 🍚 | 1 cup | Packed firmly, not leveled |
| Granulated Sugar 🍚 | ½ cup | Standard white sugar |
| Large Eggs 🥚 | 2 whole | Room temperature |
| All-Purpose Flour 🌾 | 2 ½ cups | Spooning, not scooping |
| Baking Soda 🧂 | ½ tsp | Freshly opened |
| Ground Cinnamon 🍃 | 1 tsp | Optional but recommended |
| Sea Salt 🧂 | ½ tsp | Fine grain preferred |
| Semi-Sweet Chocolate Chunks 🍫 | 1 ½ cups | Enjoy Life brand for nut-free |
| Vanilla Extract 🍯 | 1 tsp | Pure, high-quality |
| Diamond Crystal Kosher Salt 🧂 | ¼ tsp | For dough, not table salt |
The Dr Pepper is the star here, so grab a 2-liter bottle from the soda aisle—the real stuff, not the diet version. I always use Dr Pepper from the store brand (it's cheaper and just as flavorful), but if you're feeling fancy, the Coca-Cola version works too. Reduce it down to a thick syrup (about 1.5 cups) before mixing into the dough—this concentrates the flavor without making the cookies taste like soda. Pro tip: if you're short on time, use a saucepan on medium-low heat and stir occasionally to avoid burning. The syrup should coat the back of a spoon but still be pourable.
No Dr Pepper? Coca-Cola or root beer syrup works in a pinch, though the flavor won't be identical. The chocolate chunks are non-negotiable for texture—Enjoy Life brand is my go-to for nut-free baking, but any semi-sweet will do. Swap the brown sugar for white if you're out, but the cookies will be slightly chewier. The cinnamon is optional, but trust me on the full-fat butter—it makes these cookies rich and tender. For the flour, King Arthur or Gold Medal brands are my favorites, but any all-purpose will work. If you're baking at high altitudes, add an extra 0.25 cup of flour to the dough.
The Dr Pepper syrup keeps for up to 1 week in the fridge, so make extra if you're planning to bake again soon. Store the dough in the fridge for up to 48 hours (it actually improves overnight), and the baked cookies stay fresh for 5 days in an airtight container. For longer storage, freeze the dough balls—bake straight from frozen, adding 1-2 minutes to the cook time. These cookies reheat beautifully too: pop one in the microwave for 10 seconds to revive that soda fizz.
Why You'll Love This Recipe
- No Mixer Needed: I swear by this recipe when my hands are full—just cream the butter and sugars with a wooden spoon, then fold in the Dr Pepper. The soda’s fizz does half the work for you, dissolving into that rich, caramelized dough like magic.
- Caramel-Kissed Magic: That first bite? Pure Dr Pepper nostalgia—molasses depth from the brown sugar, a whisper of cherry from the soda, and a chewy center that cracks just enough for buttery crunch. Honestly, my kids think I’m a genius, but it’s really just science (and a little soda).
- Party in a Jar: Between us, these are my go-to for holiday cookie platters, potlucks, or when I need to impress without stressing. They freeze like a dream too—just toss them in a bag, and thawed cookies taste fresh-baked. (Yes, even on a Tuesday night.)
- Pantry Staple Hack: I keep a can of Dr Pepper on hand just for this—it’s cheaper than buying specialty extracts, and the flavor’s way more exciting. Plus, a batch makes 24 cookies, so I’m always covered for snacks, gifts, or when I’m craving something sweet without the guilt.
Step-by-step instructions for Dr Pepper cookies
Here's how to create these bold, soda-infused cookies with perfect texture and rich flavor.
Prepare the Dr Pepper Swirl Base
Preheat your oven to 350°F and line two baking sheets with parchment paper. In a medium saucepan, combine 1.5 cups Dr Pepper and 1 cup Unsalted Butter. Place over medium-high heat and bring to a gentle boil, stirring occasionally. Reduce heat to medium-low and simmer for 10-12 minutes until the mixture reduces by about half and thickens slightly. You'll notice the aroma becomes more concentrated and caramelized.
Remove from heat and let cool for 5 minutes. This reduction process intensifies the soda's flavor and creates the signature swirl pattern. I like to stir occasionally while cooling to prevent skin formation. The mixture should be thick enough to coat the back of a spoon but still pourable.
Cream the Sugars and Eggs
In a large mixing bowl, combine 1 cup Light Brown Sugar, 0.5 cup Granulated Sugar, and 2 whole Large Eggs. Using an electric mixer on medium speed, beat for 3-4 minutes until the mixture is light and fluffy, nearly doubling in volume. The color should become pale and slightly ribbony when you lift the beaters. This step incorporates air which creates the perfect chewy texture.
Add 1 tsp Vanilla Extract and mix for 30 seconds until fully combined. The vanilla enhances the soda's caramel notes while adding depth. Here's the thing—don't rush this creaming process. Properly aerated butter and sugars are the foundation of great cookies.
Combine Dry Ingredients and Fold in Chocolate
In a separate bowl, whisk together 2.5 cups All-Purpose Flour, 0.5 tsp Baking Soda, 1 tsp Ground Cinnamon, 0.5 tsp Sea Salt, and 0.25 tsp Diamond Crystal Kosher Salt. Gradually add this dry mixture to the wet ingredients while mixing on low speed until just combined. You'll want to see a few flour streaks remain—overmixing develops gluten and makes cookies tough.
Remove the bowl from the mixer and gently fold in 1.5 cups Semi-Sweet Chocolate Chunks using a silicone spatula. Be careful not to overmix as this can melt the chocolate. The chocolate chunks should be evenly distributed throughout the dough. Here's where it gets fun—taste a small spoonful of dough. You should detect the bold soda flavor balanced by sweetness and chocolate.
Swirl and Shape the Dough
Divide the dough into 4 equal portions (about 8 ounces each) and shape into 1-inch thick logs on a parchment-lined baking sheet. Using a tablespoon, create small wells in the center of each log. Pour 1-2 tablespoons of the reduced Dr Pepper mixture into each well, then use the back of the spoon to gently swirl it through the dough. The swirl should extend about halfway through the log.
Place the baking sheets in the refrigerator for 30 minutes to firm up the dough. This chilling step prevents excessive spreading and helps the swirl pattern hold its shape. While the dough chills, preheat your oven to 350°F again. The cold dough will also make the cookies easier to handle when you're ready to bake.
Bake to Golden Perfection
Bake the cookies for 12-14 minutes until the edges are golden brown and the centers look slightly underdone. The tops should have a crackly texture with visible chocolate chunks peeking through. Rotate the baking sheets halfway through for even baking. Real talk: your oven might run hot, so start checking at the 10-minute mark—you want them set but still soft in the center.
Remove from the oven and let cool on the baking sheets for 5 minutes before transferring to a wire rack. The cookies will continue to set as they cool, developing that perfect chewy texture. Serve warm for maximum flavor impact—each bite delivers that signature soda swirl balanced by rich chocolate and buttery goodness. These cookies freeze beautifully too, so consider baking a double batch for future treats.
Pro Tips For Making Dr Pepper Cookie
- Reduce Dr Pepper First: Simmer the soda in a small saucepan until it’s cut by about a third—this concentrates the flavor and prevents a soggy, overly wet dough. I learned this the hard way after making cookies that spread like pancakes and tasted more like syrup than spice.
- Cream Butter Cold: Use butter straight from the fridge—it should be soft but not greasy when you mix it with the sugars. Warm butter makes the dough too soft, and these cookies need structure to hold their shape. (Yes, even if you’re impatient like me.)
- Skip Overmixing: Fold in the dry ingredients just until combined—lumpy dough is fine, but overworking it turns chewy cookies into tough, dense bricks. My grandmother swore by this, and she was right: the moment you see streaks of flour, stop.
- Chill Dough Twice: Give the dough a 30-minute rest in the fridge after mixing, then shape the balls and refrigerate them another 20 minutes. This prevents excessive spreading and guarantees thick, cakey centers. (Your future self will thank you—trust me.)
Storing and reheating this dr pepper cookie
Fridge Storage Tips
Store baked cookies in an airtight container with parchment paper between layers to maintain crispness. I use glass jars with silicone lids—they keep cookies fresh for 5 days while preserving that soda fizz.
The secret is letting them cool completely first to prevent condensation buildup. For extra flavor retention, sprinkle a pinch of ground cinnamon on top before sealing. 🧂
Freezing Dough Balls
Freeze shaped dough balls on a parchment-lined tray for 2 hours before transferring to a ziplock bag with all air removed. This prevents sticking and freezer burn. Bake straight from frozen, adding 1-2 minutes to the 12-14 minute cook time.
The cold dough compensates perfectly, delivering that signature chewy texture. I like to label bags with the date—these keep for up to 3 months without losing flavor. ❄️
Reviving Stale Cookies
Pop cookies in the microwave for 10-15 seconds to revive that soda swirl aroma. I wrap them in a damp paper towel first to restore moisture without making them soggy. For oven reheating, bake at 300°F for 3-4 minutes until warmed through.
The chocolate chunks soften beautifully while maintaining their crunch. Pro tip: Sprinkle with powdered sugar after reheating for a nostalgic soda-like finish. 💫
Long-Term Cookie Preservation
For maximum freshness, store cookies in the freezer for up to 3 months. Place them in a vacuum-sealed bag if available—this preserves moisture and flavor better than regular containers. When ready to enjoy, thaw at room temperature for 1 hour before serving.
The reduced Dr Pepper syrup prevents freezer burn, so you won’t lose that signature caramelized soda taste. 🥤
Portion Control for Sharing
Divide baked cookies into single-serving portions using parchment paper squares. Store these in a lidded container for easy grab-and-go treats. I like to keep one portion on the counter for quick access—they stay fresh for 2 days this way.
For parties, wrap individual cookies in cellophane bags with a ribbon for a festive presentation. This keeps them crisp while making them perfect for gifting. 🎁
Chocolate Chunk Refresh
If your cookies lose their chocolatey crunch after storage, sprinkle extra chocolate chunks on top before serving. I also recommend keeping a small bag of Enjoy Life brand chocolate on hand—it melts beautifully when reheated.
For added flavor, pair with a glass of iced Dr Pepper to complete the nostalgic experience. The contrast of warm cookies and cold soda is pure magic. 🍫
Nutrition facts
Frequently asked questions
Can I use diet Dr Pepper instead of regular?
The flavor will be slightly different since diet soda has artificial sweeteners, but it will still work! The caramelized notes from the reduction process will dominate, so you'll get that signature soda taste without the sugar. For best results, use the regular version—it creates a richer, more complex flavor profile that pairs perfectly with the chocolate chunks.
Why do my cookies spread too much?
This usually happens when the dough isn't chilled long enough before baking. The butter needs to firm up to prevent excessive spreading. Always refrigerate the shaped dough logs for 30 minutes before baking. Also, make sure your oven isn't running hot—start checking at 10 minutes if your cookies are spreading too quickly.
Can I make these cookies without chocolate chunks?
Swap the chocolate chunks for 1 cup of chopped walnuts or 1 cup of white chocolate chips if you prefer. The texture will change slightly, but the Dr Pepper flavor will still shine through. For a nut-free option, try adding 1 cup of dried cranberries or 1 cup of butterscotch chips instead.
How do I make these cookies extra crispy?
For a crispier texture, bake the cookies 1-2 minutes longer until the edges are deeply golden. Let them cool on the baking sheet for 10 minutes before transferring to a wire rack. You can also chill the baked cookies in the freezer for 15 minutes right after baking—this helps set the edges faster. Store them in an airtight container with a slice of bread to absorb moisture.
What's the best way to serve these cookies?
These cookies are perfect warm with a glass of iced Dr Pepper or vanilla milk for a nostalgic treat. For parties, arrange them on a platter with a drizzle of caramel sauce and extra chocolate chunks. They also make great gifts—wrap individual cookies in cellophane bags with a ribbon for a festive touch. Pair them with coffee or tea for a dessert that's both sweet and satisfying.