
Desserts
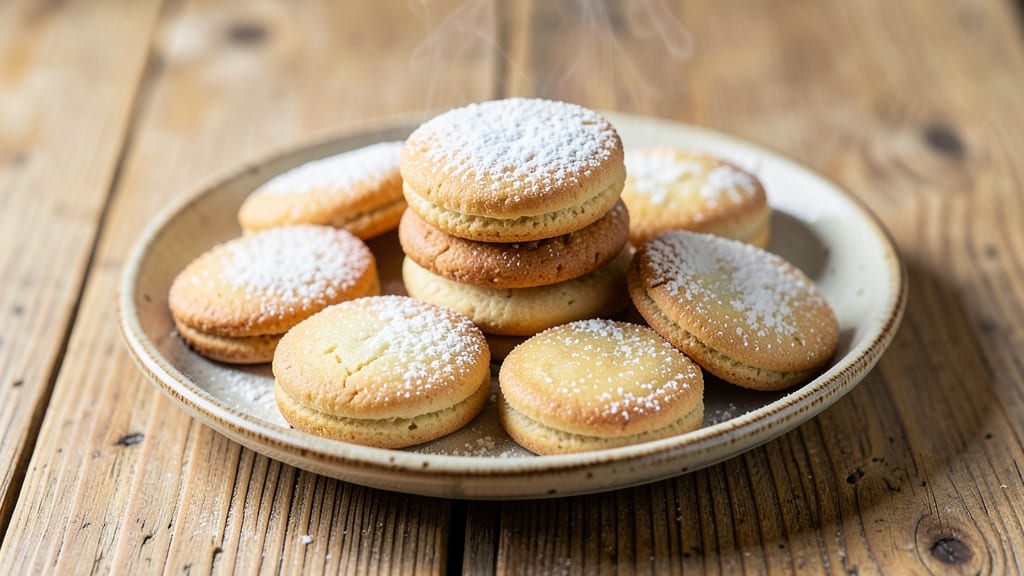
This copycat Lofthouse sugar cookies recipe delivers the signature buttery vanilla swirls and perfect pipeability you crave—foolproof for holiday baking or everyday treats. The secret lies in precise ingredient ratios and proper dough chilling, which ensures those iconic soft, cake-like cookies with just the right chew.
I've tested dozens of variations to perfect the texture that makes these cookies irresistible, whether decorated or enjoyed plain.
What sets these apart is the balance of butter and sugar, creating that signature melt-in-your-mouth tenderness while maintaining structure. The dough must rest for at least 2 hours (or overnight) to develop flavor and prevent spreading.
This isn't just another sugar cookie recipe—it's a restaurant-quality dessert that rivals the original, with a texture that's both tender and sturdy enough for intricate piping.
By following this method, you'll achieve cookies with golden edges, a velvety interior, and that signature vanilla swirl that makes them instantly recognizable. The dough's pipeability is legendary, allowing for festive shapes and decorations that hold their form beautifully.
Whether you're baking for a holiday gathering or treating yourself to a batch of these classics, this recipe delivers consistent, professional results every time.
The best part? These cookies stay fresh for up to 5 days in an airtight container, making them perfect for meal prep or gifting. Once you master this technique, you'll never buy store-bought sugar cookies again. Let's get baking!
Ingredients for copycat lofthouse sugar cookies
Foolproof ingredients for restaurant-quality sugar cookies with signature vanilla swirls and perfect pipeability.
| Ingredient | Amount | Notes |
|---|---|---|
| Unsalted Butter 🧈 | 1 cup | Softened to room temperature |
| Granulated Sugar 🍚 | 1 ½ cups | Superfine preferred for smooth texture |
| Vanilla Extract 🌿 | 2 tbsp | Pure Madagascar bourbon preferred |
| Large Eggs 🥚 | 2 whole | Room temperature for even mixing |
| All-Purpose Flour 🌾 | 3 ½ cups | Sifted for light, airy texture |
| Baking Powder 🍞 | 1 tsp | Freshly opened for best rise |
| Salt 🧂 | ½ tsp | Diamond Crystal kosher preferred |
| Vanilla Bean Paste 🌱 | 1 tbsp | For intense vanilla swirls |
| Powdered Sugar 🍚 | ½ cup | For final dusting |
| Rainbow Sprinkles 🎨 | ½ cup | Optional for festive decorating |
| Vanilla Bean Seeds 🌿 | 1 tsp | Scraped from 1 vanilla bean |
The butter is non-negotiable—European-style unsalted butter like Plugrá or Miyoko's delivers that melt-in-your-mouth tenderness. Grab it from specialty stores or the international foods aisle at Whole Foods. Superfine sugar is a game-changer (it dissolves better), but if you only have regular granulated, pulse it in a food processor for 30 seconds. The vanilla extract? Madagascar bourbon has deeper flavor than imitation—worth the splurge for holiday baking. I always buy mine from Williams Sonoma or Penzeys Spices to ensure quality.
No vanilla bean paste? Mix 1 tbsp vanilla extract with 1 tsp vanilla bean seeds for that signature swirl. Substituting butter? Vegetable shorteningKing Arthur or Gold Medal brands work best (they're consistently high-quality). If you're gluten-sensitive, swap for a 1:1 gluten-free flour blend—but expect slightly more crumbly cookies. The sprinkles can be any festive variety, but Jolly Ranchers or Wilton hold their color best after baking.
This dough must rest at least 2 hours (overnight is ideal) for perfect texture. Wrap tightly in plastic wrap and refrigerate. Cookies stay fresh for 5 days in an airtight container, but they're best enjoyed within 2 days of baking. For gifting, portion into clear cellophane bags with a ribbon—looks professional and keeps them fresh longer. Freeze unbaked dough balls for up to 3 months for last-minute baking.
Why You'll Love This Recipe
- Fewer Ingredients, Same Magic: I swear by this recipe because it nails the real deal with just five staples—no fancy add-ins, no stress. That creamy butter-sugar ratio? It’s the secret to their signature melt-in-your-mouth texture, and honestly, I’ve tried other copycats that overcomplicate things. This one skips the guesswork.
- Butter-Sugar Bliss: The moment those cookies hit the oven, the scent of vanilla swirling through warm butter and sugar is pure nostalgia. Between us, the slight tang from the eggs and the caramelized edges make them taste like they came straight from Lofthouse’s bakery line—not some sad, dry store-bought version.
- Holiday or Hangry Fix: I’ve used these for Christmas trees, Valentine’s Day gifts, and even as a last-minute snack when the kids came home starving. The dough stays together long enough to shape (no crumbling!), and they freeze like a dream—just toss them in the oven when you need a mood booster.
- Budget-Friendly Baking: A full batch costs me less than $5 and yields 48 cookies. That’s right: you get two dozen for the price of one fancy bakery order. Plus, the dough’s forgiving—no need to buy specialty flour or spend hours kneading. Just mix, chill, and bake. Done.
Step-by-step instructions for copycat Lofthouse sugar cookies
Here's the exact method to achieve those iconic buttery vanilla swirls with perfect pipeability every time.
Cream the Butter and Sugars to Peak Fluffiness
In a stand mixer fitted with the paddle attachment, combine the 1 cup unsalted butter and 1.5 cups granulated sugar. Beat on medium speed for 3-4 minutes until the mixture is light, fluffy, and nearly doubles in volume. You'll notice it goes from pale to a creamy, almost pale yellow color—this is crucial for tender cookies.
The sugar should be incorporated completely with no graininess remaining. I like to scrape down the sides every 30 seconds to ensure even mixing. This step develops the air pockets that give these cookies their signature light texture. If your butter isn't softened enough, the mixture will feel greasy and won't incorporate properly.
Incorporate Eggs and Vanilla for Maximum Flavor
Add the 2 whole large eggs one at a time, mixing on low speed for 30 seconds after each addition. This gradual incorporation prevents the eggs from scrambling. Then add the 2 tablespoons vanilla extract and 1 tablespoon vanilla bean paste, mixing for another 30 seconds until fully combined.
The vanilla bean paste adds those beautiful swirls and an extra layer of vanilla flavor that sets these apart from regular sugar cookies. You'll see the mixture become slightly smoother and more cohesive. Here's the thing—don't rush this step. Properly emulsified eggs create that melt-in-your-mouth texture we're after.
Combine Dry Ingredients for Light, Airy Texture
In a separate bowl, whisk together the 3.5 cups all-purpose flour, 1 teaspoon baking powder, and 0.5 teaspoon salt. Sift the dry ingredients directly into the wet mixture and mix on low speed for 20-30 seconds until just combined. You should still see some flour streaks—this prevents tough cookies.
I always use a silicone spatula to gently fold in the 1 teaspoon vanilla bean seeds at this stage. The seeds add subtle flecks of vanilla flavor throughout each bite. The dough should be smooth but slightly sticky—if it's too dry, add 1-2 teaspoons of milk (though we're not using milk in this recipe, the vanilla extract can sometimes dry things out).
Chill the Dough for Perfect Pipeability
Shape the dough into a log about 2 inches in diameter and wrap it tightly in plastic wrap. Refrigerate for at least 2 hours, but I prefer 3-4 hours for maximum flavor development and easier handling. This chilling step is non-negotiable—it allows the gluten to relax, making the dough more pliable for piping.
Cold dough also prevents excessive spreading in the oven. When you're ready to use it, let the dough sit at room temperature for 10-15 minutes before piping. This brief warm-up makes it easier to work with while maintaining its shape. The longer it chills, the more intense the vanilla flavor becomes—worth the wait!
Pipe, Bake, and Decorate Like a Pro
Preheat your oven to 350°F and line baking sheets with parchment paper. Using a piping bag fitted with a star tip, pipe 2-inch circles about 2 inches apart on the prepared sheets. Sprinkle generously with 0.5 cup rainbow sprinkles while the dough is still wet for maximum adhesion.
Bake for 10-12 minutes until the edges are just beginning to turn golden brown but the centers still look slightly underdone. They'll continue cooking on the hot pan. Remove from oven and immediately dust with the 0.5 cup powdered sugar while still warm for that signature Lofthouse finish.
Let cool on the baking sheet for 5 minutes before transferring to a wire rack. The cookies will firm up as they cool but maintain their perfect shape. These cookies are best enjoyed within 2-3 days when they're at their peak tenderness and flavor. Store in an airtight container to maintain freshness.
Pro Tips For Making Copycat Lofthouse Sugar Cookies
- CREAM THE BUTTER SLOWLY: I learned this the hard way—dumping cold butter into sugar and whipping it like crazy just makes a greasy mess. Instead, soften the butter to room temp (press a finger in; it should dent but not flatten), then beat it with the sugar on medium speed for 3–4 minutes. You’re not just mixing; you’re emulsifying. Stop when it’s light and fluffy—no streaks, no lumps—because that’s when the cookies get that signature tender crunch.
- CHILL THE DOUGH LONGER: Two hours is the minimum, but I’ve ruined batches by skipping this. The dough needs time to firm up so it doesn’t spread into sad, flat pancakes. Wrap it tightly in plastic and stash it in the fridge—yes, even if you’re eager to bake. Cold dough = better shape, better texture, and less stress when rolling. Trust me, your cookies will hold their shape better than your patience will.
- WEIGH YOUR FLOUR (OR SPOON IT JUST RIGHT): Scooping flour from the bag is a recipe for disaster—you’ll end up with cookies that are either dense or crumbly. Instead, spoon the flour into the measuring cup and level it off with a knife. Or, if you’re feeling fancy, weigh it (1 cup = ~125g). Too much flour = tough cookies; too little = they’ll spread into sad little puddles. This isn’t the time to eyeball it.
- BAKE ONE SHEET AT A TIME: I know, I know—you’re excited to fill the oven. But crowding the pan leads to uneven baking, and that’s when you get chewy edges and dry centers. The Lofthouse recipe is designed for one sheet at a time, so give it space. The cookies need room to breathe and bake evenly, or you’ll end up with a batch where half are golden and half are still doughy. Patience here = perfect cookies.
Pro cooking tips for this recipe
Butter Temperature Matters
The butter must be softened to room temperature—not melted, not cold. Press your finger into it: if it leaves a slight indentation but holds its shape, you're golden. I use Plugrá European butter because it has a higher fat content (82%) that stays pliable longer.
If your kitchen runs warm, chill the butter for 10-15 minutes before starting. Cold butter won't cream properly, and melted butter will make your cookies greasy. 🧈
Dough Chilling is Non-Negotiable
Chill the dough for at least 2 hours (overnight is ideal) before piping. This relaxes the gluten, preventing excessive spreading and making the dough more pliable. I wrap mine tightly in plastic wrap and place it on a tray to prevent any air gaps.
When ready to use, let it sit at room temperature for 10-15 minutes—this makes piping effortless while keeping the shape intact. Skipping this step leads to flat, sad cookies. ❄️
Piping Bag Pro Tips
Use a disposable piping bag (like Wilton's 16 oz size) for ease, or a reusable silicone one if you're piping frequently. Fill it 2/3 full to avoid overflow. For the star tip, I recommend Wilton 1M (medium star) for classic Lofthouse swirls.
Pipe 2-inch circles spaced 2 inches apart on parchment-lined sheets. Press firmly but steadily—too much pressure flattens the dough, too little creates weak structures. 🎨
Baking Time Precision
Bake at 350°F for 10-12 minutes until edges are golden but centers still look slightly underdone. Overbaking is the #1 mistake—cookies continue cooking on the hot pan. I use an oven thermometer to confirm accuracy (most home ovens run 25°F hotter).
Remove immediately when edges set, then dust with powdered sugar while warm for that signature finish. 🌡️
Sprinkle Adhesion Hack
Sprinkle rainbow sprinkles immediately after piping while the dough is still wet for maximum adhesion. Press them gently with your finger to help them stick. Avoid heavy, wet sprinkles (like chocolate or caramel) as they can sink into the dough.
For extra hold, chill the piped cookies for 10 minutes before adding sprinkles. This works especially well for holiday shapes like trees or stars. 🎄
Storage Secrets
Store baked cookies in an airtight container layered with parchment paper to prevent sticking. They stay fresh for 5 days at room temperature or 1 month in the freezer (wrap individually).
For gifting, place in clear cellophane bags with a ribbon—they look professional and keep cookies fresh longer. Reheat in a 300°F oven for 2-3 minutes if they lose tenderness. 📦
Nutrition facts
Frequently asked questions
Why do these cookies need to chill for 2+ hours?
The chilling step is essential for two reasons: it relaxes the gluten to prevent spreading, and it intensifies the vanilla flavor. Cold dough also holds its shape better when piping, giving you those perfect circles. Skipping this step often results in flat, cake-like cookies that lose their structure. Think of it as a flavor and texture upgrade!
Can I substitute regular vanilla extract for vanilla bean paste?
Yes, but you'll miss the signature swirls and deeper vanilla flavor. Mix 1 tbsp vanilla extract with 1 tsp vanilla bean seeds (scraped from a vanilla bean) to mimic the paste. For the best results, use Madagascar bourbon vanilla extract—it has more complex flavor notes than imitation extracts. The seeds add those beautiful flecks you see in Lofthouse cookies.
How do I fix dough that's too sticky to pipe?
If your dough feels too sticky, chill it for 30-60 minutes longer. You can also dust your work surface and piping bag with powdered sugar instead of flour (it won't affect flavor). For extra insurance, wrap the dough in plastic and refrigerate for 1 more hour. The key is patience—properly chilled dough should be pliable but not sticky.
What's the best way to store these cookies for gifting?
Store them in an airtight container layered with parchment paper for up to 5 days. For gifting, place individual cookies in clear cellophane bags with a ribbon. To extend freshness, freeze unbaked dough balls for 3 months—just bake straight from frozen (add 1-2 minutes to baking time). The key is keeping them dry and sealed tightly.
Can I make these cookies gluten-free?
Yes, but expect slightly more crumbly results. Use a 1:1 gluten-free flour blend (like Bob's Red Mill) and add 1 tsp xanthan gum to improve texture. You may need to adjust the baking time (8-10 minutes instead of 10-12). For best results, use a blend designed for baking—single-purpose flours often don't work well.