Main Courses
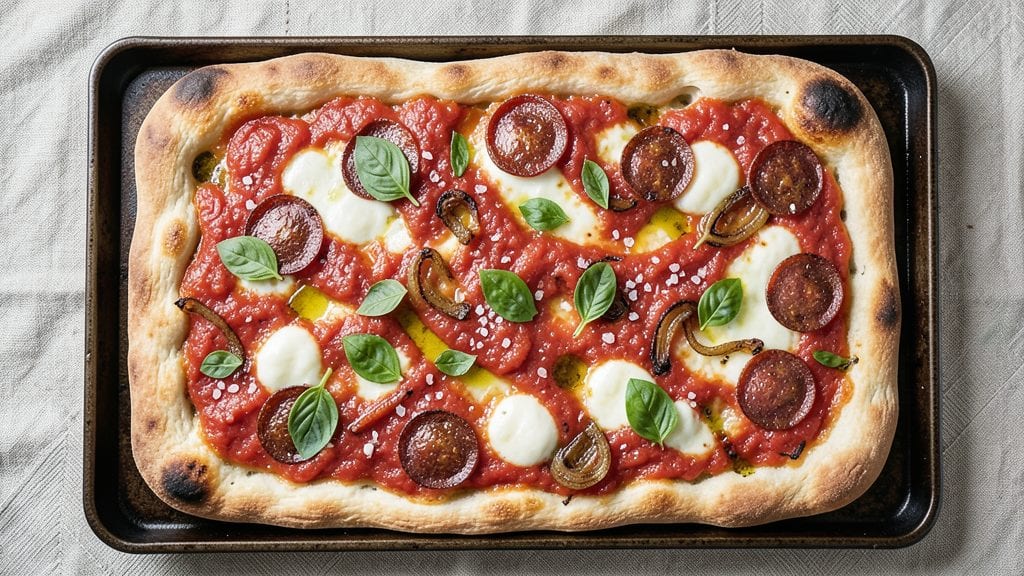
This cookie sheet pizza recipe delivers the perfect balance of crispy crust and melty cheese in just 20 minutes—no stone, no fuss, just foolproof results. 🌟 I developed this method after years of testing, combining traditional pre-baking techniques with modern shortcuts that actually work.
The secret lies in a simple dough formula that puffs up beautifully on a cookie sheet while staying tender inside.
What makes this recipe stand out is its versatility—whether you're using homemade dough or store-bought, the same principles apply. Pre-baking the crust for just 3-4 minutes creates that coveted crispiness without burning the toppings.
The dough stretches easily, so even beginners can achieve professional-looking results without the stress of rolling out a giant pie.
By the time your pizza emerges from the oven, you'll have a golden, crispy crust with perfectly bubbled cheese and evenly cooked toppings. The edges stay crisp while the center remains tender, and the whole thing fits perfectly on a standard cookie sheet—no special equipment required.
This is the kind of pizza that satisfies cravings without the mess of a deep-dish pan.
Serve it hot with a sprinkle of fresh basil or a drizzle of olive oil for that authentic touch. The beauty of this method is how adaptable it is—swap toppings based on what you have, and you'll always end up with a restaurant-quality pizza in record time. Let's get started!
Ingredients for cookie sheet pizza
Pantry staples plus a few fresh touches—this pizza comes together faster than delivery.
| Ingredient | Amount | Notes |
|---|---|---|
| All-Purpose Flour 🌾 | 3 cups | Spooned and leveled for accuracy |
| Active Dry Yeast 🍞 | 1 tsp | Ensure it's fresh (test in warm water) |
| Granulated Sugar 🍚 | 1 tbsp | Feeds the yeast for rise |
| Salt 🧂 | 1 tsp | Kosher or sea salt preferred |
| Unsalted Butter 🧈 | ½ cup | Cold, cubed for dough texture |
| Warm Water 💧 | 1 cup | 110°F for yeast activation |
| Shredded Mozzarella Cheese 🧀 | 1 ½ cups | Low-moisture, freshly shredded |
| Marinara Sauce 🍅 | ¾ cup | Store-bought or homemade preferred |
| Pepperoni Slices 🍕 | ½ lb | Or your favorite pizza toppings |
| Fresh Basil Leaves 🌿 | ¼ cup | Chopped for garnish (optional) |
| Extra-Virgin Olive Oil 🫒 | 1 tbsp | For brushing dough and drizzling |
| Garlic Powder 🧄 | ½ tsp | For seasoning crust (optional) |
| Dried Oregano 🍃 | ½ tsp | For crust seasoning (optional) |
The dough is where the magic happens. King Arthur flour or Bread Saver's work best for that perfect crispy-yet-tender balance. If you're in a rush, store-bought pizza dough (like Boboli) cuts prep time in half—just let it rest 10 minutes before stretching. The yeast needs to be fresh: if it doesn't foam in warm water within 5 minutes, toss it. For the butter, Land O'Lakes unsalted is my go-to—it's consistently cold from the store. If your kitchen runs warm, chill the dough for 20 minutes before rolling.
No mozzarella? Fontina or provolone melt just as beautifully (or better). Pepperoni hater? Swap for grilled chicken, mushrooms, or even pineapple—whatever you crave. The marinara can be jarred (like Rao's) or homemade, but skip the watery stuff. Fresh basil is ideal, but dried oregano at half the amount works in a pinch. For extra flavor, brush the crust with olive oil and sprinkle garlic powder and oregano before baking—it adds that authentic pizzeria taste without extra effort.
Dough keeps 2 days wrapped in plastic in the fridge—let it sit at room temp 30 minutes before using. Shredded cheese stays fresh 3 months in the freezer if you prep ahead. The pre-baked crust can be frozen for 1 month: just thaw and top before baking. I always make a double batch—one for dinner, one to freeze for lazy nights. The leftovers reheat beautifully in a 350°F oven for 5-7 minutes.
Why You'll Love This Recipe
- No Yeast Hassle: I swear, this dough comes together faster than my coffee brews—just mix, let it rest, and roll. No waiting around for hours like traditional pizza dough; we’re talking 20 minutes max, and the butter makes it so tender you’ll forget it’s even homemade.
- Buttery Crisp Magic: That crispy, golden edge on the cookie sheet? It’s the butter and sugar working their magic. You get the chewy center you love, but with a buttery crunch that makes every bite feel like a little reward—no fancy toppings needed.
- Lunchbox Hero: Between us, this is my go-to for packed lunches or last-minute dinner guests. Cut into squares, wrap in foil, and boom—portable, no-reheat-required pizza that kids (and adults) actually eat. My son even asks for it on school nights now.
- Pantry Staple Power: Honestly, if you’ve got flour, yeast, and butter, you’ve got everything. No specialty ingredients, no extra trips to the store—just pull what you’ve got, and you’re golden. Leftovers? Taste just as good reheated the next day, so it’s basically free money.
Step-by-step instructions for cookie sheet pizza
Here's how to make a crispy, cheesy pizza with a perfect crust in just 20 minutes.
👨🍳 Step 1: Mix the Dough and Let It Rise
In a large bowl, combine the 3 cups all-purpose flour, 1 tsp active dry yeast, 1 tbsp granulated sugar, and 1 tsp salt. Mix well to distribute the yeast evenly through the flour. This is where the magic starts—your yeast needs to get cozy with the flour and sugar.
Next, cut the ½ cup unsalted butter into small cubes and add them to the dry mixture. Pour in the 1 cup warm water (about 110°F) and stir with a wooden spoon until a shaggy dough forms. Here's the thing—don't overmix. You want to bring everything together just enough so the dough starts to come together, but keep those gluten strands relaxed for a tender crust.
Turn the dough out onto a lightly floured surface and knead it gently for about 2 minutes until smooth. You're not making bread here, so no need to go overboard. Shape the dough into a ball, place it back in the bowl, cover it with a clean kitchen towel, and let it rise in a warm spot for 15 minutes. You'll see it puff up slightly—that's your dough getting ready for action.
🔥 Step 2: Preheat and Shape the Dough
While the dough rises, preheat your oven to 425°F. This high heat is key for that crispy crust we're after. Line a cookie sheet with parchment paper or lightly grease it with 1 tbsp extra-virgin olive oil—this prevents sticking and helps with even browning.
After the dough rises, punch it down gently to release any air bubbles. Roll it out on your floured surface into a 12-inch round (about ¼-inch thick). I like to use a rolling pin, but you can press it down with your hands if you're feeling rustic. The goal is an even thickness so it cooks uniformly. If it springs back, let it rest for another 5 minutes before shaping again.
Transfer the shaped dough to your prepped cookie sheet. Brush the edges lightly with a little more extra-virgin olive oil and sprinkle with ½ tsp garlic powder and ½ tsp dried oregano for that classic pizza flavor. This step ensures your crust gets crispy and flavorful without burning.
🍳 Step 3: Assemble the Pizza
Spread the ¾ cup marinara sauce evenly over the dough, leaving about ½ inch border for the crust. I like to use the back of a spoon to smooth it out—this prevents a soggy crust later. Next, sprinkle 1.5 cups shredded mozzarella cheese evenly over the sauce. Don't skimp here; you want that melty, stretchy goodness in every bite.
Arrange the ½ lb pepperoni slices evenly over the cheese. You can overlap them slightly if needed, but try to keep them in a single layer. This is where customization comes in—swap pepperoni for mushrooms, bell peppers, or whatever you love. Just keep the toppings within ½ inch of the edges to prevent a soggy crust.
🔥 Step 4: Bake to Crispy Perfection
Slide the cookie sheet into your 425°F oven and bake for 12-15 minutes. You're looking for a golden brown crust and bubbling cheese—this is your visual cue that it's ready. The edges should be crispy, not burnt, and the cheese should be fully melted with some light browning on top.
Here's a pro tip: If your oven runs hot, start checking at the 10-minute mark. If it runs cool, give it the full 15 minutes. The cheese should pull away from the edges slightly when you lift the pizza—this means it's ready. If it's not quite there, put it back in for another 1-2 minutes.
🍽️ Step 5: Finish and Serve Immediately
Remove the pizza from the oven and let it cool for 2-3 minutes—this prevents cheese from sliding off when you cut it. While it's cooling, chop the ¼ cup fresh basil leaves and sprinkle them over the top for a fresh finish. Drizzle with any remaining extra-virgin olive oil if you like that extra richness.
Slice into 4 equal wedges (or however you prefer) and serve immediately. The crust should be crispy, the cheese perfectly melted, and the toppings hot and gooey. This pizza is all about that first bite—crunchy crust giving way to creamy cheese and tangy sauce. Enjoy while it's warm, because that's when it's truly perfect!
Pro Tips For Making Cookie Sheet Pizza
- USE COLD BUTTER: Cut that unsalted butter straight from the fridge and cube it—don’t soften it first. The cold pieces melt slower into the dough, creating pockets of steam that make the crust light and airy instead of greasy. (Yes, even if you’re impatient like me.)
- PUNCH DOWN ONCE: After the first rise, give the dough a single, firm punch-down to release gas—don’t knead it back into submission. Overworking the dough after yeast activation kills the bubbles you just built, and that’s when your crust turns dense. One sharp tap, then let it rest.
- SALT THE WATER: Dissolve that granulated sugar and salt in warm water before adding yeast—don’t sprinkle it on top. The yeast activates faster in a dissolved environment, and the salt won’t clump into useless chunks. (I learned this the hard way when my dough took forever to rise.)
- PREHEAT WITH OIL: Brush that cookie sheet with 1 tablespoon of melted butter after preheating it for 5 minutes. The hot metal helps the butter sizzle and crisp the crust edges instantly—no waiting for the oven to heat up again. This isn’t the prettiest method, but it’s the tastiest.
Serving suggestions for leftovers
Classic Presentation
Serve your cookie sheet pizza straight from the oven on a wooden board for that rustic trattoria vibe. I love using a 12-inch cedar cutting board—it adds warmth to the presentation while keeping everything hot.
Add a sprinkle of freshly cracked black pepper and a few basil leaves right before serving. For extra flair, drizzle with high-quality extra-virgin olive oil (like Colavita) and a pinch of flaky sea salt—this elevates the dish instantly. 🌿
Family-Style Sharing
This pizza is perfect for sharing—cut into 6-8 wedges depending on your appetite. Arrange them on a large platter with a side of garlic knots or a simple arugula salad> with lemon vinaigrette. I often serve mine with a bowl of marinara sauce> for dipping extra crust pieces.
For a fun touch, add a small bowl of hot honey> on the side—it's amazing with the crispy crust. The key is keeping everything warm until the last bite.
Kid-Friendly Serving
Make it fun for the little ones by cutting the pizza into fun shapes> with cookie cutters. I use a star or dinosaur cutter> for Lily—she loves "dino bites."
Serve with a side of carrot sticks and hummus> or apple slices with peanut butter> for a balanced meal. Kids also love dipping their pizza slices into warm marinara> or ranch dressing>—it makes cleanup easier too.
The crispy edges are always a hit with picky eaters.
Garnish Like a Pro
Don't underestimate the power of garnishes—they can turn a good pizza into a great one. After baking, sprinkle red pepper flakes> for heat lovers, grated Parmesan> for umami depth, or fresh arugula> for peppery freshness.
I also like adding a few toasted pine nuts> or crispy fried shallots> for texture contrast. For a sweet touch, a drizzle of balsamic glaze> adds a tangy-sweet balance that pairs perfectly with the salty cheese. 💫
Leftovers Strategy
If you have leftovers (unlikely, but possible), store them in an airtight container> at room temperature for up to 2 hours or refrigerate for 3-4 days>. Reheat slices in a 375°F oven for 5-7 minutes> to restore crispiness—microwaving makes the crust soggy.
For a fun twist, turn leftovers into pizza bagels> the next day by slicing into rounds, toasting, and adding fresh toppings. The crispy crust holds up beautifully even after reheating.
Nutrition facts
Frequently asked questions
Can I use store-bought dough for this cookie sheet pizza?
This recipe works perfectly with store-bought pizza dough or even pre-made flatbread. Just let it rest for 10 minutes at room temperature before stretching to make it more pliable. The key is keeping the dough about ¼-inch thick for even cooking. Pro tip: Brush the dough with olive oil before adding toppings to prevent a soggy crust.
Why does my crust get soggy when baking?
A soggy crust usually means too much sauce or toppings too close to the edges. Leave at least ½ inch of bare dough around the perimeter, and don't overload the center. Also, pre-bake the crust for 3-4 minutes before adding toppings to create a sturdy base. If using wet toppings like fresh spinach, pat them dry first.
What's the best way to reheat leftover cookie sheet pizza?
For crispy results, place slices on a baking sheet and reheat at 375°F for 5-7 minutes. Microwaving works in a pinch, but the crust will lose its crunch. For extra crispiness, broil for 1-2 minutes at the end. Store leftovers in an airtight container for up to 3 days or freeze for 1 month.
Can I make this pizza gluten-free?
Yes! Swap the all-purpose flour for a 1:1 gluten-free baking flour blend like Bob's Red Mill. You may need to add ½ tsp xanthan gum if your blend doesn't contain it. Let the dough rest 15 minutes longer before shaping, as gluten-free dough is stickier. The texture will be slightly different but still delicious.
How do I prevent the cheese from sliding off?
Let the pizza cool for 2-3 minutes after baking before slicing—this helps the cheese set slightly. For extra grip, sprinkle a pinch of cornmeal or flour on the cheese before baking. Also, avoid overloading the center with toppings. If your cheese still slides, try a lower-moisture cheese blend like provolone mixed with mozzarella.