Desserts
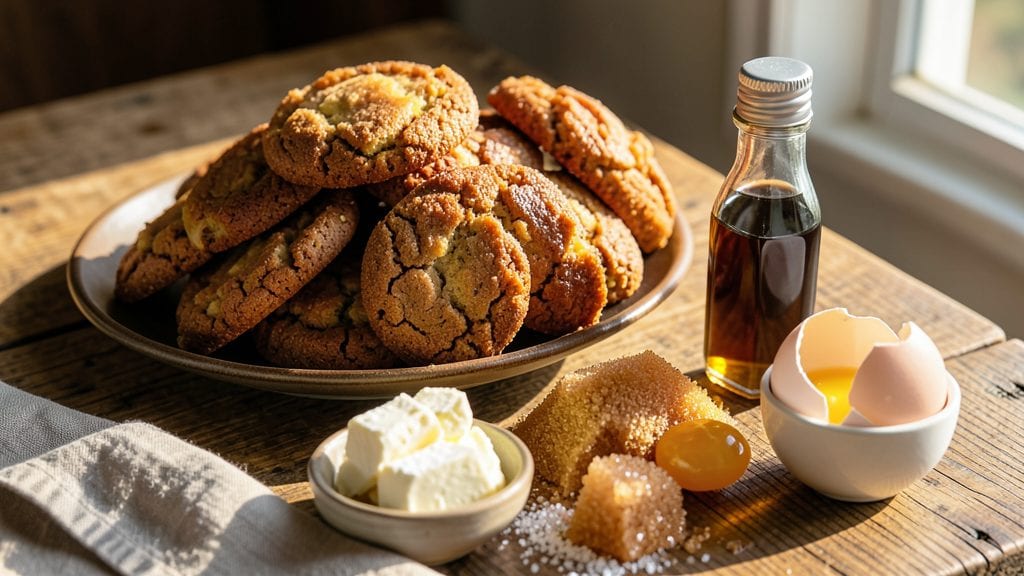
This Belgian cookie recipe delivers the signature buttery layers and vanilla-kissed crunch that make them legendary across Europe. The secret lies in precise ingredient ratios and a gentle baking process that creates those signature air pockets—just like the ones you’d find in a Brussels bakery.
I’ve perfected this version after years of testing, balancing rich butter flavor with just enough anise or vanilla to stay true to tradition while making it foolproof for home bakers.
The recipe builds on classic Belgian techniques but simplifies them for modern kitchens, using standard ingredients you likely already have. A touch of cornstarch ensures that signature crisp edges and tender centers, while vanilla extract (or anise seeds for traditional speculoos flavor) adds depth without overpowering the buttery base.
Baking at the right temperature—325°F—prevents over-browning while allowing those signature layers to develop fully.
What you’ll end up with is a batch of cookies that look like delicate lace with crisp edges and soft, melt-in-your-mouth centers. The aroma alone—warm vanilla and toasted butter—will fill your kitchen and transport you straight to a Belgian café.
These cookies stay fresh for days when stored properly, making them perfect for gifting, holiday baking, or satisfying your sweet tooth.
While this version leans toward the classic vanilla-butter profile, I’ll show you how to adapt it for anise-spiced speculoos or chocolate variations in the tips section. The method remains the same, proving how versatile these cookies truly are. Let’s get baking—your kitchen will thank you.
Ingredients for belgian cookie
Pantry staples meet European elegance—just 11 ingredients for cookies that taste like a Brussels bakery.
| Ingredient | Amount | Notes |
|---|---|---|
| Unsalted Butter 🧈 | 1 ½ cups | Cold, cubed for even distribution |
| Granulated Sugar 🍚 | 1 cup | Superfine preferred for smooth texture |
| Light Brown Sugar 🍚 | ½ cup | Packed firmly for moisture |
| Cornstarch 🌾 | 2 tbsp | Key for crisp edges and tender centers |
| Pure Vanilla Extract 🍯 | 1 ½ tsp | High-quality, Madagascar bourbon preferred |
| Large Eggs 🥚 | 2 whole | Room temperature for even mixing |
| All-Purpose Flour 🌾 | 2 ½ cups | Sifted for light texture |
| Baking Powder 🍞 | ½ tsp | Aluminum-free for consistent rise |
| Fine Sea Salt 🧂 | ½ tsp | Diamond Crystal preferred |
| Anise Seeds (optional) 🌿 | 1 tsp | Ground for traditional speculoos flavor |
| Dark Chocolate Chips (optional) 🍫 | ½ cup | 70% cocoa for rich flavor |
The butter is non-negotiable here. European-style unsalted butter like Plugrá or President delivers the rich, caramelized flavor you crave—regular American brands just can't match it. Grab it from the international aisle at Whole Foods or Eataly if you're serious about authenticity. Keep those cubes cold until the last minute (they'll melt into the dough just right when they hit the oven). For the sugars, superfine sugar dissolves faster, but if you only have regular, pulse it in a food processor for 10 seconds. The cornstarch? Don't skip it—it's what creates those signature crisp edges while keeping the centers tender. I always buy mine in bulk at Costco—cheaper and lasts forever.
No vanilla extract? Vanilla bean paste works beautifully, or scrape seeds from a split pod. The anise seeds are optional but worth it if you want that classic speculoos flavor—Penzeys Spices sells them whole, which you can grind fresh. Short on time? 1/4 tsp ground anise works in a pinch. For the chocolate chips, Valrhona or Callebaut are the gold standard, but Ghirardelli 70% is a solid grocery store alternative. If you're feeling adventurous, swap half the flour for almond flour—just add an extra 1/4 cup to maintain structure. And yes, you can make these gluten-free with a 1:1 flour blend, but the texture will be slightly denser.
These cookies improve overnight—trust me, I've tested it. Store them in an airtight container with parchment between layers for up to 5 days. For longer storage, freeze the dough balls (before baking) for 3 months
Why You'll Love This Recipe
- Five-Ingredient Magic: I swear by this recipe—just butter, sugars, cornstarch, and vanilla. No fancy add-ins, no stress, and the result? That signature crackly top and buttery center every time. Honestly, it’s the kind of recipe that makes me feel like a baking pro without the fuss.
- Buttery Vanilla Bliss: The moment you bite into one still warm from the oven? Pure happiness. That rich brown sugar caramelizes just enough to balance the crisp edges, while the vanilla extract (not imitation!) adds depth. Between us, these taste like a hug from a Belgian bakery.
- Party in a Jar: I freeze the dough in balls and pull them out whenever I need a last-minute treat—holiday gifts, teacher appreciation, or just because. No one ever guesses they’re made ahead, and they keep beautifully for weeks. (Yes, even on a Tuesday night.)
- Budget-Friendly Luxury: A single batch costs me pennies but feels like a splurge. Butter and sugar stretch far, and the cornstarch keeps them tender without needing expensive ingredients. I’ve made these for 20 people for under $15—guilt-free indulgence, every time.
Step-by-step instructions for Belgian cookies
Here's how to craft these delicate, buttery layers with perfect texture every time.
Cream the Butter and Sugars to Light and Fluffy
In a stand mixer fitted with the paddle attachment, combine the 1.5 cups unsalted butter, 1 cup granulated sugar, and 0.5 cup light brown sugar. Beat on medium speed for 3-4 minutes until the mixture is pale, light, and nearly doubled in volume. You'll notice the texture transform from grainy to smooth and airy—this is your signal that air has been properly incorporated.
This creaming process is absolutely critical. The butter should be cold but workable when you start (press a cube—it should leave a slight indentation). If your butter is too soft, chill the mixture for 10-15 minutes before continuing. The cold butter creates those signature crisp layers while the sugar helps dissolve moisture, preventing the cookies from becoming too soft.
Incorporate Eggs, Vanilla, and Dry Ingredients
Add the 2 whole large eggs, one at a time, mixing on low speed after each addition until fully incorporated. Then stir in the 1.5 teaspoons pure vanilla extract. The mixture will look slightly curdled at first, but don't worry—it will come together once the dry ingredients are added.
In a separate bowl, whisk together the 2.5 cups all-purpose flour, 2 tablespoons cornstarch, 0.5 teaspoon baking powder, and 0.5 teaspoon fine sea salt. The cornstarch is key here—it creates those crisp edges while keeping the centers tender. If using, add the 1 teaspoon ground anise seeds to the dry ingredients for that classic Belgian speculoos flavor. Gradually add the dry mixture to the wet ingredients, mixing on low speed just until combined—you should still see a few flour streaks.
Real talk: Overmixing develops gluten, which leads to tough cookies. Stop mixing the moment the flour disappears. For the optional 0.5 cup dark chocolate chips, fold them in gently by hand using a silicone spatula to distribute them evenly throughout the dough.
Chill the Dough for Optimal Texture
Divide the dough into 4 equal portions (about 1 cup each) and flatten each into a 4-inch square about ½-inch thick. Wrap each square tightly in plastic wrap and refrigerate for at least 2 hours—overnight is even better. This chilling step is non-negotiable. It allows the flour to fully hydrate, the butter to firm up, and the gluten to relax, which prevents excessive spreading and ensures those delicate, crisp layers.
I know it seems counterintuitive to wait, but trust me—skipping this step results in cookies that spread too thin and lack the signature texture. The dough should be firm but still pliable when you remove it from the fridge. If it feels too soft, return it to the refrigerator for another 30 minutes to 1 hour.
Roll and Cut the Dough for Perfect Shapes
Preheat your oven to 350°F and line two baking sheets with parchment paper. On a lightly floured surface, roll one of the chilled dough squares into a 12-inch circle about ⅛-inch thick. Use a 3-inch round cutter to cut out cookies, placing them 2 inches apart on the prepared baking sheets. You should get about 4 cookies per square, yielding a total of 16 cookies. Gather the scraps, re-roll, and cut additional cookies as needed.
For that classic Belgian look, you can also use a star-shaped cutter or a small knife to cut out decorative shapes. The key is to handle the dough as little as possible—it warms quickly and becomes sticky. If the dough starts to stick to your rolling pin or surface, chill it for another 10-15 minutes before continuing.
Bake to Golden Perfection
Bake the cookies for 12-15 minutes until the edges are golden brown and the centers still look slightly underdone. They'll continue cooking on the hot baking sheet after you remove them from the oven. The cookies should pull away from the parchment paper easily but still feel slightly soft to the touch—they'll firm up as they cool.
Here's the thing—don't overbake. Belgian cookies are delicate, and they'll crisp up as they cool. If you bake them until they look fully set, they'll turn out tough and dry. Let them cool on the baking sheet for 5 minutes before transferring to a wire rack to cool completely. Serve warm for the ultimate experience, or store in an airtight container at room temperature for up to 5 days—though they won't last that long!
Pro Tips For Making Belgian Cookie
- Cream Butter Slowly: Belgian cookies need that perfect buttery crumb, so don’t rush the mixing. Let the butter soften to room temp (65°F/18°C) first, then beat it with the sugars on medium-low for 3-4 minutes—until it’s pale, fluffy, and just starting to thicken. I learned this the hard way: aggressive mixing traps air but overworks the gluten, leading to dense cookies. Patience here makes all the difference.
- Sift That Cornstarch: Cornstarch isn’t just a binder—it’s what gives Belgian cookies their signature lightness. Sift it with your dry ingredients (flour, baking powder) to break up clumps and distribute it evenly. I used to just dump it in, and my cookies turned out gummy. A fine mesh sieve takes 30 seconds and guarantees a tender texture.
- Chill the Dough Hard: Skip the 30-minute rest in the fridge—give it a full 24 hours. Cold dough prevents spreading, deepens the flavor (the sugars caramelize slower), and lets the gluten relax for a crispier edge. I was skeptical until I tried it: the cookies held their shape, baked evenly, and stayed crisp for days. Yes, it’s a pain, but it’s worth it.
- Rotate the Pan: Belgian cookies spread unevenly when baked—hot spots on the edges, pale centers in the middle. Rotate the pan halfway through (at 12 minutes for a 16-minute bake) to even out the heat. I used to ignore this, and my cookies came out like lopsided hockey pucks. A quick spin fixes it every time.
Creative variations of these flavors
Classic Speculoos
Transform these cookies into traditional speculoos by replacing the vanilla extract with 1 teaspoon ground anise seeds and adding ½ teaspoon cinnamon to the dry ingredients. The anise flavor is bold and licorice-like—exactly what you’d find in Belgian bakeries.
For extra authenticity, fold in ¼ cup chopped candied citrus peel (orange or lemon) after mixing the dough. These cookies pair perfectly with hot chocolate or coffee—just like in Brussels cafés. 🌶️
Chocolate-Dipped Luxury
After baking, let the cookies cool completely, then dip half of each cookie into melted dark chocolate (use 70% cocoa for balance). Place them on parchment paper and sprinkle with crushed hazelnuts or flaky sea salt before the chocolate sets.
The contrast of crisp cookie and rich chocolate is pure indulgence. For a fancier touch, drizzle with white chocolate in a zigzag pattern after dipping. Store in the fridge for up to 3 days to maintain the chocolate’s shine. 🍫
Almond-Infused Twist
Swap ½ cup of the all-purpose flour for almond flour to add a nutty depth. For extra flair, fold in ¼ cup finely chopped almonds after mixing the dough. The result? A cookie with a delicate crunch and a sophisticated nutty aroma.
This variation works beautifully with orange zest (add 1 teaspoon) for a bright, citrusy note. These cookies are perfect for holiday gifting—wrap them in parchment-lined boxes tied with ribbon. 🌟
Cinnamon-Sugar Coating
Before baking, roll the cut-out cookie dough in a mix of 2 tablespoons granulated sugar and 1 teaspoon cinnamon. Press gently to adhere, then place on the baking sheet. The sugar melts slightly during baking, creating a caramelized crust that’s irresistible.
For a modern twist, use brown sugar instead—it adds a deeper molasses flavor. These cookies taste even better the next day, so bake a double batch if you can. ✨
Lemon-Glazed Brightness
After baking, brush the warm cookies with a glaze made from ½ cup powdered sugar, 1 tablespoon lemon juice, and 1 teaspoon lemon zest. The glaze sets as the cookies cool, adding a tangy sweetness that cuts through the butter richness.
For extra zing, add ½ teaspoon lemon extract to the glaze. These cookies are perfect for spring or summer—serve them with fresh berries or a dollop of whipped cream. 🍋
Spiced Rum Infusion
Boost the flavor with 1 tablespoon spiced rum (like Captain Morgan or Baileys) in place of ½ tablespoon of the vanilla extract. The rum adds warmth and a hint of spice that pairs beautifully with the butter.
For a boozy twist, drizzle the baked cookies with a mix of 1 tablespoon melted butter, 1 tablespoon brown sugar, and ½ teaspoon cinnamon before serving. These cookies are a hit at holiday parties—just don’t tell the kids! 🍹
Nutrition facts
Frequently asked questions
Why do Belgian cookies need cornstarch?
The 2 tablespoons cornstarch creates those signature crisp edges while keeping the centers tender. It acts like a texture booster, absorbing moisture and preventing the cookies from becoming too soft. Without it, you’ll miss the classic Belgian crunch!
Can I use regular butter instead of European-style?
You can, but you’ll notice a difference in flavor. European-style butter (like Plugrá) has a higher fat content and richer taste. For best results, use unsalted butter—just add a pinch of salt if needed. If you’re committed to authenticity, look for it in international grocery stores.
How do I fix cookies that spread too much?
Over-spreading usually means the dough was too warm. Next time, chill the dough for at least 2 hours (overnight is best) and use cold butter. Also, make sure your oven is properly calibrated—325°F is critical. If they still spread, try baking on the middle rack for even heat distribution.
What’s the best way to store these cookies?
Keep them in an airtight container with parchment between layers for up to 5 days. For longer storage, freeze the dough balls (before baking) for 3 months
Can I make these gluten-free?
Yes, but the texture will be slightly denser. Use a 1:1 gluten-free flour blend (like Bob’s Red Mill) and add ½ teaspoon xanthan gum to mimic the structure. Reduce the baking time by 1-2 minutes to prevent over-browning.